


2-26
Quick Start
Operation Manual for the EMT 10T, 10/4, and 10/4T
Melco Embroidery Systems
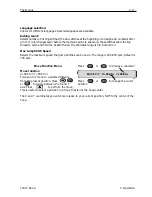
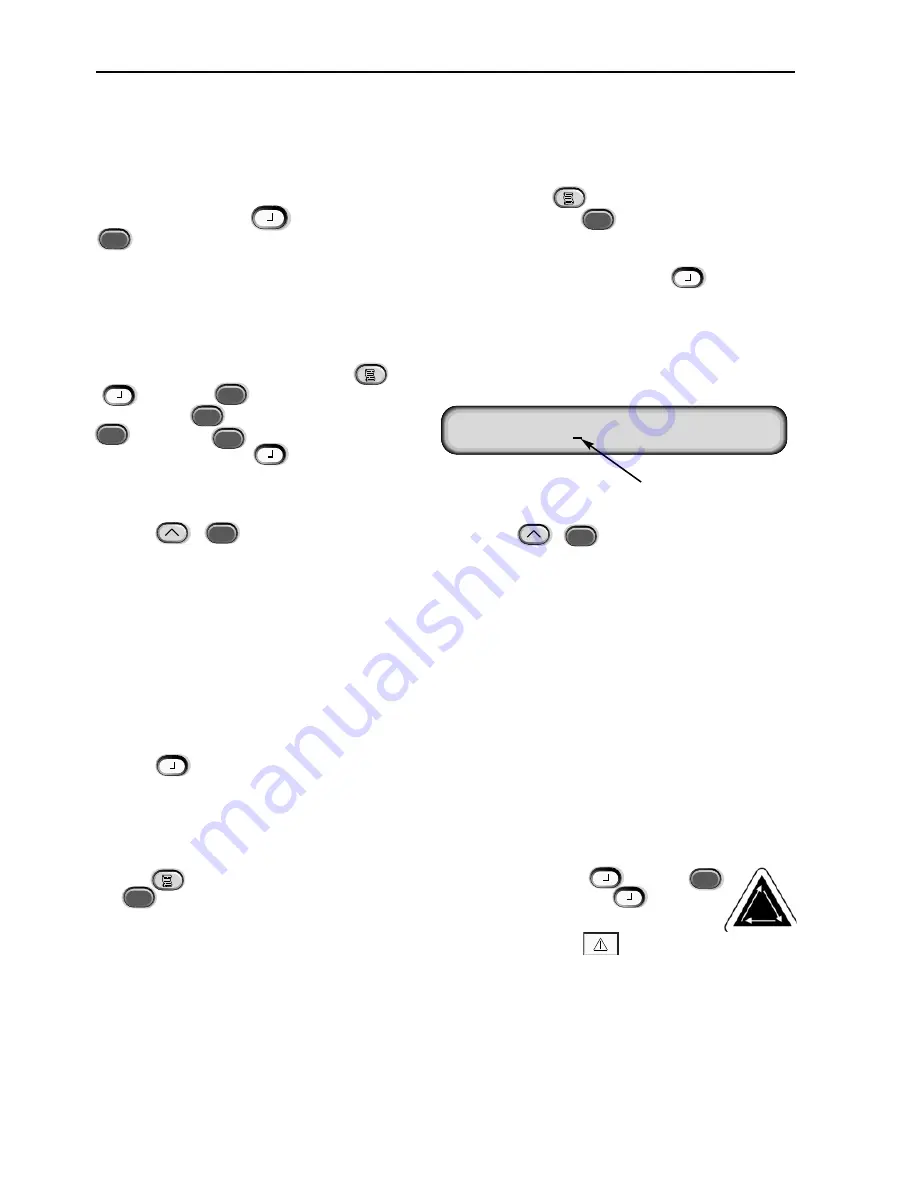
Select a design
To select a design after it has been sent to the peripheral, press
until the display scrolls to
DESIGN MENU. Press
and the first design is displayed. Use
to scroll forward or
to scroll backward through the designs in the buffer. Scroll through the menu until you
reach the design you want. The LCD displays the name of the design, the stitch count, the num-
ber of colors in the design, and the current orientation that is selected. Press
to select
the design; the LCD displays the next menu.
Color Menu
To set the color sequence press
until the display shows COLOR MENU, then press
. Press
to move to the next
number and
to move back. Press
or
to change the needle
position. Press
to select the
color sequence; the LCD displays the next
menu.
Press
to insert a color sequence and
to delete a color
sequence.
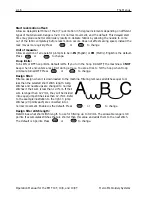
Available color choices:
•
1-10
= needle number
•
0
= pause for this color change only
•
–
= skip this color change
•
P
= pause at this color change and all color changes thereafter.
•
A
= stop for applique
Run Menu
Press
to queue the design; the LCD displays the next idle menu.
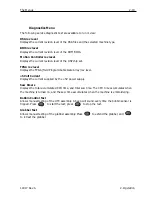
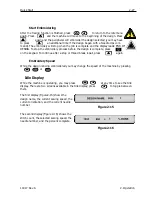
Trace the Design
Note: Do
NOT
pull the needle or presser foot down to trace.
Press
until the display reads: FUNCTION MENU, then press
. Press
or
until the display shows
Trace design outline?
, then press
. The
LCD will display
Calculating design outline
. When the outline is calculated, it will dis-
play
Trace Design name
and show you the needle number. Press
to initiate
the trace function and the pantograph will begin to move. The hoop moves along the outline of
the design without embroidering. The machine beeps and displays
Rack Limit
if a rack limit is
encountered.
The beep means the needle will strike the hoop if sewn.
To correct this, re-
center the hoop, select and use a larger hoop, or manually jog the hoop into position. Perform
another trace after you have corrected the problem.
▲
▲
▼
▲
▲
▲
▼
▲
▼
▲
▲
▼
▲
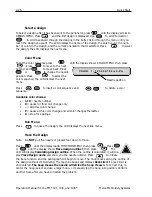
COLOR
1 : 1 2 3 4 5 6 7 8 9
10
0 - P A
Needle position
▲
▲
▲
▼
Summary of Contents for EMT 10/4
Page 52: ...2 28 Quick Start Operation Manual for the EMT 10T 10 4 and 10 4T Melco Embroidery Systems ...
Page 108: ...6 10 Error Messages Operation Manual for the EMT 10T 10 4 and 10 4T Melco Embroidery Systems ...
Page 126: ...INDEX Operation Manual for the EMT 10T 10 4 and 10 4T ...
Page 127: ...Quick Ref erence Guide for the EMT 10T 10 4 and 10 4T 11817 Revision A ...


