


The Sash Frame
3-17
The Sash Frame
The sash frame is an aluminum rectangle that attaches across the full length of the x-carriage,
using the table tops for support. The material is held in place by fabric clips included with the sash
frame. The sash frame has a maximum embroidery field per head of 11.02" x 16" (28cm x
40.6cm) for the EMT 10/4 or 10/4T and 11.02" x 19.69" (28cm x 50cm) for the EMT 10T.
Often, only the backing material is hooped in the sash frame, and several smaller pieces of fabric
are fixed on top of the backing with a non-permanent fabric adhesive. This procedure reduces
hooping time and permits a high rate of production on parts of preassembled garments like
labels, patches, collars, and pockets.
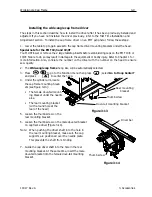
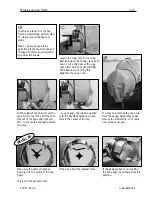
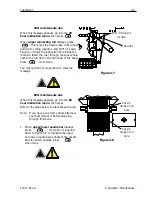
Installing the Sash Frame
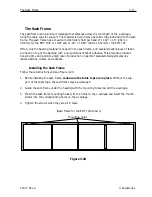
Follow these instructions and see Figure 3-20.
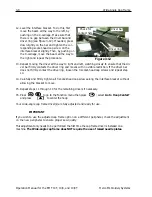
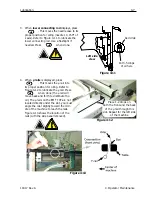
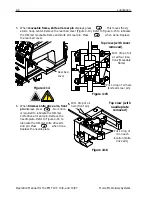
1. Before installing the sash frame,
make sure the table tops are in place
. Without the sup-
port of the table tops, the sash frame may be damaged.
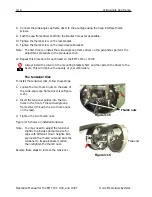
2. Guide the sash frame under the head(s) with the mounting holes toward the x-carriage.
3. Match the sash frame mounting holes with the holes on the x-carriage and insert the thumb
screws into the corresponding holes on the x-carriage.
4. Tighten the screws when they are all in place.
11817 Rev. A
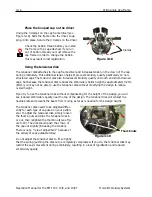
3. Accessories
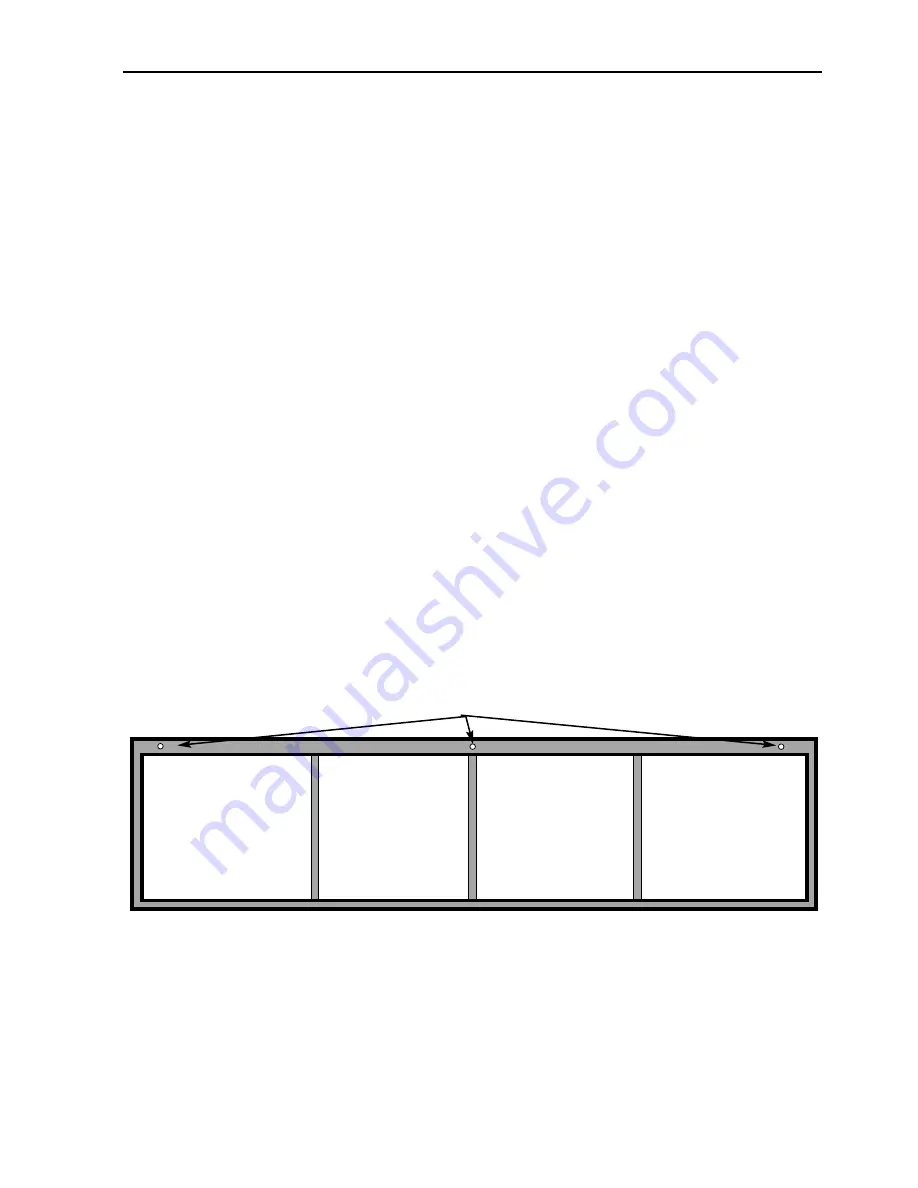
Figure 3-20
Mounting holes
(Sash Frame for the EMT 10/4 shown)
Summary of Contents for EMT 10/4
Page 52: ...2 28 Quick Start Operation Manual for the EMT 10T 10 4 and 10 4T Melco Embroidery Systems ...
Page 108: ...6 10 Error Messages Operation Manual for the EMT 10T 10 4 and 10 4T Melco Embroidery Systems ...
Page 126: ...INDEX Operation Manual for the EMT 10T 10 4 and 10 4T ...
Page 127: ...Quick Ref erence Guide for the EMT 10T 10 4 and 10 4T 11817 Revision A ...


