12616, Rev. B
17. Self-diagnosis Mode
51
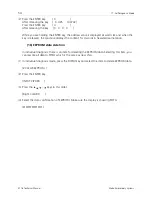
(2) Following the above steps, in every 10 seconds, the machine rotates at the speed of 300 rpm,
400 rpm, 500 rpm, 600 rpm and 700 rpm respectively and then the machine stops.
[RESULT ? ]
(3) When the rotation speed is correct, press the key and when it is not good (NG), press the
key.
(7) Spool diagnosis
(1) After checking the upper shaft DC driving motor diagnosis, [PUSH DOWN LEVER] is displayed.
Move down the spool axis to the spool position. After a few seconds, the machine will display. . .
[PUSH/SPOOL ]
(2) Hold the SPOOL key, the spool winding motor starts to rotate and the following message will
appear.
[RESULT? ]
(3) If the spool winding motor functions is all right, press the key. When it does not work, press
the key. Then the judgement key to stop the motor.
(4) While you are holding the judgment key, the result is displayed. When the key is released, [PUSH
UP LEVER] will be displayed.
(8) Diagnosis of the initial setting sensor for the frame driving motor
(1) After the spool diagnosis, go to the next step.
(2) Move the frame support backward by hand and confirm the rightmost item on the screen
changes to display [REAR(Ans=H):H], then press key.
(3) Move the frame support to frontward by hand. After confirming the message [FRONT(Ans=L):L],
press the key.
(4) Move the frame support rightward by hand. After confirming the message [RIGHT (Ans=H):H],
press the key.
(5) Move the frame support leftward by hand. After confirming the message [LEFT (Ans=L):L], press
the key.
* Operation common to all the initialization setting sensor diagnosis
Hold the key to see [XY SENSOR:OK].
If the rightmost item on the screen does changed, press the key to indicate "NG (No Good, or
Failure)." In this case, the diagnosis of the frame driving motor will be skipped and the diagnosis
for the upper thread breakage sensor will start.

