background image

- 31 -

To  Store  the  Settings

• Press “ ” or “ ” button on 

STORE

 option to store

Picture menu settings.

The stored picture mode setting will be valid only in

current  program.  However,  the  other  stored  values

in Picture Menu will be valid for all the programmes.

Feature  Menu

• To enter the Feature menu directly, press the “

YEL-

LOW

” button.

Sleep Timer

As you enter the Feature menu, 

SLEEP TIMER

 will

be the first selected option. Use “ ” or “ ” button to

change the Sleep Timer values between 

OFF, 0:15:00,

0:30:00, 0:45:00, 1:00:00, 1:15:00, 1:30:00, 1:45:00

and 

2:00:00

.

6/((37,0(5

&+,/'/2&.

/$1*8$*(

2))

2))

(1*/,6+

Child  Lock

You can use this feature to prevent children turning

on TV or changing programs or adjustments etc. with-

out remote control.
The 

CHILD LOCK

 feature can be set by “ ” or “ ”

button to either 

ON

 or 

OFF

. When 

OFF

 is selected,

there will be no difference in the operation of your TV.

When 

ON

 is selected, the TV can only be controlled

by the remote control handset. In this case, the front

panel buttons (except the Switch On/Off button) will

not work.

Selecting  Menu  Language

Menu language can be chosen by pressing “ ” or

“ ” button on 

LANGUAGE

 item.

To  Store  Settings

In Feature menu all settings are stored automatically.

Install  Menu

• To enter the Install menu directly, press the 

BLUE

button.

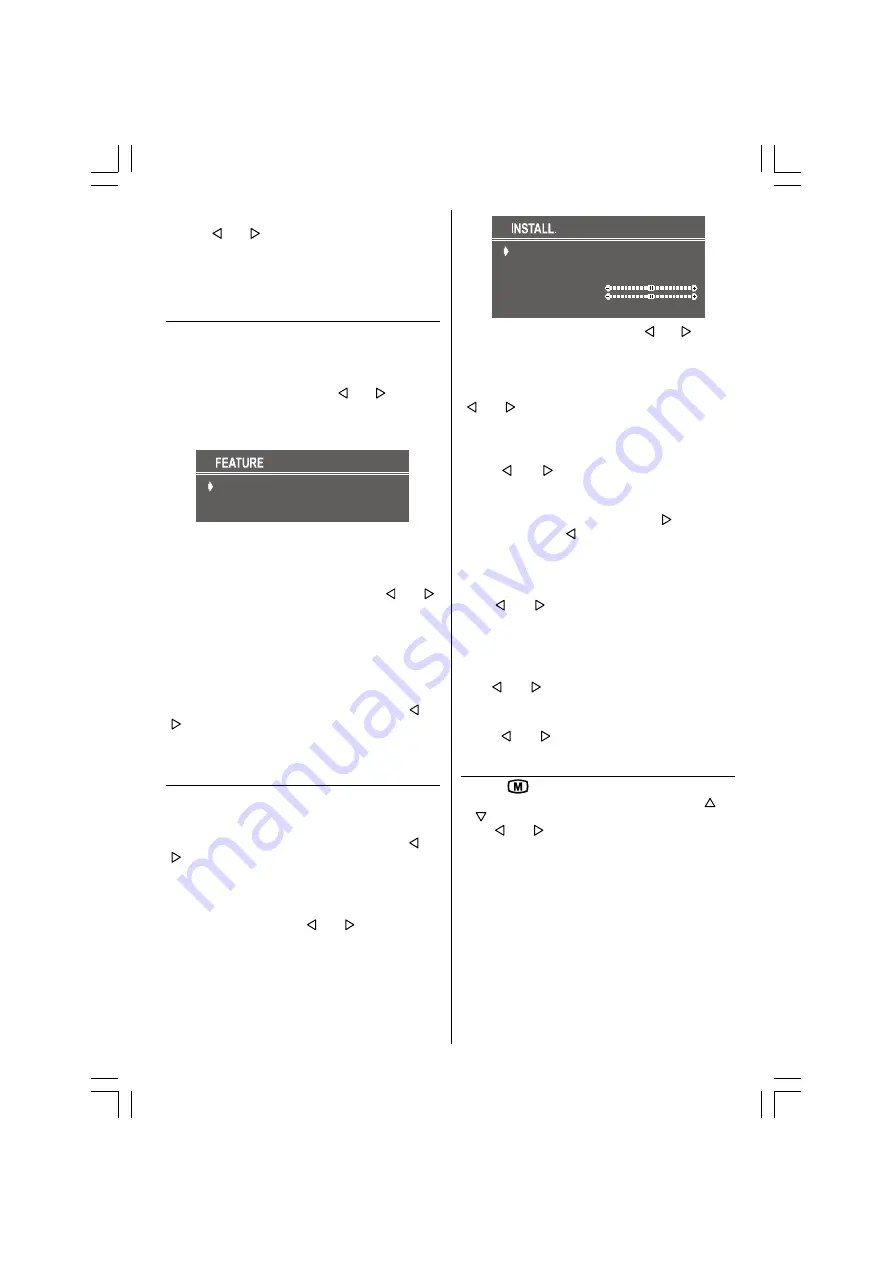
Selecting  Programme

To select programme number, you can use “ ” or

“ ” button, Digit Buttons or The Double Digit button

with digit buttons.

Selecting  Band

BAND, can be chosen either,
• VHF1, VHF3 or UHF by “ ” or “ ” button.

Selecting  Frequency

The frequency value is,
• 044 - 890 MHz for band VHF1 - VHF3 - UHF.

352*5$00(

%$1'

)5(48(1&<

67$1'$5'

6($5&+

),1(781,1*

6725(

9+)

%*

FREQUENCY can be changed by “ ” or “ ” button,

by the Digit buttons or by the Double Digit button with

digit buttons.
The decimal value in frequency can not be changed

by the digit buttons, it can be changed only by the

“ ” or “ ” button. The value can be “00”, “25”, “50”

and  “75”. Also  changing  Fine Tuning  changes  the

decimal part.

Selecting  Standard

Using “ ” or “ ” button on 

STANDARD

, you can

change the standard to 

B/G, D/K, L

/

L'

.

Selecting  Search

To  start  the  search  process,  press  “ ”  button  for

forward search or “ ” button for backward search.

SEARCH

 item blinks during search process, since

the  process  is  stopped  or  signal  is  found.  During

search  process  the  semi-transparent  menu  back-

ground  becomes  "

BLUE

". To  stop  the  search  pro-

cess “ ” or “ ” button must be pressed again.

Selecting  Fine  Tuning

You can use the Fine Tuning process for fine adjust-

ment (after coarse adjustment), if you are not happy

about the image on the screen.
Use “ ” or “ ” button on 

FINE TUNING

 item, until

getting the best image on the screen.

To  Store  Settings

Press “ ” or “ ” button on 

STORE

 option to store

Install menu settings.

Programme  Menu

• Press "

" button, now you are in Main menu. In

the Main menu, select “

PROGRAM.

” Using “ ” or

“ ” button. Then enter the Programme menu press-

ing “ ” or “ ” button.

Moving  cursor  to  four  direction  you  can  reach  30

programmes in the same page. By scrolling the pages

up or down by pressing the navigation buttons you

can select all the programmes in TV mode (except

the AV mode).
By cursor action, programme selection is done auto-

matically.  Selected  programme  is  displayed  with

“CYAN”

 characters. In order to select programme is

also possible by using digit or double-digit button. In

this  way  programme  selection  gets  also  automati-

cally and after selection the selected programme is

50083968-4-1428-FAV-ENG-1243 UK-AK36-PLL (FREKANS)-MN1P-T3X (COST).p65

31.08.2006, 14:05

31

Summary of Contents for MTP 1406VS135

Page 1: ...MTP 1406VS135 TELEVISEUR COULEUR FARBFERNSEHGERÄTE COLOUR TELEVISION TELEVISORE A COLORI Bedienungsanleitung Istruzioni per l uso Mode d emploi User manual ...

Page 2: ...keine mit Flüssigkeit gefüllten Gegenstände auf das Gerät Das Gerät darf nicht Tropf und Spritzwasser ausgesetzt werden 4 Reinigung BevorSiedasGerätreinigen ziehenSiedenNetzsteckerausder Steckdose Verwenden Sie keine flüssigen Reinigungsmittel und keine Sprays Benutzen Sie ein sauberes und trockenes Tuch 5 Belüftung Die Lüftungsschlitze und Öffnungen am Gerät sind für die Luftzirkulation vorgesehe...

Page 3: ...Menü verlassen TXT Teletext Rot SOUND Menü Ton Grün PICTURE Menü Bild Gelb FEATURE Menü Funktion Blau INSTALL Menü Install Bedienfeldtasten am Gerät Antennenanschlüsse Externe Geräte anschließen POWER GERÄTEIN AUSSCHALTEN Lautstärke verringern Lautstärke erhöhen P CH Programm zurück P CH Programm vor Front AV IN Kopfhörer ANTENNE SCART ANSCHLUSS 3 32 5 50083968 1 1428 FAV ALM 1243UK AK36 PLL FREKA...

Page 4: ...m Bild schirm leuchtet 2 Schalten Sie das TV Gerät aus dem Bereit schaftsmodus ein Drücken Sie entweder eine der Zifferntasten auf der Fernbedienung um eine bestimmte Programmnummer aufzurufen oder drücken Sie die Taste Programm aufwärts bzw ab wärts an der Vorderseite des TV Geräts oder auf der Fernbedienung Sie rufen somit das zuletzt ge sehene Programm auf Auf beide Arten schalten Sie das TV Ge...

Page 5: ...cken Sie die folgenden Tasten Taste Hauptmenü Rote Taste Menü Ton Grüne Taste Menü Bild Gelbe Taste Menü Funktion Blaue Taste Menü Install Die Taste Menü hat zweierlei Funktionen Mit ihr kön nen Sie das HAUPTMENÜ aufrufen bzw beenden und mit ihr können Sie das jeweilige Untermenü been den um gleichzeitig das übergeordnete Menü aufzu rufen Das Menü Ton Toneinstellungen ändern Gehen Sie entweder dur...

Page 6: ...ktion Sleep Timer In dem Menü Funktion ist SLEEP TIMER als erste Option ausgewählt Mit den Tasten und kön nen Sie den Sleep Timer auf folgende Einstellungen programmieren AUS 0 15 00 0 30 00 0 45 00 1 00 00 1 15 00 1 30 00 1 45 00 und 2 00 00 6 3 7 0 5 1 56 5 635 86 86 876 Kindersicherung Mit dieser Funktion verhindern Sie dass Unbefugte das TV Gerät ohne Fernbedienung einschalten Pro gramme wechs...

Page 7: ...ge als P Maske dar gestellt Wenn Sie anschließend die Zifferntasten betätigen werden die Ziffern in die Maske eingetra gen Als Programmnummern sind Zahlen zwischen 00 und 99 zulässig Programmnamen können aus maximal 5 Zeichen bestehen Nach dem automatischen Spei chern sind die Programmnamen folgendermaßen de finiert PR01 Programmnummer Im unteren Bereich des Menüs befinden sich ver schiedene Sorti...

Page 8: ...ion START und drücken Sie die Taste oder Wenn Sie die Funktion AUTO SPEICH während des Vorgangs abbrechen möchten betätigen Sie die Taste oder Nach Abschluss des automatischen Speicher vorgangs wird auf dem Bildschirm eine Programm liste angezeigt In der Programmliste finden Sie die ProgrammnummernmitdendazugehörigenProgramm namen Wenn Ihnen die Programmnummern und oder namen nicht zusagen können ...

Page 9: ...nschluss am Front AV Eingang Schließen Sie die Kamera bzw den Camcorder an der Vorderseite Ihres TV Geräts an Schließen Sie Ihre Geräte an die TV Eingänge VI DEO und AUDIO an Achten Sie darauf dass die Farben der Stecker und der Eingangsbuchsen über einstimmen Kopfhörer anschließen Zum Anschließen des Kopfhörers verwenden Sie den Stereo Kopfhöreranschluss H Phone an der Vorderseite Ihres TV Geräts...

Page 10: ...dus zurückzu kehren oder drücken Sie die Taste um in das vorige Menü zurückzukehren Probleme bleiben bestehen Schalten Sie Ihr TV Gerät aus und anschließend wie der ein Wenn das Problem dadurch nicht behoben wird rufen Sie den Kundendienst an Reparieren Sie das Gerät auf keinen Fall selbst Technische Daten TV ÜBERTRAGUNGSNORM PAL SECAM B G D K L L EMPFANGSKANÄLE VHF BAND I III UHF BAND U HYPERBAND...

Page 11: ...hroom the sink in the kitchen and near the washing machine Do not expose this equipment to rain or water as this may be dangerous and do not place objects filled with liquids on top Avoid from dripping or splashing 4 Cleaning Before cleaning unplug the receiver from the main supply outlet Do not use liquid or aerosol cleaners Use soft and dry cloth 5 Ventilation The slots and openings on the recei...

Page 12: ... OK OK Store Cursor Down MUTE Mute AV External Source AV 1 FAV RGB TV TV Quit Menu TXT Teletext Red SOUND Sound Menu Green PICTURE Picture Menu Yellow FEATURE Feature Menu Blue INSTALL Installation Menu POWER POWER ON OFF Volume Volume P CH Program P CH Program Front AV IN Headphone ANTENNA EUROCONNECTOR 3 32 5 50083968 4 1428 FAV ENG 1243 UK AK36 PLL FREKANS MN1P T3X COST p65 31 08 2006 14 05 28 ...

Page 13: ...ill become RED or Press the power button located on the front of the TV so the TV will switch off and the GREEN LED will turn off Operating the TV You can operate your TV both using the remote control handset and onset buttons Operating with the buttons on the TV set Volume setting and programme selection can be made using the buttons on the front panel Operating with Remote Control The remote con...

Page 14: ...option to store Sound menu settings Picture Menu To enter the Picture menu directly press the GREEN button Setting the Brightness Contrast Colour and the sharpness After selecting with the or button Bright ness Contrast Colour and the Sharpness settings can be changed with the or buttons 5 71 66 2175 67 2 285 6 531 66 02 6725 Mode This item is used to change the picture size By press ing or button...

Page 15: ...be changed by or button by the Digit buttons or by the Double Digit button with digit buttons The decimal value in frequency can not be changed by the digit buttons it can be changed only by the or button The value can be 00 25 50 and 75 Also changing Fine Tuning changes the decimal part Selecting Standard Using or button on STANDARD you can change the standard to B G D K L L Selecting Search To s...

Page 16: ...racters From now on the automatic se lection is canceled Cursors moves are indicated with CYAN characters With navigation buttons the de cided program space B can be selected and by pressing the green button again inserting is occurred to that space B CANCEL function cancels the activated INSERT process For DELETE process it is pressed to yellow button NAME INSERT and AUTOSTORE functions are inact...

Page 17: ...screen The Teletext page counter searches until the selected page number is located so that the desired page is displayed on the screen Press P button to move the Teletext screen forward one page at a time Press P button to move the Teletext screen back ward one page at a time To exit Teletext Press TV button The screen will switch to TV mode Connect Peripheral Equipment Via the Euroconnector Your...

Page 18: ...Picture means that your TV is not receiving any transmission Have you pressed the correct keys on the remote control Try once more Sound You can not hear any sound Did you perhaps inter rupt the sound pressing key Remote Control Your TV no longer responds to the remote control Press the TV button on the remote control once more Perhaps the batteries are exhausted If so you can still use the local ...

Page 19: ...50083968 ...

Reviews: