background image

sensory or mental capabilities, or lack of experience 
and knowledge, unless they have been given supervi-
sion or instruction concerning use of the appliance by 
a person responsible for their safety.
2.2.5. This appliance is not a toy. Children should be 
supervised to ensure that they do not play with the 
appliance.
2.2.6. Do not touch metal parts of the iron while it is in 
use, as it may cause serious burns.
2.2.7. The temperature of the accessible surfaces may 
be high when the appliance is in use.

2.3. Use and care:

2.3.1. Fully unroll the appliance’s power cable before 
each use.
2.3.2. Do not use the appliance if the parts or acces-
sories are not properly fitted.
2.3.3. Do not turn the appliance over while it is in use 
or connected to the mains power supply.
2.3.4. Unplug the appliance from the mains power 
supply when not in use and before undertaking any 
cleaning task.
2.3.5. This appliance should be stored out of reach of 
children.
2.3.6. Do not store the appliance if it is still hot.
2.3.7. Never leave the appliance unattended when in 
use and keep out of the reach of children.
2.3.8. If for some reason, the appliance were to catch 
fire, disconnect the appliance from the mains power 
supply and DO NOT USE WATER PUT THE FIRE OUT. 
2.3.9. To keep the non-stick treatment in good condi-
tion, do not use metal or pointed utensils on it.
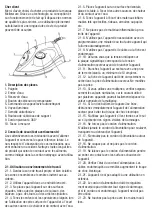
2.3.10. Respect the MAX level indicator (Fig. 1)
2.3.11. Unplug the appliance from the mains before 
refilling the water tank. 
2.3.12. To ensure that the iron functions correctly, keep 
the iron face smooth and do not hit it against metallic 
objects (for example, the ironing board, buttons, zips.)
2.3.13. The use of distilled water is recommended, 
especially if the water in your area contains any type of 
grit or is “hard” (contains calcium or magnesium).
2.3.14. The water fill-up opening must not be left open 
while the iron is being used. 

2.4. Service: 

2.4.1. Make sure that the appliance is service only suit-
ably qualified technician, and that only original spare 
parts or accessories are used to replace existing parts/
accessories. 
2.4.2. If the power cord is damaged, the manufacturer 
or its service agent, or similarly qualified person must 
replace it in order to avoid a hazard.

2.4.3. Any misuse or failure to follow the instructions 
for use renders the guarantee and the manufacturer’s 
liability null and void.

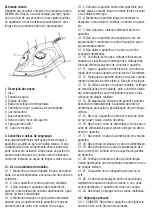
3. Instructions for use:

3.1. Before use: 

3.1.1. Remove the appliance’s protective film (if ap-
plicable).
3.1.2. Before using the product for the first time, clean 
in the manner described in the cleaning section. 
3.1.3. The first time the appliance is used a light smoke 
may be detected. 

3.2. Filling with water: 

3.2.1. Unplug the iron before filling the water tank. 
3.2.2. Hold the iron in a horizontal position. 
3.2.3. Slowly pour water through the water inlet.
3.2.4. Do not fill past the “MAX” mark on the water tank.

NOTE: 

Your iron is designed to use tap water, however, 

if the water is very hard, it is advisable to use distilled 
water. The water tank should be emptied after each use.

3.3. Use: 

3.3.1. Always check whether a label with ironing 
instructions is attached to the clothing article to be 
ironed. Follow these instructions in all cases.
3.3.2. Turn the temperature control dial to set the ap- 
propriate temperature indicated in ironing instructions 
or in fabric label.

3.3.3. Insert the plug into the wall socket. The indicator 
light will illuminate.
3.3.4. When the indicator light switches off you may 
start ironing.

CAUTION:

 Iron from low temperature first then move 

to high temperature fabrics. Should you need to iron at 
a low temperature, after using a high temperature you 
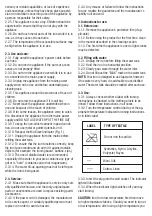
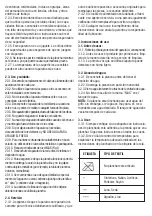
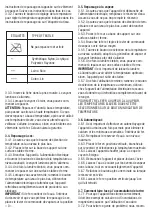
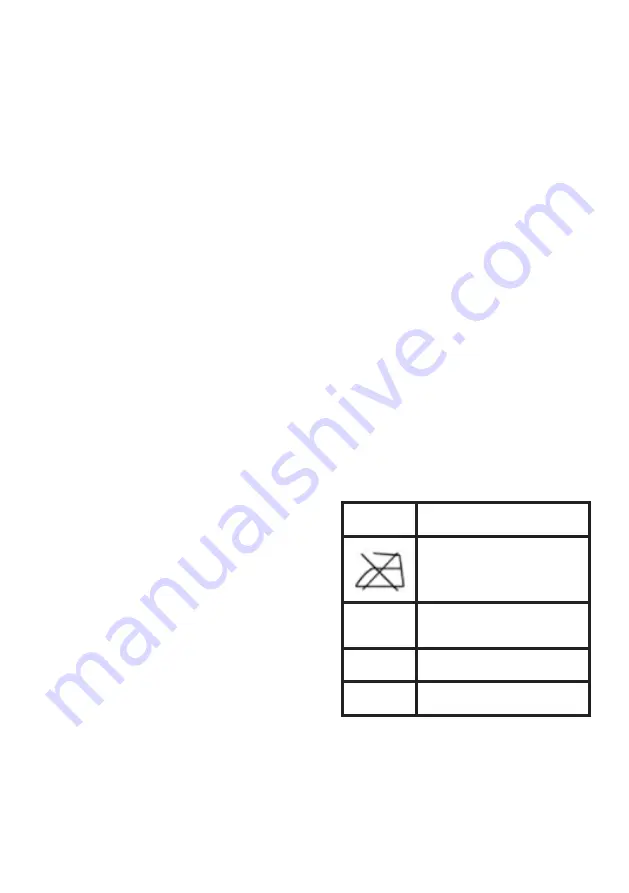
LABEL 


  TYPE OF TEXTILE


     Do not iron this article

•                  Synthetics, Nylon, Acrylics,      


     Polyester, Rayon

••  

    Wool, Silk

•••  

    Cotton, Linen

Summary of Contents for 23120A

Page 1: ...Model 23120A complies with INTERNATIONAL IEC60335 SAFETY SPECIFICATIONS 1200W GLIDE II 1200W Steam iron...

Page 2: ...e mains power supply voltage before plugging in the appliance 2 1 11 Connect the appliance to the mains power sup ply with an earth socket withstanding a minimum of 10 amperes 2 1 12 The appliance s p...

Page 3: ...calcium or magnesium 2 3 14 The water fill up opening must not be left open while the iron is being used 2 4 Service 2 4 1 Make sure that the appliance is service only suit ably qualified technician a...

Page 4: ...the appliance at least once a month to remove calcium and any the built up minerals inside the iron 3 6 2 Fill the water tank to its maximum level 3 6 3 Place the iron in an upright position plug into...

Page 5: ...products to your nearest Creative House wares office where they will be accepted for recycling free of charge 7 2 Alternatively please contact your local authority or household waste disposal service...

Page 6: ...eur verskeie toestelle gebruik word die gradering van die multi plug maklik kan oorskry 1 1 14 As enige van die omhulsels van die apparaat breek moet u die toestel dadelik van die stroomkrag ontkoppel...

Page 7: ...Die gebruik van gedistilleerde water word aan beveel veral as die water in u omgewing gruis bevat of hard is kalsium of magnesium bevat 2 2 14 Die water vullings opening mag nie oopgelaat word terwyl...

Page 8: ...er maand self skoon te maak om kalsium en al die opgeboude minerale in die strykyster te verwyder 3 6 2 Vul die watertenk tot op sy maksimum vlak 3 6 3 Plaas die strykyster regop skakel aan en kies di...

Page 9: ...herwinning neem hierdie produkte na u naaste kantoor vir Creative Housewares waar dit gratis aanvaar word vir herwinning 7 2 Kontak u plaaslike owerheid of huishoudelike vul lisdiens vir nadere beson...

Page 10: ...aparato si el cable o el enchufe est n da ados 2 1 10 Aseg rese de que el voltaje indicado en la etiqueta de clasificaci n coincida con el voltaje de la fuente de alimentaci n antes de enchufar el apa...

Page 11: ...de la plancha lisa y no la golpee contra objetos met licos por ejemplo la tabla de planchar botones cremalleras 2 3 13 Se recomienda el uso de agua destilada especial mente si el agua en su rea contie...

Page 12: ...tima de lo contrario el aparato puede experimentar fugas 3 5 7 Una vez que haya terminado su uso vuelva a girar la perilla de selecci n de temperatura al m nimo desenchufe el aparato de la fuente de a...

Page 13: ...ada y debe proceder como lo har a en caso de da o 7 Reciclaje 7 1 Estos productos el ctricos cables bater as em balajes y el manual no deben mezclarse con la basura dom stica general Para un reciclaje...

Page 14: ...2 1 7 Ne placez pas de mat riau inflammable prox imit de l appareil 2 1 8 N utilisez pas l appareil en association avec un programmateur une minuterie ou tout autre appareil qui l allume automatiqueme...

Page 15: ...enfants 2 3 8 Si pour une raison quelconque l appareil prenait feu d branchez l appareil du secteur et N UTILISEZ PAS D EAU POUR TEINDRE LE FEU 2 3 9 Pour maintenir le traitement antiadh sif en bon t...

Page 16: ...pareil 3 5 3 Posez le fer sur sa base de support sur une surface stable et ferme 3 5 4 Branchez le fer et r glez le levier de commande de vapeur sur le niveau moyen 3 5 5 Tournez le bouton de s lectio...

Page 17: ...port de base et laissez le refroidir compl tement Assurez vous de vider le r servoir d eau 5 3 Enroulez doucement le cordon d alimentation autour de son support de base et stockez le produit dans un e...

Page 18: ...N o use o aparelho em associa o com um programador cron metro ou outro dispositivo que o liga automaticamente 2 1 9 N o utilize o aparelho se o cabo ou a ficha estiverem danificados 2 1 10 Certifique...

Page 19: ...ns lios de metal ou pontiagudos sobre ele 2 3 10 Respeite o indicador de n vel MAX Fig 1 2 3 11 Desligue o aparelho da corrente antes de voltar a encher o dep sito de gua 2 3 12 Para garantir que o fe...

Page 20: ...a o de vapor e a luz indicadora de pronto deve acender 3 5 6 Assim que a luz desligar voc pode come ar a passar a ferro em uma superf cie est vel e firme IMPORTANTE importante deixar a luz acender ap...

Page 21: ...o e fresco longe da luz solar direta 6 Anomalias e reparo 6 1 Leve o aparelho a um centro de suporte autorizado se o produto estiver danificado ou outros problemas surgirem 6 2 Se a liga o rede estive...

Page 22: ...r exchange is required the product must be complete with all accessories parts and packag ing Missing parts will render the warranty void 3 Upon receipt of your appliance check it for any transport da...

Page 23: ...ofile 5 Please note that you must check that your receipt has been uploaded correctly Creative Housewares cannot be held responsible for faxes or files not received 6 For assistance with registration...

Page 24: ...tighede onderdele en verpakking Toebehore wat weg is sal die waarborg nietig maak 3 Met ontvangs van u toestel gaan dit na vir enige vervoer skade om te verseker dat dit veilig is vir gebruik Stuur di...

Page 25: ...Let daarop dat u moet seker maak dat u kwitansie korrek opgelaai is Creative Housewares kan nie verantwoordelik gehou word vir fakse of l ers nie ontvang nie 6 Vir hulp met registrasie e pos asseblie...

Page 26: ...243 Percy Osborn Road Morning side Durban South Africa Tell 27 31 303 3465 Fax 27 31 303 8259 Johannesburg Unit 25 26 San Croy Office Park Die Agora Road Croydon 1619 Tell 27 11 392 5652 Fax 27 11 39...

Reviews: