background image

industrial or professional use. It is not intended to be 
used by guests in hospitality environments such as 
bed and breakfast, hotels, motels, and other types of 
residential environments, even in farm houses, areas 

environments. 
2.2.4. This appliance is not intended for use by 
persons (including children) with reduced physical, 
sensory or mental capabilities, or lack of experience 
and knowledge, unless they have been given supervi-
sion or instruction concerning use of the appliance by 
a person responsible for their safety. 
2.2.5. This appliance is not a toy. Children should be 
supervised to ensure that they do not play with the 
appliance. 

2.3. Use and care: 

2.3.1. Fully unroll the appliance’s power cable before 
each use. 
2.3.2. Do not use the appliance if the parts or acces-

2.3.3. Do not use the appliance when empty. 
2.3.4. Do not leave the appliance unattended when 
connected to the mains power supply. 
2.3.5. Do not cover the soleplate while the appliance is 
plugged in.
2.3.6. Unplug the appliance from the mains power 
supply when not in use and before undertaking any 
cleaning task. 
2.3.7. This appliance should be stored out of reach of 
children. 
2.3.8. Do not store the appliance if it is still hot. 
2.3.9. Never leave the appliance unattended when in 
use and keep out of the reach of children. 
2.3.10. If, for some reason, the appliance were to catch 

supply and DO NOT USE WATER TO PUT THE FIRE 
OUT

2.4. Service:
 
2.4.1. Make sure that the appliance is serviced only 

spare parts or accessories are used to replace existing 
parts/accessories. 
2.4.2. If the power cord is damaged, the manufacturer 

replace it in order to avoid a hazard. 
2.4.3. Any misuse or failure to follow the instructions 
for use renders the guarantee and the manufacturer’s 
liability null and void. 

3. Instructions for use
 
3.1. Before use: 

plicable). 

clean the parts that will come into contact with clothes 
in the manner described in the cleaning section. 
3.2. Use and care: 
3.2.1. Unroll the power cord completely before plug-
ging it in. 

surface. 
3.2.3. Connect the appliance to the mains power sup-
ply. 

3.2. Filling with water:

3.2.1. Ensure the appliance is disconnected from the 
mains power supply. 
3.2.2. Turn the steam control knob to position “0” or 
Minimum.

not exceed the MAX level mark on the water tank.) 

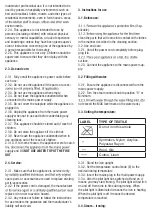
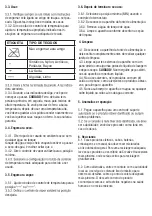
3.3. Setting the temperature: 

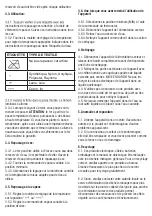
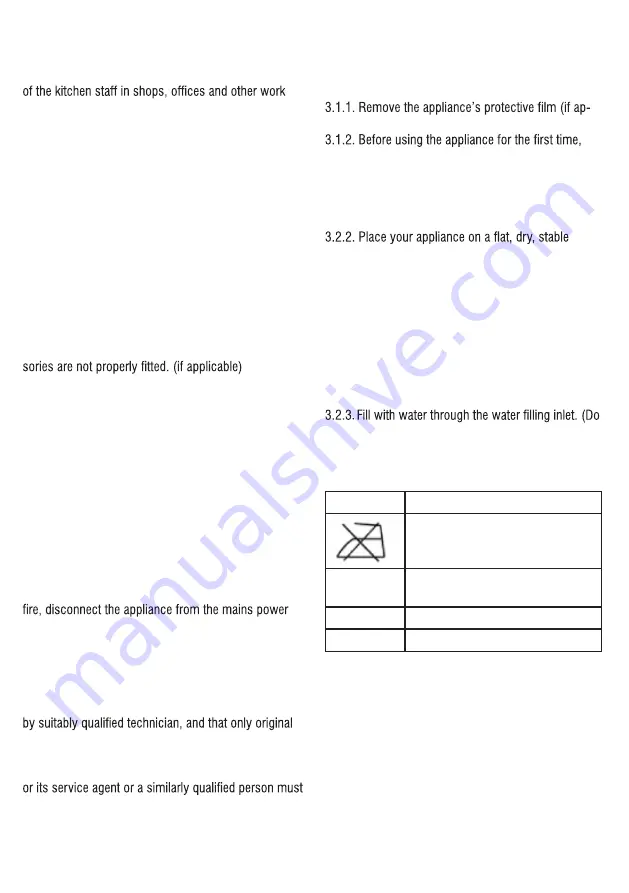
LABEL

TYPE OF TEXTILE


Do not iron this article

  •

Synthetics, Nylon, Acrylics, 
Polyester, Rayon

  ••

Wool, Silk

 •••

Cotton, Linen

  
3.3.1. Stand the iron upright.
3.3.2. Set the temperature control knob (E) to the 
desired ironing temperature.
3.3.3. Insert the mains plug in the main power supply.
3.3.4. After the pilot light has switched off and on, it 
means you may start ironing. The pilot light will switch 
on and off from time to time during ironing. When 
the pilot light is illuminated it means the iron is heating. 
When the pilot light is off it means the desired 
temperature is reached.

3.4. Steam – ironing:

Summary of Contents for PHOENIX 23220Y

Page 1: ...Model 23220Y complies with INTERNATIONAL IEC60335 SAFETY SPECIFICATIONS 2200W PHOENIX 2200W Steam iron...

Page 2: ...ug is damaged 2 1 10 Ensure that the voltage indicated on the rating label matches the mains power supply voltage before plugging in the appliance 2 1 11 Connect the appliance to the mains power sup p...

Page 3: ...to catch supply and DO NOT USE WATER TO PUT THE FIRE OUT 2 4 Service 2 4 1 Make sure that the appliance is serviced only spare parts or accessories are used to replace existing parts accessories 2 4...

Page 4: ...rature control to MAX 4 3 3 Insert the mains plug to the mains wall socket 4 3 4 Allow the iron to heat up until the pilot light switches off Then set the temperature to MIN position 4 3 5 Hold the ir...

Page 5: ...is 2 1 10 Maak seker die spanning soos aangedui op die gradering etiket kom ooreen met die hoofspanning 2 1 11 Prop in elektriese uitlaat 2 1 12 Die toestel prop moet in die hoof prop pas en Moenie di...

Page 6: ...koord beskadig word moet dit deur die om brandgevaar te verhoed 2 4 3 Enige misbruik en mislukking om instruksies te volg lewer die waarborg nul en van gener waarde 3 Instruksies vir gebruik 3 1 Voor...

Page 7: ...oet nie elektriese dele van die toestel in enige vloeistof dompel nie 4 4 Moet nie oplosmiddels of produkte met n suur gebruik nie Of basis pH soos bleikmiddel of skuurprodukte vir die skoonmaak van d...

Page 8: ...dor temporizador u otro dispositivo que lo encienda autom ticamente 2 1 9 No utilice el aparato si el cable o el enchufe est n da ados 2 1 10 Aseg rese de que la tensi n indicada en la etiqueta de car...

Page 9: ...miento antiadherente en buenas condiciones no utilice utensilios de metal o puntiagudos 2 3 10 Respete el indicador de nivel MAX Fig 1 2 3 11 Desconecte el aparato de la red antes de rel lenar el tanq...

Page 10: ...6 3 Retire el agua del tanque de agua 3 6 4 Limpie el aparato como se describe en la sec ci n de limpieza 4 Limpieza 4 1 Desconecte el aparato de la red el ctrica y deje que se enfr e completamente an...

Page 11: ...le apte supporter des temp ratures lev es et l cart des autres sources de chaleur et au contact de l eau mables tels que les textiles les rideaux le carton ou le papier etc l appareil 2 1 8 N utilisez...

Page 12: ...reil s il est encore chaud 2 3 7 Ne laissez jamais l appareil sans surveillance lorsqu il est utilis et gardez le hors de port e des enfants 2 3 8 Si pour une raison quelconque l appareil devait prend...

Page 13: ...a commande du thermostat 3 6 2 D branchez l appareil de l alimentation secteur 3 6 3 Retirez l eau du r servoir d eau 3 6 4 Nettoyez l appareil comme d crit dans la section de nettoyage 4 Nettoyage 4...

Page 14: ...usar este aparelho 2 1 5 Coloque o aparelho sobre uma superf cie hori zontal plana e est vel longe de outras fontes de calor e entre em contato com gua el como t xteis cortinas papel o ou papel etc ap...

Page 15: ...mantenha se fora do alcance das crian as 2 3 8 Se por algum motivo o aparelho incendiar desconecte o aparelho da fonte de alimenta o e N O USE GUA PARA PASSAR O INC NDIO 2 3 9 Para manter o tratamento...

Page 16: ...o termostato 3 6 2 Desconecte o aparelho da fonte de alimenta o 3 6 3 Remova a gua do tanque de gua 3 6 4 Limpe o aparelho conforme descrito na se o de limpeza 4 Limpeza 4 1 Desconecte o aparelho da f...

Page 17: ...r exchange is required the product must be complete with all accessories parts and packag ing Missing parts will render the warranty void 3 Upon receipt of your appliance check it for any transport da...

Page 18: ...e note that you must check that your receipt has been uploaded correctly Creative Housewares cannot be held responsible for faxes or files not received 6 For assistance with registration please email...

Page 19: ...tighede onderdele en verpakking Toebehore wat weg is sal die waarborg nietig maak 3 Met ontvangs van u toestel gaan dit na vir enige vervoer skade om te verseker dat dit veilig is vir gebruik Stuur di...

Page 20: ...dat u moet seker maak dat u kwitansie korrek op gelaai is Creative Housewares kan nie verantwoordelik gehou word vir fakse of l ers nie ontvang nie 6 Vir hulp met registrasie e pos asseblief marketing...

Page 21: ...243 Percy Osborn Road Morningside Durban South Africa Tell 27 31 303 3465 Fax 27 31 303 8259 Johannesburg Unit 25 26 San Croy Office Park Die Agora Road Croydon 1619 Tell 27 11 392 5652 Fax 27 11 392...

Reviews: