background image

3.2.2. Simply plug the hand-held stick blender into 
the power outlet and select your desired speed.
3.2.3. Place stick blender shaft into the measuring 
beaker.
3.2.4. Lower the hand-held stick blender into food 
and press the switch (A)

3.2.5. To stop the hand-held blender, release the 
switch (A) 

3.3 Instructions for the whisk

(Max operation time cannot exceed 1 minute, and 1 
minute rest time)
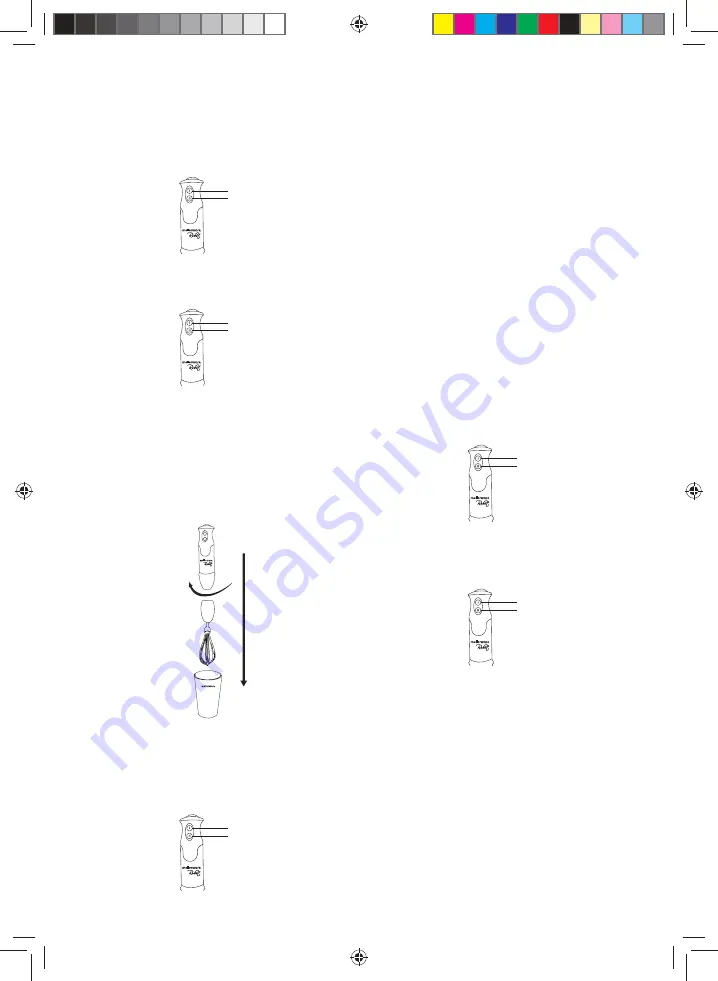
3.3.1. To assemble the whisk with the motor unit, 
place the whisk into the motor making sure it locks 
securely. (Fig 2)


Fig 2

3.3.2. Connect the power. To avoid splattering, 
insert the whisk into the food before turning on the 
power.
3.4.3. Press switch (A) to start whisking.

3.3.4. To disassemble, disconnect from the power 
source, and remove the whisk by pulling it out of the 
motor housing.

3.4 Instructions for the processor bowl 

(Max operation time cannot exceed 15 seconds and 
2 minute rest time)
3.4.1. Place the processor bowl on a clean, level 
surface.
3.4.2. Assemble the stainless steel blade into the 
processor bowl.
3.4.3. Place food into the processor bowl.
3.4.4. Note: remove the bones from meat, cut into 
small pieces, then place into bowl, the max quantity 
of ingredients can’t exceed 350g.
3.4.5. Attach the Lid onto the processor bowl and 
turn it until it locks into position
3.4.6. Insert the top part of the blender into the hole
of the procesor lid
3.4.7. Plug the stick blender into the power source
3.4.8.Select your desired speed and push switch(A)

3.4.9. To stop the appliance release the switch(A) at 
the top of the motor unit.

Caution:

 To reduce the risk of injury, never place the 

chopping blade on the base without first putting the 
bowl properly in place. Be sure the processor lid is 
securely locked in place before operating appliance.

3.5 Instructions for the slicing/shredding blades:

(Max operation time cannot exceed 15 seconds and 
2 minute rest time)
3.5.1. Place the processor bowl on a clean, level 
surface.
3.5.2. Assemble the desired slicing/shredding blade 
into the blade holder 
3.5.3. Assemble the blade holder into the processor 
bowl.

800

800

Switch A

Switch B

800

Switch A

Switch B

800

Switch A

Switch B

800

Switch A

Switch B

800

Switch A

Switch B

85800_IM.indd   4

2017/12/18   11:05:59 AM

Summary of Contents for ROBOT 800 85800

Page 1: ...00 800W complies with INTERNATIONAL IEC60335 SAFETY SPECIFICATIONS ROBOT 800 800W Stainless steel stick blender 1500ml Food processing bowl Variable speed and turbo setting food processor 85800_IM ind...

Page 2: ...y from flammable material such as textiles curtains cardboard or paper etc 2 1 7 Do not place flammable material near the appliance 2 1 8 Do not use the appliance in association with a programmer time...

Page 3: ...power supply 2 3 5 Do not cover the cooking surface or food with aluminium foil and other similar materials 2 3 6 Unplug the appliance from the mains power supply when not in use and before undertaki...

Page 4: ...bowl 3 4 3 Place food into the processor bowl 3 4 4 Note remove the bones from meat cut into small pieces then place into bowl the max quantity of ingredients can t exceed 350g 3 4 5 Attach the Lid o...

Page 5: ...d 4 2 Do not immerse the detachable shaft of the blender in water because overtime the lubrication on the bearings may wash away Wash the detachable shaft under running water without the use of abrasi...

Page 6: ...1 7 Moenie vlambare materiaal naby die toestel plaas nie 2 1 8 Moenie die toestel in kombinasie met n pro grammeerder timer of ander toestel gebruik wat dit outomaties aanskakel nie 2 1 9 Moenie die...

Page 7: ...die kragtoevoer 2 3 5 Moet nie die kookoppervlak of kos bedek nie aluminium foelie en ander soortgelyke materiale 2 3 6 Skakel die toestel uit die kragtoevoer indien nie in gebruik en voordat u enige...

Page 8: ...4 Let wel verwyder die bene van vleis sny dit in klein stukkies en plaas dit in die bak die maksimum hoeveelheid bestanddele mag nie 350g oorskry nie 3 4 5 Heg die deksel op die verwerkerbak en draai...

Page 9: ...ie afneembare as van die blender in water omdat oortyd die smering aan die laers mag wegwas Was die afneembare as onder stromend water sonder die gebruik van skuurmiddels of skoonmaakmiddels 4 3 Na di...

Page 10: ...s de calor y contacto con el agua 2 1 6 Mantenga el dispositivo alejado de materiales in flamables como textiles cortinas cart n o papel etc 2 1 7 No coloque material inflamable cerca del aparato 2 1...

Page 11: ...ienda el aparato mientras est en uso o conectado a la fuente de alimentaci n principal 2 3 5 No cubra la superficie de cocci n o la comida con papel de aluminio y otros materiales similares 2 3 6 Dese...

Page 12: ...aer la batidora tirando de la carcasa del motor 3 4 Instrucciones para el bol del procesador El tiempo m ximo de operaci n no puede exceder los 15 segundos y el tiempo de descanso de 2 minutos 3 4 1 C...

Page 13: ...ejemplo puede usarse para una r faga adicional de mezcla al final de una mezcla para suavizar la mezcla un poco m s 3 6 2 Para usar la funci n de turbo baje el eje de la licuadora de palitos en el al...

Page 14: ...es et loin des autres sources de chaleur et en contact avec l eau 2 1 6 Tenez l appareil l cart de tout mat riau inflam mable tel que textiles rideaux cartons ou papiers etc 2 1 7 Ne placez pas de ma...

Page 15: ...r l appareil pendant son utilisation ou connect l alimentation secteur 2 3 5 Ne couvrez pas la surface de cuisson ou la nourriture avec feuille d aluminium et autres mat riaux similaires 2 3 6 D branc...

Page 16: ...la source d alimentation et retirez le fouet en le tirant hors du carter du moteur 3 4 Instructions pour le bol du processeur Le temps de fonctionnement maximum ne peut pas d passer 15 secondes et 2...

Page 17: ...un m lange pour lisser le m lange un peu plus 3 6 2 Pour utiliser la fonction turbo abaissez l axe du m langeur de b tons dans l aliment et maintenez le bouton B enfonc pendant la dur e pendant laque...

Page 18: ...a o aparelho longe de materiais inflam veis como t xteis cortinas papel o ou papel etc 2 1 7 N o coloque material inflam vel perto do aparelho 2 1 8 N o use o aparelho em associa o com um programador...

Page 19: ...conectado rede el trica 2 3 5 N o cubra a superf cie de cozimento ou comida com papel alum nio e outros materiais similares 2 3 6 Desconecte o aparelho da fonte de alimenta o quando n o em uso e antes...

Page 20: ...da 3 4 2 Monte a l mina de a o inoxid vel na tigela do processador 3 4 3 Coloque os alimentos na tigela do processador 3 4 4 Nota remova os ossos da carne corte em pequenos peda os e em seguida coloqu...

Page 21: ...ten o 4 1 Desconecte o aparelho e remova o acess rio usado 4 2 N o mergulhe o eixo destac vel do Liquidificador em gua porque o tempo extra na lubrifica o os rolamentos podem lavar Lave o desmont vel...

Page 22: ...be complete with all accessories parts and packag ing Missing parts will render the guarantee void 3 Upon receipt of your appliance check it for any transport damage to ensure it is safe for use Retur...

Page 23: ...t check that your receipt has been uploaded correctly Creative Housewares cannot be held responsible for faxes or files not received 6 For assistance with registration please email marketing creativeh...

Page 24: ...wat weg is sal die waarborg nietig maak 3 Met ontvangs van u toestel gaan dit na vir enige vervoer skade om te verseker dat dit veilig is vir gebruik Stuur dit so gou as moontlik terug na die winkel o...

Page 25: ...k dat u kwitansie korrek op gelaai is Creative Housewares kan nie verantwoordelik gehou word vir fakse of l ers nie ontvang nie 6 Vir hulp met registrasie e pos asseblief marketing creative housewares...

Page 26: ...rban South Africa 4001 Tell 27 31 303 3465 Fax 27 31 303 8259 Johannesburg Unit 25 26 San Croy Office Park Die Agora Road Croydon 1619 Tell 27 11 392 5652 Fax 27 11 392 1694 086 111 5006 HELPLINE 8580...

Reviews: