background image

6

CONEXIÓN OPCIONAL

CONECTOR DE ENTRADA DE LÍNEA (ATRÁS EN LA

UNIDAD)

Introduzca un extremo del cable de audio (no incluido) en

el conector de SALIDA DE LÍNEA, que está en la unidad

externa de audio, y el otro extremo en el conector de

ENTRADA DE LÍNEA en la parte posterior de esta unidad. 

Para escuchar la unidad de audio externa, encienda la

unidad usando el botón de Encendido en el control remoto

o unidad principal, y encienda también la unidad externa.

El sonido que produce la unidad de audio externa se

escuchará a través de las bocinas de esta unidad. Si

desea escuchar el iPod en el compartimiento del iPod,

desconecte el cable de audio de esta unidad.

Summary of Contents for Mi2032 - Portable Speakers With Digital Player Dock

Page 1: ......

Page 2: ...sons ATTENTION The exclamation point within an equilateral triangle is intended to alert the user to the presence of important operating and maintenance servicing instructions in the literature accomp...

Page 3: ...rrect the interference by one or more of the following measures Reorient or relocate the receiving antenna Increase the separation between the equipment and receiver Connect the equipment into an outl...

Page 4: ...e Universal Docks 3 Volume Down Button 4 Power Button 5 Left Speaker 2 of 2 6 LINE IN and DC IN 15V Z Jacks Rear of Unit AC Adapter Part No 295 04991 E000 7 Right Speaker 1 of 2 8 Volume Up Button 9 i...

Page 5: ...Down Button 3 Skip Search o Button 4 Play Pause p Button 5 Remote Transmitter Top of Unit 6 Volume Up Button 7 Skip Search n Button 8 MUTE Button 9 Battery Compartment Rear of Unit Remote Control Par...

Page 6: ...ce only with the same or equivalent type 2 Use only the size and type of battery specified 3 Be sure to follow the correct polarity when installing the battery as indicated next to the battery compart...

Page 7: ...he LINE IN jack on the rear of this unit To listen to the external audio unit turn this unit on using the Power button on the remote control or main unit and turn on the external unit as well The exte...

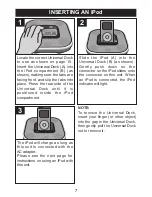
Page 8: ...1 The iPod will charge as long as this unit is connected with the AC adapter Please see the next page for instructions on using an iPod with this unit 3 Slide the iPod A into the Universal Dock B as...

Page 9: ...playback and press yet again to resume playback 1 1 3 To skip forward or backward on the iPod Press the Skip Search o 1 or n 2 button to skip to the beginning of the current track previous or next tra...

Page 10: ...mute the main volume Press the MUTE button 3 on the remote the Power indicator will blink Press this button again or either of the Volume Up 1 and or 2 buttons on the remote shown or on the main unit...

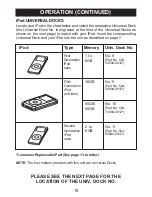
Page 11: ...your iPod into the unit as described on page 7 PLEASE SEE THE NEXT PAGE FOR THE LOCATION OF THE UNIV DOCK NO iPod Type Memory Univ Dock No 1 to 8GB First Generation iPod nano 30GB 60GB 80GB Fifth Gen...

Page 12: ...11 OPERATION CONTINUED IMPORTANT The Universal Dock No is engraved at the front of the docks Please refer to the illustration below for the location of the Universal Dock No 8 8...

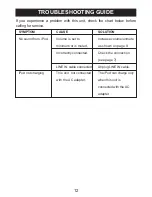
Page 13: ...ION No sound from iPod Volume is set to Increase volume unmute minimum or is muted as shown on page 9 Incorrectly connected Check the connection see page 7 LINE IN cable connected Unplug LINE IN cable...

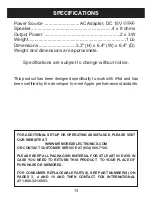
Page 14: ...iPod and has been certified by the developer to meet Apple performance standards FOR ADDITIONAL SET UP OR OPERATING ASSISTANCE PLEASE VISIT OUR WEBSITE AT WWW MEMOREXELECTRONICS COM OR CONTACT CUSTOME...

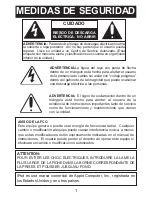
Page 15: ...ERTENCIA El signo de exclamaci n dentro de un tri ngulo est hecho para alertar al usuario de la existencia de instrucciones importantes tanto de servicio como de funcionamiento y mantenimiento que vie...

Page 16: ...Cambie la orientaci n o ubicaci n de la antena receptora Incremente la distancia entre el equipo y el receptor Conecte el equipo a un contacto el ctrico que est en un circuito distinto al que est cone...

Page 17: ...de Bajar Volumen 4 Bot n de encendido 5 Bocina izquierda 2 de 2 6 Conectores de entrada de L nea y 15VCD Z atr s en la unidad Adaptador CA No de pieza 295 04991 E000 7 Bocina derecha 1 de 2 8 Bot n de...

Page 18: ...ar o 4 Bot n de Reproducir Pausa p 5 Transmisor del control remoto arriba en la unidad 6 Bot n de Subir Volumen 7 Bot n de Brincar Buscar n 8 Bot n de SILENCIO 9 Compartimiento de pilas atr s en la un...

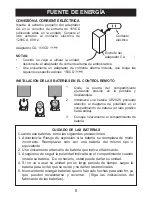
Page 19: ...recto Reemplazar s lo con una bater a del mismo tipo o equivalente 2 Use nicamente el tama o de bater a que indica el fabricante 3 Aseg rese de seguir la polaridad indicada en el compartimiento cuando...

Page 20: ...r de ENTRADA DE L NEA en la parte posterior de esta unidad Para escuchar la unidad de audio externa encienda la unidad usando el bot n de Encendido en el control remoto o unidad principal y encienda t...

Page 21: ...compartimiento del iPod A B 1 El iPod se cargar siempre y cuando la unidad est conectada con el adaptador CA Consulte la siguiente p gina para obtener las instrucciones sobre c mo usar un iPod con est...

Page 22: ...ucci n y presi nelo una vez m s para reanudar la reproducci n 1 1 3 Para brincar hacia adelante o atr s en el iPod Presione el bot n de Brincar Buscar o 1 o n 2 para brincar al inicio de la pista actu...

Page 23: ...men principal Presione el bot n de SILENCIO 3 en el control remoto el indicador de Encendido parpadear Presione nuevamente este bot n o bien el bot n de Subir 1 y o Bajar 2 VOLUMEN en el control remot...

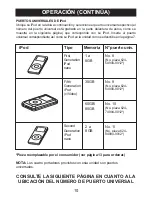
Page 24: ...en la unidad como se describe en la p gina 7 CONSULTE LA SIGUIENTE P GINA EN CUANTO A LA UBICACI N DEL N MERO DE PUERTO UNIVERSAL iPod Tipo Memoria N puerto univ 1 a 8GB First Generation iPod nano 30G...

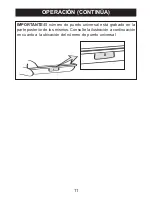
Page 25: ...ERACI N CONTIN A IMPORTANTE El n mero de puerto universal est grabado en la parte posterior de los mismos Consulte la ilustraci n a continuaci n en cuanto a la ubicaci n del n mero de puerto universal...

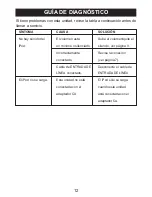
Page 26: ...lumen est Sube el volumen quite el iPod en m nimo o silenciado silencio ver p gina 9 Incorrectamente Revise la conexi n conectado ver p gina 7 Cable de ENTRADA DE Desconecte el cable de L NEA conectad...

Page 27: ...rtificado por el creador para satisfacer las normas de rendimiento de Apple PARA OBTENER AYUDA ADICIONAL CON RESPECTO A LOS AJUSTES O LA OPERACI N VISITE NUESTRO SITIO WEB EN WWW MEMOREXELECTRONICS CO...

Page 28: ......

Reviews: