85-03-01058-O
FV33i Gen 3
Page
66
4.12.5
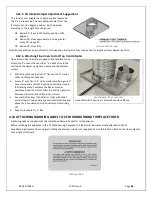
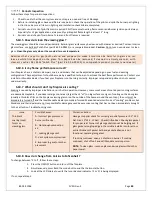
Air Intake Damper Adjustment Suggestions
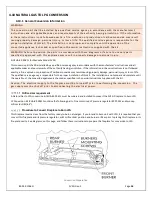
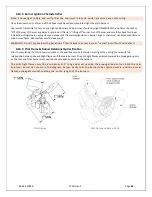
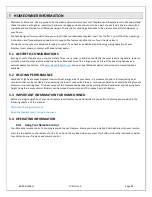
The Insert's vent adapter has a damper plate located on
the 3" air intake tube. The vent damper comes from the
factory set at a 45-degree position. Set the damper
according to the length of venting used.
Below 20’. leave in the factory position of 45-
degrees.
Above 20’. close approximately 15-degree for
every 10’. above 20’.
Above 50’. close fully.
Note: Some variations due to offsets in chimney and other factors may require fine tuning the primary damper position.
4.12.6
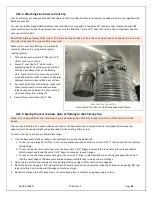
Attaching Flue Liners to Unit Top Vent Adapter
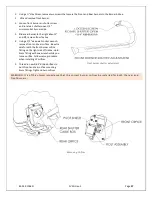
Once the two flex liners are dropped to the fireplace cavity,
attach the 4” exhaust flex and the 3” air intake flex to the
unit top vent adapter using hose clamps and sheet metal
screws
1.
At the fireplace cavity attach 4” flex vent to 4” starter
collar on sliding vent adapter.
2.
Secure 4” vent flex to 4” starter collar employing one 4”
hose clamp and a ratchet. Position hose clamp close to
the flashing plate. Compress the flex as much as
possible around the starter collar to obtain a tight joint
between starter stubs and flex inner surface.
3.
Secure the flex liner to the starter collar with sheet
metal screws in two equally spaced radial locations and
above the hose clamp to stop hose clamp from sliding
off.
4.
Repeat procedure for 3” flex.
4.13
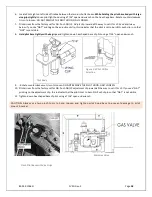
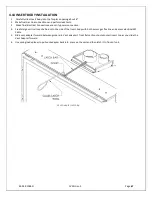
ATTACHING WARNING LABEL TO ZC WOODBURNING FIREPLACE FLOOR
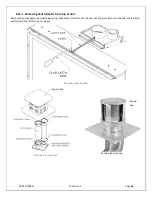
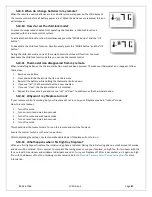
A Warning Label is supplied with the Installation Manual Packet for this appliance.
Before installing this appliance in the ZC Woodburning Fireplace, this label must be mechanically attached to the ZC
Woodburning Fireplace floor using self-drilling sheet metal screws (not supplied). Secure this label on floor on the floor adjacent
to the right or left walls.
Warning Label
Primary Vent Damper
Vent Adapter Flex Connection
Hose Clamp first. Secure w/ Screw above Hose Clamp

