background image

Operating Instructions

Modular Pressure Controller

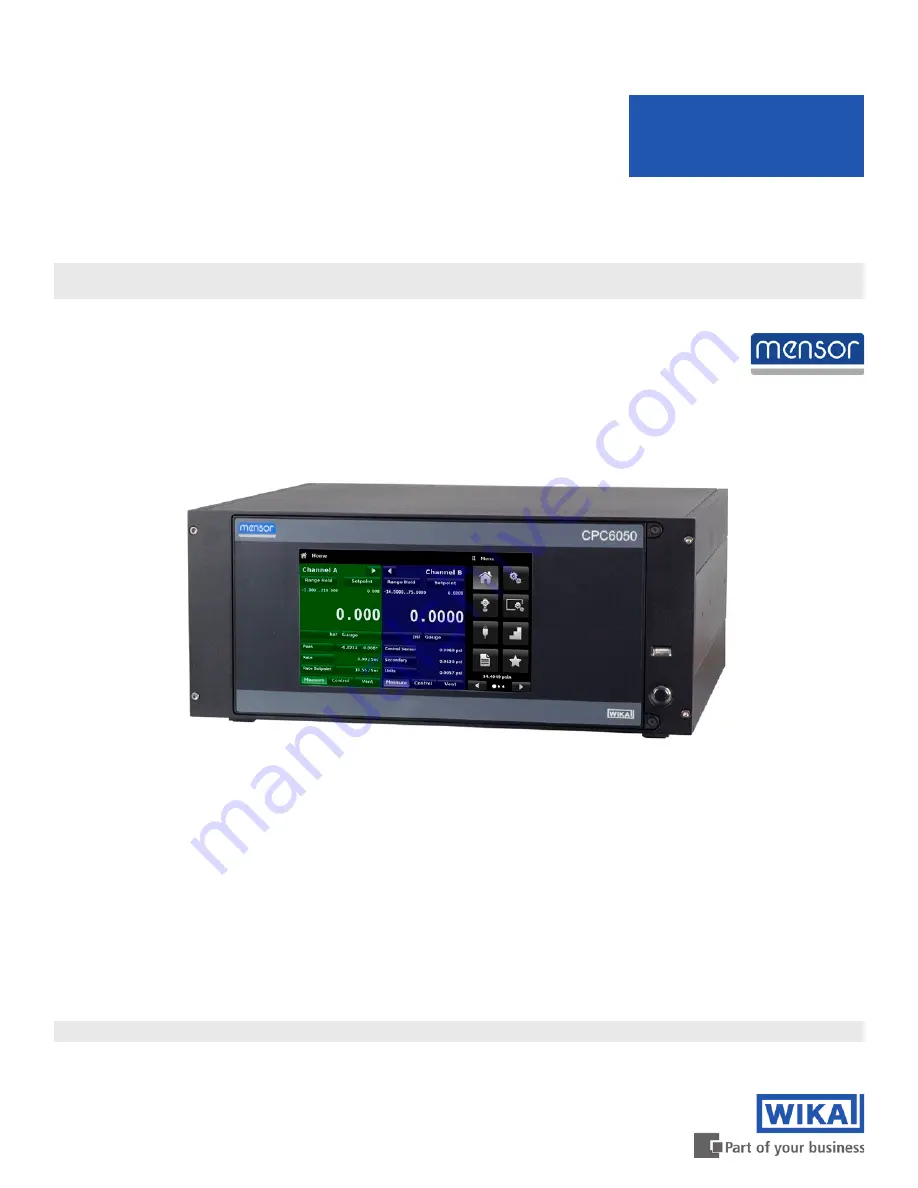
Modular Pressure Controller CPC6050 

PN 0019108001G • 03/2018

CPC6050

Summary of Contents for CPC6050

Page 1: ...Operating Instructions Modular Pressure Controller Modular Pressure Controller CPC6050 PN 0019108001G 03 2018 CPC6050 ...

Page 2: ... and or considerable damage mortal danger danger of injury will occur if the respective safety precautions are not taken Caution This Caution symbol indicates danger for the system and material if the respective safety precautions are not taken i Notice This Notice symbol does not indicate safety notices but information for a better understanding of the facts ...

Page 3: ...2 1 User Responsibilities 10 2 2 General Safety Notices 10 2 3 Warnings and Caution Notices 11 3 General Description 12 3 1 Features 12 3 2 Turning On 13 3 3 Front Panel 14 3 3 1 Power Switch 14 3 3 2 USB Port 14 3 4 Display 15 3 5 Chassis Assembly 16 3 5 1 Control Module 16 3 6 Electrical Block Diagram 17 4 Specifications 18 4 1 Measure Specification 18 4 2 Base Instrument 19 4 3 Approvals and Ce...

Page 4: ...8 6 4 1 1 Range Hold Autorange 29 6 4 1 2 Control Setpoint 29 6 4 1 3 Units and Pressure Type 33 6 4 1 4 Bar Graph 34 6 4 1 5 Auxiliary Displays 34 6 4 1 6 Zero Button 35 6 4 1 7 Tare Button 36 6 4 1 8 Operating Mode Selection 37 6 4 2 Settings Application 38 6 4 2 1 Languages 38 6 4 2 2 Brightness 39 6 4 2 3 Volume 39 6 4 2 4 User Base Units Base Units Multiplier 40 6 4 2 5 Barometer Units 40 6 4...

Page 5: ...4 7 1 Edit Programs 57 6 4 8 Favorites Application 59 6 4 9 Information Application 59 6 4 10 Troubleshooting Application 60 6 4 11 Digital I O Application 61 6 4 12 Leak Test Application 62 6 4 13 Switch Test Application 63 6 4 14 Burst Test Application 64 6 4 15 Service Application 64 6 4 16 Unlocked Service Application 66 7 Remote Operation 67 7 1 Digital I O 67 7 1 1 Digital I O Specifications...

Page 6: ... 8 2 Single Output Dual Channel Version 108 8 2 1 Single Output Dual Channel Home App 108 8 2 2 Single Output Dual Channel Rear Panel 109 8 3 Single Supply 110 8 4 Barometric Reference CPX A C5 3 110 8 4 1 Gauge Pressure Emulation 110 8 4 2 Absolute Pressure Emulation 110 8 4 3 Emulation Mode Accuracy 111 8 4 4 Barometric Reference Calibration 111 8 4 5 Barometric Reference Specifications 111 8 5 ...

Page 7: ...l 126 10 Calibration 128 10 1 Calibration Services by Mensor or WIKA worldwide 128 10 2 Environment 128 10 3 Pressure Standards 128 10 4 Media 128 10 5 Setup 129 10 6 Calibration Data 130 10 7 One Point Cal Application 130 10 8 Two Point Cal Application 131 10 9 Linearization 132 10 10 Head Pressure 134 11 Technical Assistance 135 11 1 Options 135 11 2 Logging 136 11 2 1 Remote Logging 137 11 2 2 ...

Page 8: ... contained herein or for incidental or con sequential damages in connection with the furnishing performance or use of this material 1 2 Important Notice The product specifications and other information contained in this manual are subject to change without notice Mensor has made a concerted effort to provide complete and current information for the proper use of the equipment If there are question...

Page 9: ... consequential or incidental damages including dam ages for loss of business profits business interruption loss of business information and the like arising from or in connection with the delivery use or performance of the software program 1 6 Mensor Service Plus If you have problems and you don t find the answer in this manual contact Mensor at 1 800 984 4200 USA only or 1 512 396 4200 for person...

Page 10: ...ith this manual and the operation of the instrument Warning WARNING A condition for trouble free and safe operation of this system is proper transport proper storage installation assembly and proper use as well as careful operation and maintenance Any operation not described in the following instructions should be prohibited The system must be handled with care required for an electronic precision...

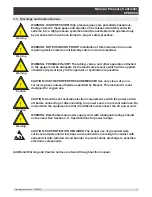
Page 11: ...to the operator or bystanders is possible Caution CAUTION USE THE PROPER PRESSURE MEDIUM Use only clean dry non corrosive gases unless otherwise specified by Mensor This instrument is not designed for oxygen use Caution CAUTION As with most sensitive electronic equipment switch the power switch off before connecting or disconnecting to a power source to prevent data loss Do not position the equipm...

Page 12: ...Provides a single output with a choice of controlling with the internal control module A or B Figure 3 1 Desktop version Note Some screens in the following sections may appear slightly different from units with options See configuration options described in more detail in Section 8 Options 3 1 Features Here is a short list of significant features designed into the CPC6050 Up to four two per channe...

Page 13: ...round Any power adaptors or surge protection devices that negate the protective earth ground should not be used The power cord must be accessible and contain a protective earth ground Do not position the equipment so that it is difficult to remove the power cord Ventilation Do not block airflow to ventilating fans located on rear of instrument To see information about the configuration of your new...

Page 14: ... the transducers are provided in Section 9 3 Transducer Removal The front panel also shows the model number designation and brand logos Screws to open front panel 3 3 1 Power Switch The power switch is a two state device with an action similar to that of a ball point pen Push the button with enough force to latch it in to turn the unit ON Push it again to release it to turn the system OFF i Notice...

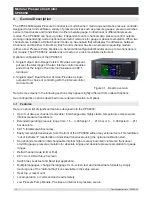
Page 15: ...Modes Buttons Labels and Windows The CPC6050 touch screen has many buttons with relevant graphic icons or text which when touched will open a related window where changes can be made or informa tion viewed Some of these buttons will toggle from one state to another others present choices or dis play a numerical data entry screen Text or icons that are displayed but do not respond to being touched ...

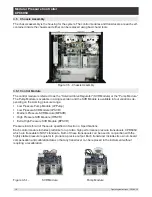
Page 16: ...n the working pressure range Low Pressure Pump Module LPPump Low Pressure SVR Module LPSVR Medium Pressure SVR Module MPSVR High Pressure SVR Module HPSVR Extra High Pressure SVR Module EPSVR Pressure limits for all of these are specified in Section 4 Specifications Each control module includes platforms for up to two high performance pressure transducers CPR6050 which are traceable to NIST standa...

Page 17: ...Operating Instructions CPC6050 17 Modular Pressure Controller CPC6050 3 6 Electrical Block Diagram Figure 3 6 Electrical Block Diagram ...

Page 18: ... Calibration interval 365 days 6 365 days Optional barometric reference Function The barometric reference can be used to switch pressure types 7 absolute gauge With gauge pressure transducers the measuring range of the transducers must begin with 1 bar 15 psi in order to carry out a complete absolute pressure emulation Measuring range 552 1 172 mbar abs 8 17 psi abs Accuracy 1 0 01 of reading Pres...

Page 19: ...ar 10 psi whichever is greater Measure Control port max 105 FS Voltage supply Power supply AC 100 120 V 50 60 Hz AC 220 240 V 50 60 Hz Power consumption max 210 VA Permissible ambient conditions Storage temperature 20 70 C 4 158 F Humidity 5 95 r h relative humidity non condensing Compensated temperature range 15 45 C 59 113 F Mounting position horizontal Control parameter SVR module 8 LPPump modu...

Page 20: ...tor is expected to take the appropriate measures 12 Calibration in a horizontal position operating position 4 4 Working Ranges of the Controller Modules Bi directional or gauge pressure bar psi 1 1 15 0 1 15 3 4 50 10 150 100 1 500 210 3 045 LPPump MODULE 12 5 mbar 0 18 psi 2 LPSVR MODULE 12 5 mbar 0 18 psi 2 MPSVR MODULE 0 35 bar 5 psi 2 HPSVR MODULE 1 5 bar 15 75 psi 2 EPSVR MODULE 1 10 bar 15 1...

Page 21: ... appearance prior to leaving the factory Upon receipt please examine the instrument for shipping damage Report any apparent damage to the carrier immediately In addition to this manual you should have CPC6050 Modular Pressure Controller Power Cord Fitting adapters ordered Any accessories ordered An envelope containing the calibration certificate s A Quick Start Guide for all Mensor products A USB ...

Page 22: ...ches Digital I O or A CPS Exhaust Ports 7 16 20 UNF Supply Ports 7 16 20 UNF Measure Control Ports 7 16 20 UNF Reference Ports 7 16 20 UNF Baro ref Port 10 32 UNF IEEE 488 RS 232 Ethernet Port USB device Power Supply USB host Vents ATM Front view Side view 19 rack mount Rear Panel Rear Panel ...

Page 23: ...p on either side of the ventilation fan Positioned on the right side is the RS 232 Ethernet IEEE 488 USB device connections for communication the USB host connection and the 12 VDC power input Figure 5 4 A Rear Panel 5 4 1 Pressure Connections Warning Warning The pressure connections must be installed according to the following instructions observing the relevant regulations The installation is to...

Page 24: ...sducers that are not sealed gauge units For these units this port is available to connect to the reference side of the transducer This port is normally left open to atmosphere but may be connected to a stable reference pressure In an absolute pressure transducer this port is not used 5 4 7 Barometric Reference Port The Barometric Reference port is connected to the optional internal barometer and s...

Page 25: ...ppear on the left After choosing one of these parameters a set of selections related to that parameter will appear on the right or a data entry keypad The desired selection or data can be entered here 6 1 2 Display Screen Features The screen shown below provides an overview of the features that may appear on the display after initial ization The left three fourth of the display contains the area w...

Page 26: ...ed transducers installed regulator along with instrument and software version information Figure 6 2 1 Information 6 2 2 Language Selection Pressing the settings application button will open a screen where the language display bright ness volume user base units multiplier and configuration loading saving can be changed The current language selections available are shown in the table below Addition...

Page 27: ... page by a larger circle As each App is chosen related application parameters will appear on the left three fourth of the screen along with the name of the application and a reduced size icon in the top title section When a parameter is chosen related selections sliding scales or a data entry key pad will appear in the input area on the right where the application selection buttons were previously...

Page 28: ...xpanding Channel A or Channel B by pressing the Channel Expand Collapse button for each channel figure 6 4 1 B The dual display can be restored by pressing the Channel Expand Collapse button The Units button is always displayed When the Units button is pressed a selection of imperial and metric units will be displayed on the right figure 6 4 1 C notice that the Units button has a lighter backgroun...

Page 29: ...y select the active range based on the current pressure value Figure 6 4 1 1 Range Hold Button 6 4 1 2Control Setpoint The Setpoint button allows the user to enter the desired pressure value to be controlled by the instru ment There are multiple ways of entering the control setpoint numeric keypad step increments percent age entry digital step or a program data entry These methods can be accessed ...

Page 30: ...er a valid number The setpoint can only be entered within the minimum and maximum control range set in the Control Settings App section 6 4 3 7 These limits are shown above the numeric entry keypad Figure 6 4 1 2 1 Numeric Keypad Setpoint Entry 6 4 1 2 2 Step Increments The second entry method allows the user to enter the setpoint in the same way as the Numeric Keypad by keying in the value and th...

Page 31: ...cking the button displaying pressure range figure 6 4 1 2 3 B This would take the user to the Step Settings App figure 6 4 1 2 3 C which is explained in Section 6 4 6 Step Settings Figure 6 4 1 2 3 A Percentage Entry Figure 6 4 1 2 3 B DUT Pressure Value Entry Figure 6 4 1 2 3 C 6 4 1 2 4 Digital Step Entry The fourth entry method is the Digital Step data entry method This method allows the user t...

Page 32: ...32 Operating Instructions CPC6050 Modular Pressure Controller CPC6050 Figure 6 4 1 2 4 Digital Step Entry Pressure Type button ...

Page 33: ...Type The Units button is always displayed When the units button is pressed a selection of imperial and metric units will be displayed on the right figure 6 4 1 3 A The Pressure Type button is only active if there is an optional Barometer installed Otherwise the Pressure Type button becomes a label figure 6 4 1 3 B indicating the native mode of the channel absolute or gauge When an optional baromet...

Page 34: ... B Figure 6 4 1 5 A Home App with Auxiliary Displays Figure 6 4 1 5 B Auxiliary Display Selection Some of the auxiliary display can be modified by pressing the displayed button Others simply display auxiliary information Peak Pressing the Peak button will reset the upper and lower peak value to the current reading subse quent negative or positive divergence from that reading will be recorded in th...

Page 35: ...If the channel is in emulation mode absolute or gauge then the value will not be saved to the transducer but only as a temporary adjustment while in emulation mode After exiting the emulation mode or after a power cycle the temporary adjustment will be cleared The zero adjustment for a channel not in emulation mode will be saved to the transducer as if single point calibration had been performed F...

Page 36: ...ear on the screen at the same time in the same channel When the Tare button is pressed the instrument will subtract the current pres sure reading the tare pressure so that the indicator will display zero Subsequent deviations in pressure will be relative to the tare pressure Figure 6 4 1 7 Tare Button Pressing the tare button again will deactivate the tare and change the pressure indication back t...

Page 37: ...50 provides a controlled pressure at the Measure Control port equal to the setpoint value It is activated by pressing the Control button In order to ensure smooth operation in the control mode following measures must be taken and respective parameters must be set In order to control pressures close to or below atmospheric pressure a vacuum pump should be con nected to the Exhaust port The control ...

Page 38: ...e made The Settings App provides a place to change the language display brightness volume user units and barometer units Configuration settings of the unit can also be saved within this application plus the de fault configuration can be activated Figure 6 4 2 Settings application 6 4 2 1Languages The Language parameter provides a selection of different languages Once a language is chosen all words...

Page 39: ...r along the bar graph or touching anywhere in the bar graph will change the brightness of the screen After the setting is made and your finger is removed from the screen the menu will show the brightness percent selected and revert back to the main settings menu Figure 6 4 2 2 Brightness 6 4 2 3Volume The Volume setting provides a way to turn on or off the touch screen audio feedback Figure 6 4 2 ...

Page 40: ...ascal as the User base unit and the User multiplier can be entered to derive the special unit using the formula Special unit Base Unit x Unit multiplier When set this way and the user unit has been chosen from the main screen then the user unit will now display the Special unit as derived Figure 6 4 2 4 User base units Base units multiplier 6 4 2 5Barometer Units When the Barometer Units button ha...

Page 41: ...up as needed in the future Configuration variables that are currently set in all Apps can be saved using the Configuration Save button and recalled using the Configuration Load button Simply set all desired variables in each app then go to Settings Configuration press one of the numbered Configuration buttons then press the Save button This will save the current configuration in that button To rel...

Page 42: ...on of channels for changing the control parameters The Control Settings App provides two preset control modes Precision and High Speed which affect the Control Behavior Rate Setpoint Stable Window and Stable Delay The Precision con trol mode is set as default and provides a stable control rate at medium overshoots The High Speed control mode provides faster control rate at a higher overshoot Each ...

Page 43: ...ot control mode Precision and 100 represents High Speed control mode The Precision or the High Speed modes can be chosen simply by pressing the corresponding button at the bottom of the screen The Control Behavior is preset to 50 for Precision control mode and to 100 for High Speed control mode The Control Behavior can be changed using the sliding scale This will change the control mode to Custom ...

Page 44: ...utput will move between set points more quickly As the set point is approached the external supply is shut off and the pump continues to increase or decrease the pressure into the set point with precision When the external supply pressure is turned off the pump output pressure will increase or decrease more slowly into the set point Figure 6 4 3 2 External Supply for Pump Module 6 4 3 3 Control Be...

Page 45: ...olled pressure can be configured using the Stable Window and Stable Delay buttons SVR Module and Pump Module When the controller enters a stable condition the pres sure indication color on the Home App will change from white to green The Stable Window button allows the user to enter a value as a percentage of the highest range transducer This value represents the pres sure window within which any ...

Page 46: ...imum and Minimum Limit buttons SVR Module and Pump Module in the Control Settings App second page provide a place to limit the set point value that can be chosen in the Home App These lim its can only be set within 0 1 of the range of the active transducer When the channel is in Autorange the limits can only be set within 0 1 of the range of the primary transducer which by convention will have the...

Page 47: ...meters Rate parameters for the control rate SVR Module only can be found in the Control Settings App and can be configured using the Rate Stable Window and Rate Stable Delay buttons The Rate Stable Window button allows the user to enter a value as a percentage of the active range of transducer This value rep resents the pressure window within which the control rate value would be considered stable...

Page 48: ...ply pressure is less than 10 of the control setpoint an error is reported which can be seen in the Troubleshoot App by clicking the error symbol This flag is turned Off by default Burst Detection Enable If turned On this flag allows the user to protect the instrument against sud den bursts in the pressure at the Measure Control Port In case a burst is detected an error is report ed which can be se...

Page 49: ...ise and to set the resolu tion of the reading In addition the bar graph display and calibration function can be specified here Figure 6 4 4 Display Settings Application 6 4 4 1Channel Selection To set the channel s display parameters the control channel must be selected Display parameters are iden tical for all channels but can be set differently in each channel Figure 6 4 4 1 shows three displays...

Page 50: ...able reading for some pressure units Turn off the Filter by selecting Off select varying degrees of filtering for the current units by selecting Low Normal or High Figure 6 4 4 2 Reading Filter 6 4 4 3 Reading Resolution The Resolution of the displayed pressure value for each Channel can be set in the Display Settings Ap plication using the resolution Parameter The resolution can be set to 4 5 or ...

Page 51: ... section 6 4 1 6 and 6 4 1 7 for operation of the Zero and Tare buttons in the Home App main screen Figure 6 4 4 4 Cal Function 6 4 4 5 Zero Reference Standard The Zero Reference Standard selection appears on the Display Settings App when a channel with absolute transducers is selected It presents a choice of Input Barometer and Lowest Range of the transducer as a reference for zeroing the absolut...

Page 52: ...creen in the Home App will display a reading resulting from the mathematical equation chosen in this screen Figure 6 4 4 5 Delta Function 6 4 5 Remote Application With the Remote Settings application users can select the remote command set for all inter faces The GPIB address Ethernet network parameters and Serial parameters can also be set here Details about the Remote Operation command sets cabl...

Page 53: ... also provides an option to set the Checksum Figure 6 4 5 1 B which when set to ON or AUTO appends a mod base 100 checksum to end of any remote communication response A proper mod base 100 checksum must be sent to the instrument when the checksum is ON Sending the checksum is optional when set to AUTO The flow control is set to NONE as default internally The termination character sets the output t...

Page 54: ...rs that require a numeric address for example an IP address will also present a keypad Address entries should conform to the format of the parameter selected The three screens below show examples of each type Numeric address entry Figure 6 4 5 2 Remote Communication Settings Numeric entry Radio button selection i Setting the Ethernet DHCP to yes will have a short delay while the DHCP server is con...

Page 55: ...maximum range of the DUT select the DUT Maximum Range and DUT Minimum Range buttons figure 6 4 6 A and enter the values These ranges should be within the maxi mum range of the primary transducer in the selected channel CPC6050 automatically switch between Pressure units and Percent of DUT Range values by pressing the units button or the percent button Figure 6 4 6 B The user can be directed to thi...

Page 56: ... points along the DUT range then enter 5 in the numeric keypad and press Enter button CPC6050 will create setpoints at 0 25 50 75 and 100 of the DUT range Figure 6 4 6 1 A The user also has the option of changing these percentage values or adding aditional values as needed by clicking on the individual Percentage button on the Step Settings app The user can enter any percentage between 0 and 100 T...

Page 57: ... to prevent accidental changes to existing pro grams The users can edit existing programs or create steps in new ones by clicking on Edit Program button figure 6 4 7 1 A This makes the program editable and also activates the Insert and Delete buttons which are otherwise just labels and can t be clicked by the user A series of pre defined commands can be chosen to write the steps of a program Selec...

Page 58: ...Sets the units for the active channel PTYPE Sets the pressure type Gauge or Absolute SETPOINT Sets the control setpoint in of current range Numerical Entry SETPOINT Sets the control setpoint for the instrument Numerical Entry STEP Increases or decreases the current setpoint by the percent full scale specified STEP Increases or decreases the current setpoint in current units Nu merical Entry RSETPT...

Page 59: ... be edited by clicking on the Play button The list of programs in the Favorites App can be chosen by clicking a program from the list on the left and replaced by clicking a predefined or saved programs shown on the right side of the screen A maximum of eight programs can be stored as favorites Figure 6 4 8 Favorites Application 6 4 9 Information Application The Information Application displays inf...

Page 60: ...en Figure 6 4 10 B push the Error button to display any errors that have occurred in the instrument due to a com munication or network error Push the Remote button to show commands and responses that have been sent over the remote communication connection If there are any errors in the error queue an error symbol will appear in all screens Figure 6 4 10 A of the instrument Pressing this error butt...

Page 61: ...erform actions based on the options assigned to the input Measure Option Will put the respective channel in Measure mode Control Option Will put the respective channel in Control mode Vent Option Will put the respective channel in Vent mode Keylock Option Will lock out the touch screen interface preventing local operation Start Option Will start the most recent program selected in Favorites App Fi...

Page 62: ...monitoring the pressure change Delta The change in pressure during the test that determines a pass or fail result Setpoint The controlled pressure at which the test begins If the change in pressure exceeds the Delta parameter before the allotted time in the Dwell Time parameter then the Leak Test App will return a red status indication showing initial final and the actual difference Delta in press...

Page 63: ...ch Test App has parameters that are used to setup the test High Point The highest pressure that the controller will control to during the test and should be set at a value above the point where the switch is expected to actuate Low Point The pressure point below the value where the pressure switch is expected to actuate It is also the point where the Controller switches from Fast Rate to Slow Rate...

Page 64: ...lue where the burst pressure is expected to be It is also the point where the controller switches from Fast Rate to Slow Rate Fast Rate the rate at which the controller will control pressure to the Low Point Slow Rate The rate at which the controller will control between the Low Point and the High point If the Device under test must experience a burst condition between the Low Point and the High P...

Page 65: ...his area can be changed Figure 6 4 15 A Service Application locked Press the Enter button to show the numeric keypad to enter a password This will unlock other applica tions Default password for calibration menu is 123456 Default password for technical assistance menu is 111111 Enter password and press the check mark to unlock the Service Application Figure 6 4 15 B Service Application Enter Passw...

Page 66: ...Application the Password can be changed by pressing the Enter button next to the Change Password label This will open a keypad where a new password can be entered and ac cepted by pressing the Check Mark i Note Please make note of a password change and save the new password in a secure location The Unlocked Service Application is the access point to all calibration screens described in Section 10 ...

Page 67: ...trigger input referenced to ground pin 2 5 VDC Minimum current required to trigger input 0 5 mA The digital inputs are connected through a series resistor and then through an optocoupler before being used internally in the instrument They require a minimum amount of current before they will trigger The schematic for each digital input can be seen in Figure 7 1 1 1 A The output of a logic device su...

Page 68: ... the ground pin of the digital outputs to the anode of the LED Then connect a current limiting resistor to the cathode of the LED Connect the other end of this resistor to the digital output pin Figure 7 1 1 2 B To connect one of the digital outputs to a logic device first connect the digital output pin to a high value 10 KΩ or more pull up resistor Connect the other end of this resistor to the lo...

Page 69: ...ol Signal Rear Panel 10 KΩ Exernal Logic Supply Voltage To Logic Input Figure 7 1 1 2 C Digital Output with Logic Device 0 75 Ω Internal Control Signal Rear Panel Exernal Voltage Supply Load Relay Load Voltage Supply Flyback Diode Figure 7 1 1 2 D Digital Output with Relay Connector Pin Out designation corresponds to numbers on the connector 1 Ground 2 Input 1 3 Input 2 4 Input 3 5 Ground 6 Output...

Page 70: ...n 11 Standard Mensor default SCPI WIKA The SCPI WIKA mode emulates the WIKA command set in SCPI format DPI 5XX Optional SCPI GE The SCPI GE mode emulates the GE PACE command set in SCPI format 7 4 IEEE 488 IEEE 488 address button Allows the user to set the GPIB address by inputting a numeric value utilizing the touch screen 7 4 1 IEEE 488 2 Commands Command or Query Response Function IDN Returns i...

Page 71: ...d in Section 6 4 5 Caution CAUTION Please contact your network administrator for proper settings Caution CAUTION Please consult your computer resources department prior to connect ing this instrument to your network to verify there are no conflicts with existing IP addresses The Ethernet communication port allows the CPC6050 to communicate with computers using 10 100Based T specifications Before u...

Page 72: ... no parity and no echo If echo is ON the CPC6050 will immediately echo back characters sent over the serial port The Serial function allows the user to set the RS 232 serial port settings by selecting from the choices provided Baud 9600 19200 38400 57600 115200 Data Bits 7 8 Stop Bits 1 2 Parity Even Odd None Echo settings On Off 7 6 1 Serial Cable Requirements RS 232 communications are transmitte...

Page 73: ...e of multiple data fields commas are required to separate the fields Queries do not have a data field String text or value numeric data are acceptable in any of the following formats Examples of string data ON OFF mBar inHg Examples of value data 1 1 0 5 678 25 68324e 5 7 7 2 Command Set Definitions In this manual a data entry made up of alpha characters is defined as a string as opposed to data c...

Page 74: ...f different brands of pressure gauges Please contact Mensor for more details Table 7 7 4 CPC6050 Commands and Queries Command Data Response Function See Section 7 10 Returns data per the current output format A sp n nnnnnE nn cr lf Returns the A channel pressure read ing in current units AR sp n nnnnnE nn cr lf Returns the A channel rate reading in current units ARS sp YES or NO cr lf Returns the ...

Page 75: ...ime to complete in seconds and x is a 0 character since this data location is not used at this time Autozeroabort none Aborts autozero Any transducers that have been zeroed will not revert to previous zero offsets Auxdisp n NONE PEAK RATE RATE SETPOINT UNCERTAINTY UNITS BAROMETER Sets the auxiliary display setting for index n 0 to 2 If n is left out defaults to index 0 Auxdisp n sp NONE PEAK RATE ...

Page 76: ...per and lower limits This is the higher pressure limit of the anticipated burst range Burst_High sp n nnnnnE nn cr lf Returns the higher pressure limit for burst test Burst_Slow Value inside upper and lower limits This is the rate used during the transi tion from low setpt to high setpt in the anticipated burst range Burst_Slow sp n nnnnnE nn cr lf Returns the slow rate for burst test Burst_Fast V...

Page 77: ...mand set identifier Control Instrument placed in Control Mode Control sp YES or NO cr lf Returns YES if instrument is in control NO if otherwise Control_behavior n 0 to 100 100 highspeed 0 low overshoot May be set between 0 and 100 Control_behavior sp NNN cr lf Retuns the control behavior number Control_default PRECISION HIGHSPEED CUSTOM or NONE Sets the current control settings Control_default sp...

Page 78: ...63 DOC mm dd yyyy Sets the date of cal for the active transducer DOC sp mm dd yyyy cr lf Returns the date of cal for the active transducer DOM sp mm dd yyyy cr lf Returns the date of manufacture Error sp text description cr lf Returns the next error in the error queue Errorno sp Enn text cr lf Returns pcs400 error code and text Filter OFF LOW NORMAL HIGH Sets the reading filter 0 80 92 95 Filter s...

Page 79: ...t of time the instrument has been on in min utes IP nnn nnn nnn nnn Sets the IP address of the instrument IP sp nnn nnn nnn nnn cr lf Returns the IP address of the instru ment Keylock YES or NO Locks or unlocks the entire touch screen Keylock sp YES or NO cr lf Returns Yes or No Leak_Chan A B Sets the leak channel over the bus and makes that channel the active remote channel Leak_Chan sp A or B cr...

Page 80: ...tion dates for each range Listrange sp PRI 1 min max 2 min max S EC 1 min max 2 min max 3RD 1 min max 2 min max 4TH 1 min max 2 min max cr lf bracketed single output only Returns the ranges of the installed transducers for the active channel Listsensorinfo sp PRI SN PTYPE ACCURACY 1 min max 2 min max SEC SN PTYPE ACCURACY 1 min max 2 min max 3 RD SN PTYPE ACCURACY 1 min m ax 2 min max 4TH SN PTYPE...

Page 81: ...re since peakreset was sent Peakmin sp n nnnnnE nn cr lf Returns the minimum pressure since peakreset was sent Peakreset None Resets the peak values Port nnnnnn Sets the Ethernet port of the instru ment Port sp nnnnn cr lf Returns the Ethernet port of the in strument Precision ON or OFF Sets the precision control mode which sets the control behavior stable window stable delay and rate set point Pr...

Page 82: ... available only on native gauge units Reference sp EXTVAC or ATM cr lf Returns the current reference type see Reference Release 15 char string EX Release Test_stand_1 Returns sp YES or NO CCC CCC cr lf This command is used to release control of the instrument in a multiple computer environment Yes if release is successful No if instrument is being controlled with another computer CCC name of contr...

Page 83: ... in long string format Sensorid sp Mensor SN XXXXXX VN NN Returns the active transducer s serial number and firmware version Setpt Value inside upper and lower limits Sets the control setpoint for the instru ment Setpt sp XXXXXXX cr lf Returns the control setpoint in current units Setpt Value in of primary range Sets the control setpoint in of pri mary range Setptpct Value in of primary range Sets...

Page 84: ...ed Stabletime sp XXXXXXX cr lf Returns the stable time StableWin FS value Sets the stable window as a FS StableWin sp n nnnnnE nn cr lf Returns the stable window Standby None Instrument placed in Standby Mode Standby sp YES or NO cr lf Returns yes if instrument is in Stand by no if otherwise Step Value inside upper lower limits and in side the range of the active transducer Sets the control step s...

Page 85: ...sp n nnnnnE nn cr lf Returns slow rate setpt Switch_1_Up sp n nnnnnE nn cr lf Returns the pressure at which switch 1 tripped while going up scale Re turns 0 if switch was not triggered Switch_1_Dn sp n nnnnnE nn cr lf Returns the pressure at which switch 1 tripped while going down scale Re turns 0 if switch was not triggered Switch_2_Up sp n nnnnnE nn cr lf Returns the pressure at which switch 2 t...

Page 86: ...r 2 unit multiplier Unlock None Releases Acquire locks see Acquire and Release UpperLimit Value inside primary transducer range in current units Sets the Upper control limit for the ac tive transducer UpperLimit sp xxxxxxx cr lf Returns the upper control limit for the active transducer Vent None Instrument placed in Vent Mode Vent sp YES or NO cr lf Returns yes if instrument is in Vent no if other...

Page 87: ...s MBAR Metric 16 millimeters of water 4 C MMH2O Metric 17 centimeters of water 4 C CMH2O Metric 18 meters of water 4 C MH2O Metric 19 millimeters of mercury 0 C MMHG Metric 20 centimeters of mercury 0 C CMHG Metric 21 torr TORR Metric 22 kilopascals KPA Metric 23 pascals PA Metric 24 dynes per square centimeter DY CM2 Metric 25 grams per square centimeter G CM2 Metric 26 kilograms per square centi...

Page 88: ... and Queries The WIKA SCPI command is compatible with older WIKA instruments such as the original CPC8000 Notes 1 Note that WIKA and Ruska 7010 Emulation return slightly different responses to some queries 2 Except for the engineering units selection the numeric suffix selects the applicable transducer R 1 Sensor 1 default Turndown 1 11 Sensor 1 Turndown 1 12 Sensor 1 Turndown 2 2 Sensor 2 default...

Page 89: ...ng MODE Returns ABSOLUTE or GAUGE MODE ABS GAUGE Sets pressure type ABS Returns native transducer type 0 GAUGE 1 ABSOLUTE RESolution Returns resolution float RANGe UPPer Returns maximum range LOWer Returns minimum range UNIT NAME Returns ASCII units mixed case VALue Returns the units conversion factor REFerence HEIGht n Sets the head pressure height HEIGht Returns the head pressure height MODE Ret...

Page 90: ...e keylock state PRESet Load known state values SAVe No function not needed VERSion Returns SCPI version 1994 0 TEST ELECtronic Returns OK RELay n Returns status of digital output n RELay n ON OFF Turns the digital output on or off n UNIT PRESsure bar mbar Pa psi Sets the pressure units PRESsure Returns the pressure units NAME n Returns the units string for units code n FACTor n Returns the units c...

Page 91: ...mTorr 34 uHg 0 C 35 mmH2O 4 C 36 mH2O 4 C 37 mmH2O 20 C 38 cmH2O 20 C 39 mH2O 20 C 40 mSW 41 g cm2 42 Kg m2 OUTPut STATe ON OFF 1 0 ON or 1 Control OFF or 0 Measure STATe Returns 0 for measure 1 for control MODE MEASure CONTrol VENT Sets the mode indicated MODE Returns the mode string STABle Returns 1 if stable 0 if not AUTOvent ON OFF 1 0 Autovent is always true on CPC6050 AUTOvent Returns the st...

Page 92: ...l remote commands sent to the CPC6050 are shown in the Trouble Shooting App under the Remote button If there is a syntax error an error message will appear below the errant command Local errors and remote command errors will appear under the Error button Maximum of 100 errors are stored and can be retrieved The error messages can also be seen remotely when SYST ERR is sent any error in the error q...

Page 93: ...se it returns 0 000 case E Clear_Error_Mode usage E The PCS 400 will accept all types of termination CR LF EOI It will also accept the strings E0 E1 and E2 but will not respond to these Note Send E to clear an error from the buffer this is an added function not part of the Druck command set case F Function usage F00 does not apply to CPC6050 usage F01 puts instrument into vent mode when C0 or cont...

Page 94: ...is set to 0 the pressure reading is the pressure reading example 199 98REMR1S3D0 01 N1 if display is set to 1 the pressure reading is the setpoint reading example 200 00 if display is set to 0 the pressure reading is the pressure reading example 199 98 N2 example R1S3D1C0I0F00 01 N3 example 1 N4 01 1J0V 00009U BAR case P Pressure_Setpoint_Mode usage PXXXX XXXX X sets the pressure setpoint ex P13 5...

Page 95: ...eroing software will accept the command but does not affect the zero status of the instrument usage R0 setting remote to local usage R1 setting to remote usage I0 does nothing usage I1 does nothing usage I2 does nothing usage I3 does nothing usage I4 does nothing usage I5 does nothing usage I6 does nothing UNITNO 7 kg m2 does nothing UNITNO 10 mHg does nothing UNITNO 17 lb ft2 does nothing UNITNO ...

Page 96: ...s as listed in this manual s Appendix Table 7 9 3 DPI 510 Measurement units Druck Unitno Units Comments 1 Pa 2 kPa 3 mPa 4 mbar 5 bar 6 kg cm2 7 kg m2 not supported 8 mmHg 9 cmHg 10 mHg not supported 11 mmH2O 12 cmH2O 13 mH2O 20c 14 torr 15 Atm 16 psi 17 1b ft2 not supported 18 inHg 19 H2O 04c 20 H2O 04c 21 Special not supported 22 H2O 20c 23 H2O 20c ...

Page 97: ...imum control limit CALibration PRESsure R POINt Returns the number of calibration points used in the active sensor s linearity correction Calibra tion functionality must be enabled by sending the calibration password See SYST PASS CEN ZERO AUTO Start autozero process AUTO Returns 1 if autozero process is running 0 other wise VALVe ON OFF 1 0 ON or 1 puts in vent mode OFF or 0 puts in mea sure mode...

Page 98: ...nstrument s pressure maximum in native units native pressure units native pres sure type current upper control limit current lower control limit Ex INST LIM INST LIM 1000 000psig 1000 000 15 0000 MACaddress Returns the ethernet interface medium access control MAC hardware address in XX XX XX XX XX XX format Any letters will be upper case Ex INST MAC INST MAC 84 EB 18 B2 97 AB SENSe R Returns the s...

Page 99: ...ASK CCC Set the instrument task Either the long or short version may be sent Makes the active screen on the instrument be loaded Loading a new task will force any other tasks being run to be stopped Does not put the screen in keylock mode BAS BASIC loads home application BUR BURST BURSTTEST loads burst test ap plication DIV DIVIDER loads step settings application LEAK LEAKTEST loads leak test appl...

Page 100: ... in Measure mode 0 otherwise STATe ON OFF 1 0 ON or 1 puts in Measure mode 0 puts in Vent mode LOGic Returns a single digit number that is a mask of the digital output states e g a number of 7 in binary is 111 which indicates all digital outputs are on LOGic Set the digital outputs with a mask number from 0 to 7 for setting the three outputs Note the digital output functions will be automatically ...

Page 101: ... cor rection in current units for the active channel Ex SENS PRES CORR HEAD SENS PRES CORR HEAD DRY AIR 0 000000 HEAD CCC f Set the gas type and head pressure correction value in current units Requires the gas type CCC AIR HELIUM NITROGEN in double quotes numeric value float STATe Returns 1 if the head pressure correction is cur rently enabled 0 if not STATe ON OFF 1 0 Enable or disable the head p...

Page 102: ...urrent units SOURce PRESsure LEVel IMMediate AMPLitude Returns the setpoint in current units AMPLitude f Sets the setpoint in current units VENT Returns 1 if in vent mode and pressure is not fully vented stable yet 0 otherwise Proper usage put in vent mode then query this value until it is 0 again to know the system is vented VENT ON OFF 1 0 ON or 1 puts in vent mode OFF or 0 puts in Measure mode ...

Page 103: ...00 indicat ing how much effort the regulator is using to achieve the setpoint STATus OPERation Returns 0 OPERation CONDition Returns 0 EVENt Returns 0 QUEStionable Returns 0 EVENt Returns 0 ENABle Returns 0 SYSTem AREA Returns the system locale area AREA Set the system locale area Accepts the following lower case letters are not required EURope JAPan USA ASIA ROW abbreviation for Rest of World DAT...

Page 104: ... Accept 0 All other values generate a parameter error no handshaking modes supported TYPE PARity Returns the serial communication parity bit set ting NONE EVEN ODD PARity CCC Set the communication parity setting to NONE ODD or EVEN GPIB SELF ADDRess Returns the GPIB address SET Returns VENT 0 0 SET Only accepts Vent 0 Not allowed to boot up a Mensor product in any mode except vent mode with a setp...

Page 105: ...urned otherwise the following is returned 0 No Error Error String Returned 0 No error 1 Overflow occurs when remote interface buffer of commands has become full Command will not be processed 102 Syntax error 102 Syntax error Unbalanced string 105 Parameter not supported parameter 1 105 Parameter not supported parameter 2 108 Parameter not allowed 109 Missing parameter 113 Undefined header 113 Comm...

Page 106: ...12 The user can navigate to the Software upgrade menu by clicking on the USB icon The software upgrade menu gives the user information on the current instrument software and the version of instrument software on the USB device figure 7 11 A The user can load the instrument software from the USB to the instrument by clicking on the desired ver sion and then clicking button The status of the install...

Page 107: ...both internal regulator modules of the CPC6050 This version is capable of controlling pressure over a wide range with a 400 1 turndown It accomplishes this by auto matically switching between the transducers on the internal control modules and also switching between the two control modules When configured with four transducers that have contiguous ranges this Single Output Auto Range Version of th...

Page 108: ... A or Channel B This option is useful if test procedures require a quick change from Absolute mode to Gauge mode or if there is a need to control at very low pressures in some situations and very high pressures in others Warning Warning in the case of a power failure pressure will be trapped in the Mea sure port and the DUT 8 2 1 Single Output Dual Channel Home App The Home App for the CPC6050 Sin...

Page 109: ...er CPC6050 Figure 8 2 1 Channel A Active Channel B Active 8 2 2 Single Output Dual Channel Rear Panel The rear Panel has a single output and plug fittings marked with a red dot that should not be removed Single Measure Control Output Plugged ports do not remove ...

Page 110: ...n absolute transducer channel will indicate Absolute in the Pressure Type button this is the default mode When the Pressure Type button is pressed the button la bel will toggle to Gauge and have a lighter background color The lighter background color is an indica tion that the channel is in emulation mode In the gauge emulation mode the atmospheric pressure reading from the barometric reference tr...

Page 111: ...A secondary transducer of any standard range can be purchased as an option In all other regards the add on transducer will meet all of the specifications and operating parameters outlines throughout this manual CAUTION Typically the pressure regulator in each instrument has limits of 50 150 1500 or 3 045 psig If a transducer is placed into an instrument where the transducer has a higher upper pres...

Page 112: ...dard barb fitting 8 8 Remote Calibration A remote calibration sled power supply cable and software are available to calibrate the optional baro metric reference and internal transducers outside of the CPC6050 In both cases a PC with an RS 232 connection is required Both kits are supplied with an instruction manual For instructions to remove the internal transducers and the barometric reference see...

Page 113: ...rometric Reference can be performed remotely using the Cal sled a PC and the software provided Figure 8 7 2 CPC6050 Barometric Reference Cal Sled Kit 8 8 3 External Calibration Procedures To calibrate the internal transducers or the barometric reference remotely use the same setup described in section 10 of this manual The only difference is that the interface with the transducer is through the so...

Page 114: ...tes while a Single Output A or B instrument has only one backplate Figure 8 8 shows a dual channel instrument with Digital I O on chan nel A backplate and Automatic CPS on channel B backplate Automatic CPS Backplate Digital I O Backplate Figure 8 9 Rear Panel with Automatic CPS and Digital I O Backplates 8 9 1 Digital I O The Digital I O capability is available to test various devices like a press...

Page 115: ...ants by an automated purge sequence within the CPC6050 user interface Figure 8 9 2 Automatic Contamination Prevention System i Notice The system should only be operated by trained personnel who are familiar with this manual and the operation of the instrument Warning Warning The pressure connections must be installed according to the following instructions observing the relevant regulations The in...

Page 116: ... can be mounted either on top of the accessory for convinient test stand setup or on the back of the accessory for connection with a pressure hose Figure 8 9 2 1 B The not connected port should be sealed by the plug provided to ensure no leakage The pressure connection to the Measure Control port of the CPC6050 is established by a pressure tube with 7 16 SAE adapters The Automatic CPS is powered b...

Page 117: ...fication Operating Conditions Maximum operating pressure 3 065 psig 211 bar gauge Maximum operating temperature 176 C 350 F Voltage Supply Power supply 12 VDC Power consumption 13 VA Pressure Connection To the M C port of CPC6050 1 port with 7 16 20 F SAE To the DUT 2 ports with Standard 7 16 20 F SAE Option 6 mm tube fitting 1 4 tube fitting 1 4 female NPT fittings 1 8 female NPT fittings or 1 8 ...

Page 118: ...r CPC6050 8 9 2 2 2Dimensions mm in 264 3mm 10 406in 38 1mm 1 500in 177 8mm 7 000in 3 2mm R 125in 6 4mm R 250in MENSOR AUTOMATIC CPS LABEL FFigure 8 9 2 2 2 A Front side view 139 7mm 5 500in 139 7mm 5 500in Figure 8 9 2 2 B Top view 8 9 2 3Automatic CPS Operation ...

Page 119: ...ystem Figure 8 9 2 3 B Figure 8 9 2 3 B Contamination Prevention System When in manual or auto mode the purge valve will be opened whenever switching to vent mode while at a positive pressure above atmosphere In manual mode the internal purge sequence can be run by the Purge button on the Home screen When in auto mode the purge sequence will be required to be run when switching to control mode aft...

Page 120: ...g or maintenance procedure is performed 8 10 Manual Contamination Prevention Accessories The contamination prevention accessories allow the user to operate the CPC6050 in contamination prone areas These accessories prevent contaminants like oil or dirt from entering into the instrument These filters when connected to the Measure Control Port at the rear of the instrument prevent any liquids to ent...

Page 121: ...ock valve Open the bleed valve and purge the system to atmospheric pressure Observe the sump to see if any liquid is purged Close the bleed valve Repeat steps 3 to 7 until no more liquid is observed coming out of the system With the block and the bleed valves securely closed vent the controller Figure 8 10 2 Contamination prevention accessories 8 11 Vacuum Regulator Vacuum Regulator accessory redu...

Page 122: ...ansducers in the corresponding channel are changed or removed to bidirectional transducers with greater than 10 psig full span or any gauge or absolute transducers Figure 8 11 A Vacuum Regulator installed on Exhaust Port Connection to the exhaust port of CPC6050 Connection to the vacuum pump Figure 8 11 B Vacuum Regulator ...

Page 123: ...ty roll bar frame The unit includes an operator control panel with gauges for supply pressure output reference pressure and an output vent valve The system requires shop air to drive the booster and a minimum of 300 psi to 3000 maximum inlet pressure clean dry air or Nitrogen Table 8 12 Specifications for Input Supply Pressure and Output Pressure Input Supply Pressure Minimum 300 psi Maximum 3000 ...

Page 124: ...st frequent services required We use this knowledge in our continuing effort to design better and more robust instruments Repair or replacement of the CPC6050 chassis modules and measurement transducers will be avail able up to 7 years after the production life cycle of the product pending external vender parts or equiv alent parts availability The production life cycle is defined as the time from...

Page 125: ...ck into position to engage the pneumatic passages with those in the manifold and tighten the thumb screw on the trans ducer module Then tighten the Philips screws to secure the door In replacing the transducer modules the order of position must be maintained according to the pressure limit of each module starting with the highest transducer on the left Primary transducer and the lower pressure tra...

Page 126: ...ut exclusively by Mensor authorized personnel or under Mensor supervision Servicing of electrical electronic or pneumatic equipment must be performed by qualified and authorized technical staff observing all relevant safety regulations 9 3 2 1Barometric Reference Removal To remove the optional Barometric reference first turn off the CPC6050 and loosen the Phillips head screws that secure the door ...

Page 127: ...ken to solve the problem of 2 above has no effect Unplug the unit from the power source wall sock et then remove the power cord from the instru ment The power cord input socket includes two internal fuses Check both fuses for continuity WARNING When needed use only 1 25 amp 250V SLO BLO 5x20 Fuse 4 Malfunction during operation Switch the system off Wait 5 seconds and switch the system on 5 Unstabl...

Page 128: ...www mensor com tel 1 512 396 4200 1 800 984 4200 fax 1 512 396 1820 email tech support mensor com WIKA Alexander Wiegand SE Co KG website www wika de www wika com tel 49 9372 132 0 fax 49 9372 132 406 email CTServiceTeam wika com Service Center China WIKA China website www wika cn contact Baggio Li tel 86 512 6878 8000 fax 86 512 6809 2321 email baggio li wika com 10 2 Environment For maximum accu...

Page 129: ... pressures A vacu um pump with the capacity to generate 600 mTorr absolute is recommended PRESS PRESSURE STANDARD VACUUM PRESSURE SHUT OFF VALVES VOLUME CONTROLLER VENT RS232 IEEE488 Ethernet or USB LINE REGULATOR PRESSURE SUPPLY SHUT OFF VALVES VENT METERING VALVE DIAPHRAGM TYPE VACUUM GAUGE VAC NOTE DISCONNECT WHEN VACUUM GAUGE RANGE IS EXCEEDED PRESSURE REFERENCE ATMOSPHERE SHUT OFF VALVE VOLUM...

Page 130: ...Cal Application A single point calibration usually a zero point calibration of each transducer installed can be accomplished in One Point Cal Application The transducer channel is chosen by pressing the Channel button at the top of this screen and then selecting from the list of installed transducers For gauge pressure simply expose the reference and the Measure Control port of the CPC6050 to atmo...

Page 131: ...r a gauge transducer this low point pressure can be achieved by opening the Measure Control and reference ports to atmospheric pressure 3 For an absolute transducer a suitable source of vacuum should be applied to the Measure Control port along with a high accuracy vacuum standard or a pressure calibration standard can be connected to the Measure Control port that can generate and measure a stable...

Page 132: ...er using that data An as found calibration can be performed by connecting a suitable pressure standard to the Measure Control port of the CPC6050 being calibrated and supplying between 3 and 11 pressure points across the complete range The pressure points may be entered using both upscale and downscale pressure points or only one direction The record of the pressures from the pressure standard and...

Page 133: ... error calculated from the data entered in the Linearization Matrix It is a good indication of the overall error of the transducer and will quickly reveal any gross data entry errors that have been made To revert back to the Lineariza tion Matrix press the Matrix Icon Relative Scale Figure 10 9 C Linearization Error Graph When satisfied that all values have been entered correctly press the adjust ...

Page 134: ...e that is at a different elevation from the CPC6050 transducer sensing that pressure The four parameters are used to calculate the pressure that is a result of the different elevations It should not be used when calibrating CPC6050 transducers The Head height should be set at zero before cali brating the transducers of the CPC6050 i Notice The Head Pressure should not be active when calibrating CP...

Page 135: ...11 1 Options The Options Application lists some of the software options that can be enabled on the CPC6050 Some of the software options require a hardware upgrade to the instrument and would be not active if enabled without the hardware Figure 11 1 A shows the Options screen Each option can be individually turned on off by clicking on the option line and selecting ON OFF from the drop down menu Th...

Page 136: ...ich drives the Automatic Contamination Prevention System Warning WARNING It is not recommended to activate other software options without consulting with WIKA Mensor Service Centers Section 10 1 11 2 Logging The Logging Application enables real time storage of current instrument output and state in a USB device plugged to the front panel of the CPC6050 The application also provides a means to log ...

Page 137: ...file on the USB device and start logging the remote commands The log function continues to run in the background while the instrument is operated locally or remotely To stop logging press the Stop line Figure 11 2 1 File Name Keypad 11 2 2 Pressure Logging The Logging App allows the storage of the time interval active pressure reading on the selected channel stable window and stable flag status to...

Page 138: ...uiding the user to up to three points on the screen The touchscreen calibration can be started by pressing on the right side of the screen Figure 11 3 A During the calibration the CPC6050 would prompt and guide the user to press different target points on the screen Figure 11 3 B After success fully completing the calibration the user is directed back to the Technical Assistance menu Figure 11 3 A...

Page 139: ... operation during its lifetime and the usage since last reset The usage screen also shows usage for the internal regulator pressure modules and the total control time The operating time since last reset and control time since reset can be reverted to 0 00 hours by pressing the corresponding Reset button on the screen Figure 11 4 Instrument Usage ...

Page 140: ...s bar 15 millibars mbar 16 millimeters of water 4 C mm H2O 4 C 17 centimeters of water 4 C cm H2O 4 C 18 meters of water 4 C m H2O 4 C 19 millimeters of mercury 0 C mm Hg 0 C 20 centimeters of mercury 0 C cm Hg 0 C 21 torr Torr 22 kilopascals kPa 23 pascals Pa 24 dyne per square centimeter dyn cm2 25 grams per square centimeter g cm2 26 kilograms per square centimeter kg cm2 27 meters of seawater ...

Page 141: ...O 60 F 2 308966 0 4330943 10 mTorr 51715 08 0 00001933672 11 inSW 0 C 3 5 salinity 26 92334 0 03714250 12 ftSW 0 C 3 5 salinity 2 243611 0 445710 13 ATM 0 06804596 14 69595 14 Bar 0 06894757 14 50377 15 mBar 68 94757 0 01450377 16 mmH2O 4 C 703 0890 0 001422295 17 cmH2O 4 C 70 30890 0 01422295 18 MH2O 4 C 0 7030890 1 422295 19 mmHg 0 C 51 71508 0 01933672 20 cmHg 0 C 5 171508 0 1933672 21 Torr 51 ...

Page 142: ...rr 1 0 1 000000000 11 inSW 0 C 3 5 salinity 0 0005206091 1920 827359 12 ftSW 0 C 3 5 salinity 0 00004338408 23049 92831 13 ATM 0 000001315786 760002 2299 14 Bar 0 000001333220 750063 6259 15 mBar 0 001333220 750 0636259 16 mmH2O 4 C 0 0135954 73 5540997 17 cmH2O 4 C 0 001359544 735 5409971 18 MH2O 4 C 0 00001359544 73554 09971 19 mmHg 0 C 0 001 1000 000000 20 cmHg 0 C 0 0001 10000 00000 21 Torr 0 ...

Page 143: ...8871E 04 2 986080E 03 10 mTorr 7 500636E 00 1 333220E 01 11 inSW 0 C 3 5 sal 3 904899E 03 2 560885E 02 12 ftSW 0 C 3 5 sal 3 254082E 04 3 073062E 03 13 ATM 9 869230E 06 1 013250E 05 14 Bar 1 00000E 05 1 00000E 05 15 mBar 1 00000E 02 1 00000E 02 16 mmH2O 4 C 1 019744E 01 9 806378E 00 17 cmH2O 4 C 1 019744E 02 9 806378E 01 18 MH2O 4 C 1 019744E 04 9 806378E 03 19 mmHg 0 C 7 500636E 03 1 333220E 02 2...

Page 144: ...ting Instructions CPC6050 Modular Pressure Controller CPC6050 36 MPa 1 00000E 06 1 00000E 06 37 mmH2O 20 C 1 021553E 01 9 789017E 00 38 cmH2O 20 C 1 021553E 02 9 789017E 01 39 MH2O 20 C 1 021553E 04 9 789017E 03 ...

Page 145: ...ive San Marcos Texas 78666 Tel 512 396 4200 Website www mensor com Fax 512 396 1820 Email sales mensor com WIKA Alexander Wiegand SE Co KG Alexander Wiegand Straße 30 D 63911 Klingenberg Germany Tel 49 93 72 132 5015 Website www wika de Fax 49 93 72 132 8767 Email CTsales wika de ...

Reviews: