12
Operating Instructions - CPG2500
Precision Pressure Indicator
CPG2500
3.2 Turning On
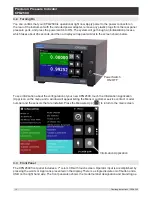
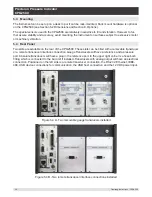
You can confirm that your CPG2500 is operational right now. Apply power to the power connector on
the rear of the instrument with the included power adapter, remove any plastic plugs from the rear panel
pressure ports, and press the power switch to ON. The system will go through an initialization process,
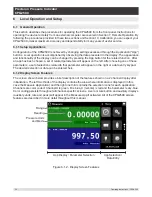
which takes about 45 seconds, and then a display will appear similar to the screen shown below.
Power Switch
ON/OFF
To see information about the configuration of your new CPG2500, touch the Information Application
(App) icon on the menu and a window will appear listing the Mensor customer service contact, model
number and the sensors that are installed. Press the Measure App [
] to return to the main screen.
Information Application
3.3 Front Panel
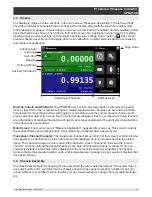
The CPG2500 front panel includes a 7” color LCD with touch screen. Operator input is accomplished by
pressing the words or App icons presented on the display. There is a single discrete on/off button and a
USB on the right hand side. The front panel also shows the model number designation and brand logos.
Summary of Contents for CPG2500
Page 14: ...14 Operating Instructions CPG2500 Precision Pressure Indicator CPG2500 NOTES ...
Page 47: ...Operating Instructions CPG2500 47 Precision Pressure Indicator CPG2500 NOTES ...
Page 61: ...Operating Instructions CPG2500 61 Precision Pressure Indicator CPG2500 NOTES ...
Page 67: ...Operating Instructions CPG2500 67 Precision Pressure Indicator CPG2500 NOTES ...
Page 69: ...Operating Instructions CPG2500 69 Precision Pressure Indicator CPG2500 NOTES ...
Page 85: ...Operating Instructions CPG2500 85 Precision Pressure Indicator CPG2500 NOTES ...


