background image

ENGLISH 

45 

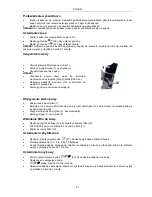
Brewing coffee with coffee powder 


Press  any  button  to  activate  the  display  light.  The  light  goes  off  after  60  seconds  if  none  of  the 
buttons are pressed. 


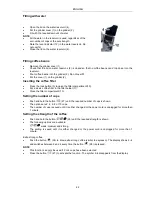
Fill the water reservoir with water. 


Put a coffee filter in the filter holder. Measure up the coffee in the filter with the supplied measuring 
cup (1 level measure per cup), no higher than 2 cm below the edge of the filter. 


Press the button 

 (26) to start the brewing. 


The status lamp 

 (24) goes on the brewing starts. 

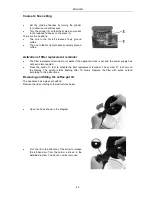
To stop the brewing 


Press  the  button 

  (26),  or  the  button 

  (19),  to  stop  the  brewing  and  switch  off  the 

appliance. The status lamp 

 (24) goes off and the appliance switches off. 

NOTE: 

The appliance switches off automatically after 2 hours. 

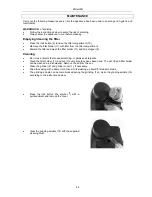
Brewing with the timer 


The clock must be set to brew with the timer. 


Press  any  button  to  activate  the  display  light.  The  light  goes  off  after  60  seconds  if  none  of  the 
buttons are pressed. 

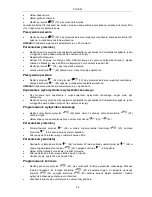
Programming the timer 


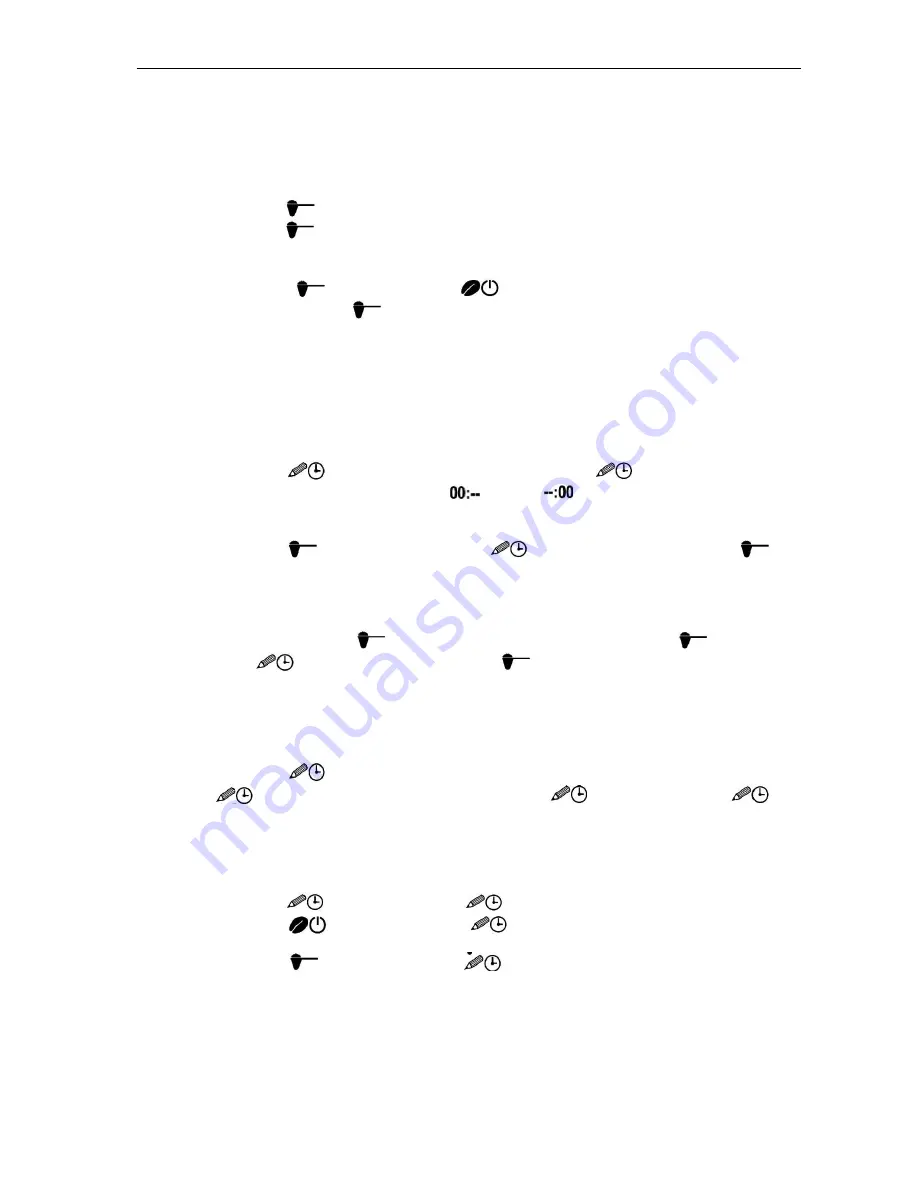
Press the button 

 (22) for about 3 seconds. The status lamp 

 (23) starts flashing. 


Set the required start time with the buttons 

 (30) and 

 (31). 

Brewing coffee with coffee powder 


Press the button 

 (26) while the status lamp 

 (23) is flashing. The status lamp 

 (24) 

stops flashing. 


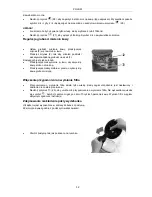
Fill the water reservoir with water and fill the filter with coffee powder. 

Brewing coffee with coffee beans 


Check that the status lamp 

 (24) is not on. If necessary, press the button 

 (26) while the 

status lamp 

 (23) is flashing. The status lamp 

 (24) goes off. 


Set the required number of cups, strength, and fine to coarse grinding. 


Fill the water reservoir with water and fill the grinder with coffee beans. 


Put a clean, empty filter in the filter holder. 

End programming 


Press the button 

 (22) again to activate the timer function. You can also wait until the status 

lamp 

 (23) stops flashing, and then press the button 

 (22). The status lamp 

 (23) 

is constant and the timer setting function is activated. 


The appliance switches on automatically when the set time is reached. 

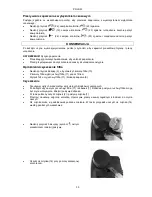
Stopping timed brewing 

Follow the instructions below to stop brewing with the timer. 


Press the button 

 (22). The status lamp 

 (23) goes off. 


Press the button 

 (19). The status lamp 

 (23) goes off and the appliance starts brewing 

coffee with coffee beans. 


Press the button 

 (26). The status lamp 

 (23) goes off and the appliance starts brewing 

coffee with coffee powder. 

Summary of Contents for 802-394

Page 1: ...trakter med kvern Instrukcja obsługi ekspresu do kawy z młynkiem User instructions for coffee maker with grinder 802 394 SV Bruksanvisning i original NO Bruksanvisning i original PL Instrukcja obsługi w oryginale EN Operating instructions in original 20 10 2014 Jula AB ...

Page 2: ... 11 Kaffebryggning med kaffebönor 11 Avbrytande av bryggning 11 Kaffebryggning med kaffepulver 12 Avbrytande av bryggning 12 Bryggning med timer 12 Programmering av timer 12 Kaffebryggning med kaffepulver 12 Kaffebryggning med kaffebönor 12 Slutprogrammering 12 Avbrytande av timerbryggning 12 UNDERHÅLL 13 Tömning rengöring av filter 13 Rengöring 13 Byte av filter med aktivt kol 14 Avkalkning 14 Fö...

Page 3: ...ZPIECZEŃSTWA 27 Zagrożenie elektryczne 27 Ryzyko poparzenia 27 DANE TECHNICZNE 28 OPIS 28 Akcesoria 29 Panel sterowania 29 OBSŁUGA 29 Przed pierwszym użyciem 29 Rozpakowywanie 29 Lokalizacja 30 Podłączenie elektryczne 30 Przed pierwszym użyciem 30 Podświetlenie wyświetlacza 31 Ustawianie czasu 31 Uzupełnianie wody 31 Wsypywanie ziaren kawy 31 Wkładanie filtra do kawy 31 Ustawianie liczby filiżanek...

Page 4: ...lling with water 42 Filling coffee beans 42 Inserting the coffee filter 42 Setting the number of cups 42 Setting the strength of the coffee 42 Coarse to fine setting 43 Activation of filter replacement reminder 43 Removing and fitting the coffee pot lid 43 Coffee brewing 44 Preparation 44 Brewing coffee with coffee beans 44 To stop the brewing 44 Brewing coffee with coffee powder 45 To stop the br...

Page 5: ...mna aldrig apparaten tillslagen utan uppsikt Dra inte i sladden för att dra ut stickproppen ur nätuttaget Apparaten är inte avsedd att användas av personer barn eller vuxna med någon typ av funktionshinder eller av personer som inte har tillräcklig erfarenhet eller kunskap för att använda den såvida de inte har fått anvisningar gällande användande av apparaten av någon med ansvar för deras säkerhe...

Page 6: ...ck till vattenbehållare 5 Spärrknapp 6 Manöverpanel 7 Kaffekanna med lock 8 Värmeplatta 9 Droppstopp 10 Filterfack 11 Filterhållare 12 Nivåindikering 13 Vattenbehållare 14 Kvarnaxel 15 Filterfäste med lock över filterutrymme 16 Filter med aktivt kol Tillbehör Rengöringsborste Mått ...

Page 7: ...lutning Uppackning Packa upp apparaten alla tillbehör samt bruksanvisningen ur lådan Avlägsna allt förpackningsmaterial före första användning Avlägsna skyddsfilmen från apparaten och alla tillbehör och avlägsna informationskortet från kvarnen OBS Avlägsna inte typskylten eller eventuella varningsmärken från apparaten Märkena på kvarnen och på vattenbehållarens lock kan avlägsnas men anvisningarna...

Page 8: ... för att aktivera kvarnen Vänta tills allt vatten runnit igenom och koppsymbolen 20 börjar blinka Häll ut kaffet ur kannan 7 Diska kannan 7 med varmt vatten och diskmedel Vid de första användningstillfällena kan vissa material i apparaten avge lukt Denna lukt försvinner inom kort VARNING Skållningsrisk Varm ånga kan strömma ut när apparaten är i drift Följ anvisningarna nedan för att undvika skåll...

Page 9: ...r storlek 4 i fillterhållaren 11 Stäng filterfacket 10 Inställning av antal koppar Håll knappen 27 intryckt tills önskat antal koppar visas Möjliga inställningar är 2 4 6 8 eller 10 koppar Antalet koppar lagras tills det ändras eller tills sladden dras ut under mer än 1 minut Inställning av kaffets styrka Håll knappen 25 intryckt tills önskad styrka visas Följande alternativ är tillgängliga svagt ...

Page 10: ...bara om apparatens klocka är ställd och strömförsörjningen till apparaten inte bryts Tryck på knappen 29 för att aktivera påminnelse om filterbyte Symbolen visas på displayen Symbolen börjar blinka efter 70 bryggningar Byt filtret med aktivt kol enligt anvisningarna Demontering och montering av kaffekannans lock Apparaten har en glaskanna med lock Demontera locket enligt anvisningarna nedan Öppna ...

Page 11: ...trycker droppstoppet 9 uppåt så att kaffet kan rinna genom filtret ned i kannan Droppstoppet 9 gör att inget kaffe rinner från filtret när kannan 7 avlägsnas Avlägsna inte kannan 7 under mer än 30 sekunder under pågående bryggning annars svämmar filtret över När bryggningen är avslutad börjar koppsymbolen 20 blinka längst upp till vänster på displayen Kaffebryggning med kaffebönor Tryck på någon k...

Page 12: ... av knapparna 30 och 31 Kaffebryggning med kaffepulver Tryck också på knappen 26 medan indikeringslampan 23 blinkar Indikeringslampan 24 lyser med fast sken Fyll vattenbehållaren med vatten och filtret med kaffepulver Kaffebryggning med kaffebönor Kontrollera att indikeringslampan 24 inte lyser Tryck om så behövs på knappen 26 medan indikeringslampan 23 blinkar Indikeringslampan 24 slocknar Ställ ...

Page 13: ...terhållaren 11 och droppstoppet 9 Rengöring Använd inte repande föremål eller slipande rengöringsmedel Rengör filterhållaren 11 och kannan 7 efter varje användning Kanna lock och filterhållare kan diskas i diskmaskin Ta av locket från kannan Rengör kvarnen 2 och kvarnlocket 1 om så behövs Torka av höljet med en fuktad trasa Använd milt diskmedel på envisa fläckar Kvarnaxeln kan blockeras under mal...

Page 14: ...rbyte igen OBS Påminnelse och filterbyte är bara aktiv om symbolen inte blinkar Avkalkning Avkalka apparaten regelbundet för bästa funktion och smak Avkalka minst var sjätte vecka beroende på vattnets hårdhet Fyll vattenbehållaren med vatten upp till markeringen för 10 koppar och tillsätt citronsyra eller ättika så att lösningen innehåller cirka 5 syra Följ tillverkarens anvisningar om du använder...

Page 15: ...n Kaffet rinner mycket långsamt ned i kannan Droppstoppsventilen är igensatt Rensa droppstoppsventilen Kalkavlagringar i apparaten Avkalka apparaten Kaffe rinner ut på värmeplattan Kannan är felplacerad Placera kannan rakt under mitten av filterfacket Kaffe rinner inte ned i kannan Kannans lock är felmonterat Montera locket korrekt Kaffet är för svagt För mycket vatten i vattenbehållaren Använd lä...

Page 16: ...t er i gang Ikke trekk i ledningen når du skal trekke støpselet ut av stikkontakten Apparatet er ikke beregnet på bruk av personer barn eller voksne med funksjonshemminger eller av personer uten tilstrekkelig erfaring med eller kunnskap i å bruke det med mindre de har fått anvisninger om bruk av apparatet av noen som er ansvarlig for deres sikkerhet Reparasjoner skal kun utføres av kvalifisert per...

Page 17: ... til vannbeholder 5 Sperreknapp 6 Betjeningspanel 7 Kaffekanne med lokk 8 Varmeplate 9 Dryppstopp 10 Filterbeholder 11 Filterholder 12 Nivåindikator 13 Vannbeholder 14 Kvernaksel 15 Filterfeste med lokk over filterrom 16 Filter med aktivt kull Tilbehør Rengjøringsbørste Måleskje ...

Page 18: ...skortet fra kvernen OBS Ikke fjern typeskiltet eller eventuelle varselmerker fra apparatet Merkene på kvernen og lokket på vannbeholderen kan fjernes men anvisningene på dem må alltid følges Plassering Stedet der apparatet skal stå må oppfylle følgende krav Plasser apparatet på et jevnt og tørt underlag som tåler vann og varme Enkelte underlag kan skade gummiføttene på apparatet Sett i så fall app...

Page 19: ...aratet kan avgi lukt de første gangene apparatet brukes Denne lukten forsvinner fort ADVARSEL Fare for skålding Varm damp kan strømme ut når apparatet er i bruk Følg anvisningene nedenfor for å unngå skålding Hold alle deler av kroppen unna damp som strømmer ut Ikke åpne filterbeholderen mens apparatet er i gang VIKTIG Fare for skade på eiendom Følg anvisningene nedenfor for å unngå eiendomsskade ...

Page 20: ... kaffefilter nr 4 i filterholderen 11 Lukk filterbeholderen 10 Stille inn antall kopper Hold knappen 27 inne til ønsket antall kopper vises Mulige innstillinger er 2 4 6 8 eller 10 kopper Antallet kopper lagres til det endres eller til ledningen er trukket ut i mer enn 1 minutt Stille inn kaffestyrken Hold knappen 25 inne til ønsket styrke vises Følgende alternativer er tilgjengelige svak medium o...

Page 21: ...okken på apparatet er stilt og strømtilkoblingen ikke blir brutt Trykk på knappen 29 for å aktivere påminnelse om filterbytte Symbolet vises på displayet Symbolet begynner å blinke etter 70 traktinger Bytt filteret med aktivt kull i henhold til anvisningene Montere og demontere lokket på kaffekannen Apparatet har en glasskanne med lokk Demonter lokket i henhold til anvisningene nedenfor Åpne lokke...

Page 22: ...t på kannen trykker dryppstoppen 9 oppover slik at kaffen kan renne gjennom filteret og ned i kannen Dryppstoppen 9 sørger for at det ikke renner noe kaffe fra filteret når kannen 7 fjernes Ikke fjern kannen 7 i mer enn 30 sekunder mens trakting pågår ellers renner det over i filteret Når traktingen er ferdig begynner koppsymbolet 20 å blinke øverst til venstre på displayet Trakte kaffe med kaffeb...

Page 23: ...tarttid ved hjelp av knappene 30 og 31 Trakte kaffe med kaffepulver Trykk også på 26 mens indikatorlampen 23 blinker Indikatorlampen 24 lyser konstant Fyll vannbeholderen med vann og filteret med kaffepulver Trakte kaffe med kaffebønner Kontroller at indikatorlampen 24 ikke lyser Trykk om nødvendig på knappen 26 mens indikatorlampen 23 blinker Indikatorlampen 24 slokkes Velg antall kopper styrke o...

Page 24: ...stoppen 9 Rengjøring Ikke bruk gjenstander som kan lage riper eller slipende rengjøringsmidler Rengjør filterholderen 11 og kannen 7 etter hver bruk Kannen lokket og filterholderen kan vaskes i oppvaskmaskin Ta lokket av kannen Rengjør kvernen 2 og lokket på kvernen 1 ved behov Tørk av dekselet med en fuktig klut Bruk mildt oppvaskmiddel på enkeltflekker Kvernakselen kan bli blokkert under maling ...

Page 25: ...filterbytte er bare aktiv hvis symbolet ikke blinker Avkalking Avkalk kaffetrakteren regelmessig for å oppnå best mulig funksjon og smak Avkalk minst hver sjette uke avhengig av hvor hardt vannet er Fyll vannbeholderen med vann opp til markeringen for 10 kopper og tilsett sitronsaft eller eddik slik at løsningen inneholder cirka 5 syre Følg produsentens anvisninger hvis du bruker et spesielt avkal...

Page 26: ...ren Kaffen renner svært langsomt ned i kannen Dryppstoppventilen er tiltettet Rengjør dryppstoppventilen Kalkavleiringer i kaffetrakteren Avkalk kaffetrakteren Det renner kaffe ut på varmeplaten Kannen er plassert feil Plasser kannen rett under midten på filterbeholderen Kaffen renner ikke ned i kannen Lokket på kannen er feilmontert Monter lokket riktig Kaffen er for svak For mye vann i vannbehol...

Page 27: ...nie pod kątem ewentualnych uszkodzeń Nie używaj urządzenia jeśli jest uszkodzone Nie pozwalaj używać urządzenia dzieciom bez nadzoru Nigdy nie pozostawiaj włączonego urządzenia bez nadzoru Nigdy nie ciągnij za kabel aby wyciągnąć wtyczkę z gniazdka Urządzenie nie jest przeznaczone do stosowania przez osoby dzieci lub dorosłych z jakąkolwiek formą dysfunkcji lub osoby nieposiadające wystarczającego...

Page 28: ...banka 1 2 l Wymiary wys x szer x gł 393 x 243 x 320 mm Masa w przybliżeniu 4 7 kg OPIS 1 Pokrywa młynka 2 Młynek 3 Regulacja grubości mielenia 4 Pokrywa zbiornika na wodę 5 Przycisk blokady 6 Panel sterowania 7 Dzbanek do kawy z pokrywką 8 Płyta grzewcza 9 Blokada kapania 10 Komora filtra 11 Uchwyt filtra 12 Wskaźnik poziomu wody 13 Zbiornik wody 14 Oś młynka 15 Mocowanie filtra z pokrywą otworu n...

Page 29: ...d pierwszym użyciem Przestrzegaj poniższych instrukcji aby uniknąć ryzyka obrażeń ciała i lub uszkodzenia mienia Upewnij się że materiały użyte do opakowania urządzenia są niedostępne dla dzieci ryzyko uduszenia Przestrzegaj zaleceń dotyczących rozmieszczenia podłączeń elektrycznych Rozpakowywanie Wyjmij z pudełka urządzenie wszystkie akcesoria oraz instrukcję obsługi Przed pierwszym użyciem zdejm...

Page 30: ...e uziemionego gniazdka sieciowego Przed pierwszym użyciem UWAGA Naciśnij dowolny przycisk aby uaktywnić podświetlenie wyświetlacza Przetrzyj urządzenie i akcesoria lekko wilgotną ściereczką Umyj dzbanek 7 ciepłą wodą i płynem do mycia naczyń Włącz przypominanie o wymianie filtra Napełnij zbiornik wody 13 czystą wodą do oznaczenia 10 Wsyp kawę Opłucz uchwyt filtra 11 czystą wodą i włóż do urządzeni...

Page 31: ...serwuj wskaźnik poziomu 12 w zbiorniku na wodę Nie przepełniaj Zamknij pokrywę zbiornika na wodę 4 Wsypywanie ziaren kawy Zdejmij pokrywę młynka 1 Sprawdź czy pokrywa zbiornika na wodę 4 jest zamknięta i czy ziarna kawy nie przedostaną się do zbiornika na wodę Wsyp ziarna kawy do młynka 2 Nie przepełniaj Załóż pokrywę 1 na młynek 2 Wkładanie filtra do kawy Naciśnij przycisk blokady 5 aby otworzyć ...

Page 32: ...kali 3 Dostępnych jest pięć położeń Przekręcając maksymalnie w lewo uzyskuje się kawę drobno zmieloną Przekręcając maksymalnie w prawo uzyskuje się kawę grubo zmieloną Włączenie przypomnienia o wymianie filtra Przypomnienie o wymianie filtra działa tylko wtedy kiedy zegar urządzenia jest nastawiony i zasilanie nie zostało przerwane Naciśnij przycisk 29 aby uruchomić przypomnienie o wymianie filtra...

Page 33: ...ady kamienia pogarszają aromat Płyta grzewcza może być wykorzystywana do podtrzymywania temperatury kawy ale zalecamy przelanie kawy do termosu i wyłączenie urządzenia Przygotowania W czasie pracy urządzenia dzbanek 7 z prawidłowo zamontowaną pokrywą powinien stać pod komorą filtra 10 Pokrywa dzbanka unosi blokadę kapania 9 tak aby kawa mogła przepływać przez filtr do dzbanka Blokada kapania 9 spr...

Page 34: ...z wykorzystaniem wyłącznika czasowego Aby możliwe było zaparzanie z wykorzystaniem wyłącznika czasowego zegar musi być nastawiony Naciśnij dowolny przycisk aby uaktywnić podświetlenie wyświetlacza Podświetlenie zgaśnie jeżeli w ciągu 60 sekund żaden przycisk nie zostanie wciśnięty Programowanie wyłącznika czasowego Naciśnij i przytrzymaj przycisk 22 przez około 3 sekundy Lampka kontrolna 23 zaczni...

Page 35: ...a odczekaj aż urządzenie ostygnie Opróżnianie czyszczenie filtra Naciśnij przycisk blokady 5 aby otworzyć komorę filtra 10 Z komory filtra wyjmij uchwyt filtra 11 wraz z filtrem Wyrzuć filtr umyj uchwyt filtra 11 i blokadę kapania 9 Czyszczenie Nie używaj ostrych przedmiotów ani ściernych środków czyszczących Po każdym użyciu wyczyść uchwyt filtra 11 i dzbanek 7 Dzbanek pokrywa i uchwyt filtra mog...

Page 36: ... Usuwanie kamienia Regularnie usuwaj kamień z urządzenia aby uzyskać jak najlepsze działanie ekspresu i doskonały smak kawy Usuwaj kamień co najmniej raz na sześć tygodni w zależności od twardości wody Napełnij zbiornik wodą do poziomu oznaczającego 10 filiżanek i dodaj kwasek cytrynowy lub ocet tak aby roztwór zwierał co najmniej 5 kwasu Postępuj zgodnie ze wskazówkami producenta podczas stosowan...

Page 37: ...o dzbanka bardzo powoli Zatkany zawór blokady kapania Oczyść zawór blokady kapania Osady kamienia w urządzeniu Usuń kamień z urządzenia Kawa wycieka na płytę grzewczą Dzbanek jest nieprawidłowo ustawiony Ustaw dzbanek bezpośrednio pod środkiem komory filtra Kawa nie spływa do dzbanka Pokrywa dzbanka jest nieprawidłowo zamontowana Zamontuj pokrywę prawidłowo Kawa jest zbyt słaba Za dużo wody w zbio...

Page 38: ... the appliance if it is damaged Do not allow children to use the appliance without supervision Never leave the appliance unattended when switched on Do not pull the power cord to unplug the plug from the mains supply The appliance is not intended to be used by persons children or adults with any form of functional disorders or by persons who do not have sufficient experience or knowledge on how to...

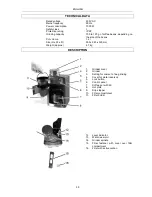
Page 39: ...me 1 2 l Size H x W x D 393 x 243 x 320 mm Weight approx 4 7 kg DESCRIPTION 1 Grinder cover 2 Grinder 3 Setting for coarse to fine grinding 4 Cover for water reservoir 5 Lock button 6 Control panel 7 Coffee pot with lid 8 Hot plate 9 Drip stopper 10 Filter compartment 11 Filter holder 12 Level indicator 13 Water reservoir 14 Grinder spindle 15 Filter fastener with cover over filter compartment 16 ...

Page 40: ...ructions from the box Remove all the packaging materials before using for the first time Remove the protective film from the appliance and all the accessories and remove the information card from the grinder NOTE Do not remove the type plate or any warning labels from the appliance The labels on the grinder and on the cover for the water reservoir can be removed but always follow the instructions ...

Page 41: ...ber of cups 10 Press the button 19 to activate the grinder Wait until all the water has run through and the cup symbol 20 starts flashing Pour the coffee out of the pot 7 Wash the pot 7 in hot water and washing up liquid The first few times the appliance is used it may emit a slight smell This smell will soon disappear WARNING Risk of scalding Hot steam can flow out from the appliance when it is i...

Page 42: ...ee filter in the filter holder 11 Close the filter compartment 10 Setting the number of cups Push and hold the button 27 until the required number of cups is shown The options are 2 4 6 8 or 10 cups The number of cups is saved until it is either changed or the power cord is unplugged for more than 1 minute Setting the strength of the coffee Push and hold the button 25 until the required strength i...

Page 43: ...r only works if the appliance clock is set and the power supply has not been disconnected Press the button 29 to activate the filter replacement reminder The symbol is shown on the display The symbol starts flashing after 70 brews Replace the filter with active carbon according to the instructions Removing and fitting the coffee pot lid The appliance has a glass pot with lid Remove the lid accordi...

Page 44: ...p the drip stopper 9 so that the coffee can run through the filter down into the pot The drip stopper 9 prevents coffee running from the filter when the pot 7 is removed Do not remove the pot 7 for more than 30 seconds when brewing otherwise the filter will flood over When the brewing is finished the cup symbol 20 on the top left hand side will start flashing in the display Brewing coffee with cof...

Page 45: ...s 30 and 31 Brewing coffee with coffee powder Press the button 26 while the status lamp 23 is flashing The status lamp 24 stops flashing Fill the water reservoir with water and fill the filter with coffee powder Brewing coffee with coffee beans Check that the status lamp 24 is not on If necessary press the button 26 while the status lamp 23 is flashing The status lamp 24 goes off Set the required ...

Page 46: ...r holder 11 and drip stopper 9 Cleaning Do not use objects that cause scratching or abrasive detergents Clean the filter holder 11 and pot 7 every time they have been used The pot lid and filter holder can be washed in a dishwasher Remove the lid from the pot Clean the grinder 2 and grinder cover 1 if necessary Wipe the casing with a damp cloth Use a mild washing up liquid for stubborn stains The ...

Page 47: ...eplacement reminder is only active if the symbol is not flashing Descaling Descale the appliance regularly for best functionality and taste Descale at least once every six weeks depending on the hardness of the water Fill the water reservoir with water up to the marking for 10 cups and add citric acid or vinegar so that the solution contains about 5 acid Follow the instructions of the manufacturer...

Page 48: ...ill The coffee is running very slowly down into the pot The drip stopper valve is clogged Clear the drip stopper valve Scale in the appliance Descale the appliance Coffee is running out onto the hot plate The pot is incorrectly positioned Put the pot directly under the middle of the filter compartment Coffee does not run down into the pot The pot lid is not properly fitted Fit the lid correctly Th...

Reviews: