background image

SAFETY 

45V4 • 55V4 • 60V4 ENG 

1-18 

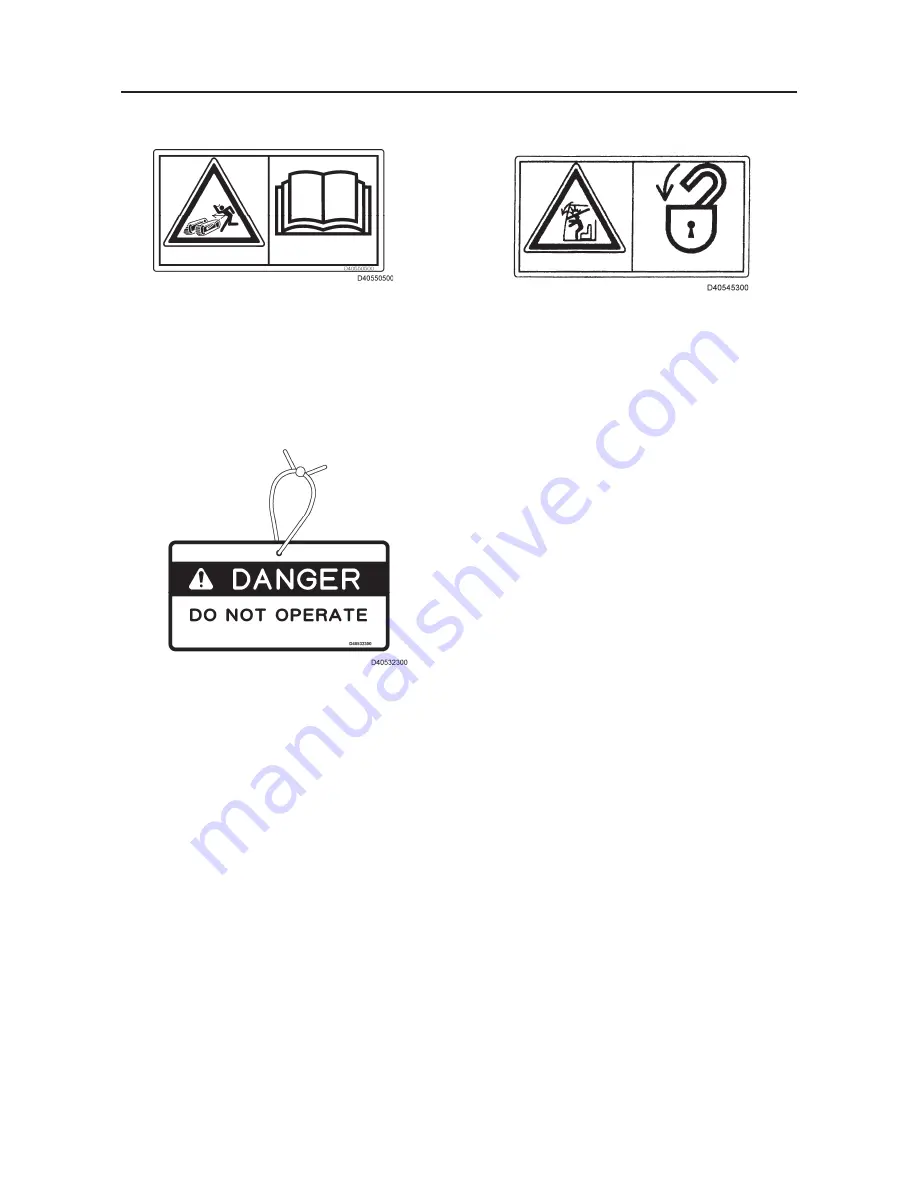
12.  Warning for track adjuster 

(D405 505 00) 


Sign indicates a hazard of flying plug from 
track adjuster that could cause injury. 
Read manual before adjusting track for safe 
and proper handling. 

13.  Hazard from falling window 

(D405 510 00) 


Sign indicates a hazard from falling 
window. 
After raising window, be sure to lock it in 
place with lock pins. 


14.  Do not operate 

(D405 323 00) 


Operation prohibition during inspection and 
servicing. 
Hang this sign on the control lever during 
inspection and servicing not to allow any 
other worker to start the engine or operate 
the machine. 


Summary of Contents for Menzi IHI 45v4

Page 1: ...Menzi Muck AG Telefon 41 0 71 727 12 12 9451 Kriessern Switzerland Fax 41 0 71 727 12 13 www menzimuck com info menzimuck com Operator s manual Menzi IHI 45v4 Menzi IHI 55v4 Menzi IHI 60v4...

Page 2: ...45V4 55V4 60V4 WG010001 WY010001 WZ010001 45V4 55V4 60V4 0988405EN...

Page 3: ...ting Engine with Booster Cables 2 20 Check after Starting Engine 2 21 Warming Up Engine 2 21 STOPPING ENGINE 2 22 EMERGENCY ACTIONS IF ENGINE STOPS 2 23 RUNNING IN NEW MACHINE 2 24 LEVER OPERATIONS 2...

Page 4: ...ment 3 20 ENGINE OIL 3 21 Check the Engine Oil Level and Refill 3 21 Replace the Engine Oil and Engine Oil Filter 3 22 FUEL SYSTEM 3 23 Check Fuel Quantity and Refilling 3 23 Check and Clean Water Sep...

Page 5: ...45V4 55V4 60V4 ENG BUCKET 4 2 DIMENSIONS 4 4 WORKING RANGE 4 7 WORKING RANGE FOR OFFSET DIGGING 4 10 RATED OBJECT HANDLING CAPACITIES TABLE 4 12...

Page 6: ...45V4 55V4 60V4 ENG...

Page 7: ...using the machine Contact our dealer immediately if you lose or damage this manual See the Operation Manual of the Engine for the engine If you hand over this machine to any third party this manual s...

Page 8: ...FOREWORD 45V4 55V4 60V4 ENG 2 MACHINE NUMBER The machine No and engine No are marked at the positions shown below...

Page 9: ...ACHINE DIRECTION The front rear right and left directions of the machine are determined based on the orientation when the operator is seated on the operator s seat with the blade frontward as shown be...

Page 10: ...FOREWORD 45V4 55V4 60V4 ENG 4 This page is intentionally left blank...

Page 11: ...re not observed Such accidents may be avoided by paying careful attention in advance This manual describes the basic safety instructions to be observed in daily operation inspection and maintenance of...

Page 12: ...45V4 55V4 60V4 ENG...

Page 13: ...h or serious injury This safety alert symbol and signal word indicates a potentially hazardous situation which if not avoided could result in death or serious injury This safety alert symbol and signa...

Page 14: ...the work only after discussing with the person in charge at the site Wear proper working clothes For the sake of safety during working wear clothes that match your body Always wear required protective...

Page 15: ...ation position and usage of the fire extinguisher Install the ROPS canopy We recommend that the ROPS canopy should be installed to avoid accidents which may result in injury if a machine with a canopy...

Page 16: ...s down you may be thrown out of the operator s seat or pressed under the machine Such an accident may result in serious injury or death Sit on the operator s seat and fasten the seat belt all the time...

Page 17: ...or personnel Do not swing above the truck cab If you swing the bucket above the truck cab the driver may be injured by dropped soil and sand or the bucket contacting the truck cab Do not swing the buc...

Page 18: ...give a warning to the workers around the machine Do not put on the step when you get off the shovel Jump down onto the ground Do not operate the engine in an enclosed area without adequate ventilatio...

Page 19: ...y be broken or injury or death may result Be sure to use a bucket or attachment that meets the specifications Never lean out of the window Do not lean out of the window enter between the attachment an...

Page 20: ...on it may cause the machine to slide and fall over To prevent such accidents only travel up and down the slope at a right angle Do not steer on the slope Avoid changing the direction on a slope which...

Page 21: ...al from the ramp board and truck deck before loading x Never swing the machine on a ramp board Otherwise it may fall down Never load or unload the machine without ramp board Never load or unload the m...

Page 22: ...ve goggles and protective cap before starting work Put the maintenance signboard Put the Maintenance signboard on an easy to see position of the operation lever in order to prevent any other person fr...

Page 23: ...c Never watch the check valve when adjusting crawler tracks Never watch the check valve when servicing the crawler tracks Position yourself not to be splashed with grease Grease used to adjust the cra...

Page 24: ...connecting a hydraulic line Precautions for high pressure oil It is very dangerous if the high pressure oil enters your skin or eyes If oil enters your skin immediately go to the doctor and get medica...

Page 25: ...SAFETY 45V4 55V4 60V4 ENG 1 13 This page is intentionally left blank...

Page 26: ...our machine Following is a listing of Safety Decals and locations Clean or replace these if you cannot read the words Check the part number for the safety sign against this manual or the actual object...

Page 27: ...4 ENG 1 15 Operator s cab inside right Side view of hydraulic oil tank Cabin specification Operator s cab inside left View C Detail of counterweight section Detail of operator s seat 14 Put in storage...

Page 28: ...ing crushed or run over by unexpected moving of stopped machine Lower working device to ground move safety lever to lock position and take engine key with you before leaving machine 4 Electric power l...

Page 29: ...icates a crush hazard by rotation of upper structure of the machine Keep away from swinging area of machine 9 Keep away from machine D405 511 00 Sign indicates a hazard of being hit by the working dev...

Page 30: ...fe and proper handling 13 Hazard from falling window D405 510 00 Sign indicates a hazard from falling window After raising window be sure to lock it in place with lock pins 14 Do not operate D405 323...

Page 31: ...55V4 60V4 ENG OPERATION This section describes the proper operation procedures of this machine Always look to the safety and observe the given operation instructions and cautions to carry out works sa...

Page 32: ...45V4 55V4 60V4 ENG...

Page 33: ...ator and oil cooler 25 Lower roller 4 Bucket cylinder 15 Canopy 26 Track adjusting device 5 Arm 16 Air cleaner 27 Swing bearing 6 Arm cylinder 17 Engine 28 Front idler 7 Boom 18 Muffler 29 Blade cylin...

Page 34: ...OPERATION 45V4 55V4 60V4 ENG 2 2 CONTROLS AND INSTRUMENTS No Name No Name 1 Right control box 4 Boom swing pedal 2 Left control box 5 Operator s seat 3 Travel lever 6 No 1 AUX pedal Option...

Page 35: ...l speed select switch 12 No 1 AUX proportional lever E Grip 5 Throttle dial 13 No 1 AUX bottum E Grip 6 Engine key switch 14 No 1 AUX flow limit switch E Grip 7 Power outlet 15 No 1 AUX hold switch E...

Page 36: ...e 17 Hour meter x If some trouble occurs in the machine the corresponding warning indicator turns on to indicate the trouble If a warning indicator turns on during work stop the engine immediately and...

Page 37: ...ricating oil pressure lowers while the engine is running Stop the engine and check the lubrication system and lubricating oil quantity if this indicator turns on while the engine is running Water temp...

Page 38: ...ring operation x After starting the engine carry out warming up operation of the engine until the needle points in the horizontal direction x Idle the engine and wait until the temperature lowers to t...

Page 39: ...Blade lever Use this lever to raise and lower the blade x Raising the blade Pull the lever backward x Lowering the blade Push the lever forward 4 Travel speed select switch Use this switch to select...

Page 40: ...o this position to start the engine Release the fingers from the key immediately after the engine starts The key returns to the ON position automatically 7 Power outlet This is a power socket for stan...

Page 41: ...ion in works that may cause dangerous accidents if the operation speed changes suddenly such as loading or unloading of the machine turning etc 12 No 1 AUX proportional lever E Grip Sliding to left Pr...

Page 42: ...he lever diagonally to operate the arm and swing simultaneously 2 Control lock lever Use this lever to lock all operations The control lock lever moves together with the control box x Lock Pull up the...

Page 43: ...d movement means forward movement with the blade in the front position If the blade is at the rear position the traveling directions are contrary to the lever operations x Check if the blade is in the...

Page 44: ...g the operator s seat Seat belt Hold the grip 1 insert the tongue plate 2 into the buckle 3 to the end and make sure that it is locked x Fasten the seat belt during operating x Be sure to check the be...

Page 45: ...pening 1 Release the locking device by pressing down the left and right locking device release levers 2 2 Pull and push up the front window by holding the right and left handles 3 and move the window...

Page 46: ...the bottom window while the locking device is still in the released state and release the locking lever when it touches the locking device of the front window 5 and be sure to put that lever back in t...

Page 47: ...e wiper switch when the cabin front window upper is stored on the ceiling Window washer switch Press the mark side further Washer liquid spouts out of the nozzle while the mark side is kept depressed...

Page 48: ...in 1 Air conditioner switch Pressing the switch starts the air conditioner The indicator blinks when this switch is ON 2 Fan speed controlling knob This knob is for switching ON or OFF the fan and for...

Page 49: ...right side of the operator s seat inside the cabin Operate this for heating inside the cabin LOW or HIGH Starts the fan and blows warm air into the cabin The air flow rate of the fan can be selected...

Page 50: ...tral position 4 Insert the key into the engine key switch Turn it to the ON run position and make sure of the following x The engine oil pressure warning indicator 1 and battery charge warning indicat...

Page 51: ...or more If the engine fails to start return the key to the OFF position wait for 30 seconds and try to start the engine again Starting in Cold Seasons Preheat the engine in cold seasons to make it eas...

Page 52: ...he normal machine 3 Connect the clip of the booster cable black to the terminal of the normal machine Connect the other clip to the upper frame of the machine in trouble Starting engine 1 Make sure th...

Page 53: ...ts 2 Lift the bucket from the ground and repeat cycles of moving the bucket lever to the digging or dumping position for 10 to 15 seconds and keeping it at the neutral position for about 10 seconds fo...

Page 54: ...bottom horizontal 3 Lower the blade onto the ground 4 Set the control lock lever to the locked position x Stopping engine 1 Idle the engine for five minutes or so to lower the engine temperature 2 Set...

Page 55: ...two minutes or so and restart the motor then x If the engine does not rotate at all 1 Open the cover 1 2 Loosen the lock nut 3 of the overload relief valve 2 for lifting the boom above the control va...

Page 56: ...ficiently 2 Do not run the machine with heavy loads or at high speed Run the machine at about 80 of the maximum engine revolution 3 Do not apply the full load to the machine The adequate load is 80 or...

Page 57: ...out Arm in Arm out Boom lowering 3 Bucket digging Bucket digging Left swing Left swing Bucket digging Left swing 4 Bucket dumping Bucket dumping Right swing Right swing Bucket dumping Right swing 5 Ar...

Page 58: ...e The corresponding operation mode plate shown below is stuck on the right of the operator s seat Operation mode Operation mode plate Pattern A D40662200 Pattern B D40662300 Pattern C D40662400 Patter...

Page 59: ...is inside the front left cover 2 Loosen the wing bolt that fixes the selector valve lever Set the lever to the intended position 3 Fix the selector valve lever with the wing bolt after changing the op...

Page 60: ...ctor valve is inside the front left cover 2 Remove the bolt that fixes the selector valve lever Set the lever to the intended position 3 Fix the selector valve lever with the bolt after changing the o...

Page 61: ...r valve is inside the front left cover 2 Remove the bolt that fixes the selector valve lever Set the lever to the intended position 3 Fix the selector valve lever with the bolt after changing the oper...

Page 62: ...swinging the boom Step on the right or left side of the boom swing pedal to swing the boom When boom swing is not carried out put the pedal cover on the pedal and lock it to prevent an improper operat...

Page 63: ...right to swing to the right Turn the lever to the left to swing to the left Return the lever to the neutral position to stop swinging Do not let any persons enter the swinging operation range Check th...

Page 64: ...height that allow smooth traveling without hitting them 4 Operate the right and left travel levers as shown below x Forward Push both travel levers forward to move the machine forward The machine alw...

Page 65: ...avel lever 1 to turn the machine forward Pull it back to turn the machine backward 2 Pivot turn to the right Use the left travel lever 2 in the same way Spin turning when blade is in front of machine...

Page 66: ...machine is 30 58 2 Travel up or down a slope at the low speed 3 Travel up a 15 or more slope in the posture shown on the right 4 Reduce the engine speed and operate the travel levers slowly when trav...

Page 67: ...nk and bucket link Improve the digging work efficiency making use of these angles properly In digging pull the arm to dig with the bucket Raise and lower the boom to adjust the depth Ditching Place th...

Page 68: ...cylinder stroke end At the stroke end of the cylinder the bucket moves faster Thus operate the bucket slowly with care not to allow soil and sand to drop When the cylinder is moved to the stroke end...

Page 69: ...te in digging work If a single side of the blade contacts the ground the blade may be damaged Pay attention to the blade when digging deep ditches The cylinder may hit against the blade Thus the boom...

Page 70: ...the river Do not go into water deeper than the allowable water depth The machine may sink little by little if the ground is soft Pay great attention to the footing in work If the bucket is dipped in...

Page 71: ...to sustain tension iron core to support it and covering rubber to them If a crack reaches the steel cord it may be rusted and cut off by moisture When any crack is detected immediate repair is essenti...

Page 72: ...ot travel or work while spanning a ditch This causes damage of the lug and breakage of the steel cord Do not forcibly press soil while rubber tracks are slipping Slipping of the rubber tracks promotes...

Page 73: ...e to the rubber tracks x If fuel hydraulic oil and paint should adhere to the rubber tracks wipe it away quickly x Wash away with water after working in locations with a large salt content Salt can ca...

Page 74: ...pecial hydraulic devices and so forth that fit the capability of this machine x Some special attachments require reinforcement of the arm Inquire our dealer about reinforcement x Be sure to read the m...

Page 75: ...ng lever Specifications No Name Work Breaker Iron fork S Grip 1 No 1 AUX pedal E Grip Option 2 No 1 AUX proportional lever 3 No 1 AUX button 4 No 1 AUX flow limit switch 5 No 1 AUX hold switch Be sure...

Page 76: ...y side hose to the pipe on the left side of the arm and the return side hose to the pipe on the right side 2 Set the selection valve so that the mark 6 is vertical 3 Press the No 1 AUX button 3 and op...

Page 77: ...3 Operate the dismantling fork by sliding to the left or right the No 1 AUX proportional lever 2 Sliding to the left Compressed oil is supplied to the arm left side pipe Sliding to the right Compresse...

Page 78: ...lect switch 1 to change the circuit into the No 2 AUX pipe 2nd PTO select switch x Pushing the ON position The circuit is changed into the No 2 AUX pipe x Pushing the OFF position The circuit is chang...

Page 79: ...il is supplied to the pipe on the right of the arm and the quick hitching device releases the bucket Pushing the LOCK position Pressure oil is supplied to the pipe on the left of the arm and the quick...

Page 80: ...another machine if it enters a muddy place and cannot escape from it by itself Never use the pulling hook for light objects to pull the machine itself 1 Start the engine 2 Select the low speed mode wi...

Page 81: ...hange the direction on the ramp boards It is very dangerous Move down from the ramp boards once and change the direction x The center of gravity moves quickly at the border of the truck and the ramp b...

Page 82: ...fully Lower the attachment onto a wooden block etc 3 Stop the engine and pull out the key from the engine key switch 4 Apply stopper blocks to the front and rear positions of the crawlers 5 Apply wir...

Page 83: ...ly 4 Make the boom straight if it has swung to the right or left 5 Fasten wire ropes to the lifting holes at the back of the boom using the shackle 6 Stop the engine and get off the machine 7 Fasten t...

Page 84: ...OPERATION 45V4 55V4 60V4 ENG 2 52 This page is intentionally left blank...

Page 85: ...d to maintain the machine performances for long and prevent damages and troubles in advance This section describes the proper maintenance procedures of this machine Carry out maintenance safely and pr...

Page 86: ...45V4 55V4 60V4 ENG...

Page 87: ...eparator 1 Every 2 years Water separator Fuel pump 1 Fuel pump Fuel filter 1 Fuel filter Engine 1 Engine Fuel cooler 2 Fuel cooler Fuel tank 1 Coolant hose Radiator hose upper 1 Every 2 years Radiator...

Page 88: ...heck Replace Maintenance point Maintenance work Maintenance interval Daily 50h 100h 250h 500h 1000h 1500h 2000h Irregular Greasing Attachment Grease Boom swing Blade Swing bearing Ring gear Bucket Buc...

Page 89: ...tank Suction strainer Clean Return filter Replace cartridge First time Air breather Element replacement Hydraulic devices Check oil leak Hydraulic equipment Check oil leak Lubrication system Engine oi...

Page 90: ...s Oil cooler fins Check clean Fan belt Check tension adjust First time Check cracks First time Intake system Air cleaner Check dust indicator Check element clean First time Replace element Hoses Fuel...

Page 91: ...e point Maintenance work Maintenance interval Daily 50h 100h 250h 500h 1000h 1500h 2000h Irregular Electric system Fuse Replace Fusible link Replace Battery Check battery liquid qty refill Clean termi...

Page 92: ...9 7 L L 6 7 L Hydraulic oil tank Hydraulic oil Abrasion resistant System 75 L Tank level 56 L Travel reduction gear Gear oil API GL 4 0 9 L Fuel tank Diesel fuel 66 L Cooling system Coolant Long life...

Page 93: ...grease nipples completely after greasing No Name Qty 1 Boom foot pin 1 2 Boom cylinder foot pin 1 3 Boom cylinder rod pin 1 4 Arm foot pin 1 5 Arm cylinder foot pin 1 6 Arm cylinder rod pin 1 7 Bucke...

Page 94: ...ing cylinder foot pin 1 4 Swing cylinder rod pin 1 Blade No Name Qty 1 Blade foot pin 2 2 Blade cylinder rod pin 1 3 Blade cylinder foot pin 1 x Carry out greasing regardless of the greasing interval...

Page 95: ...letely if water or mud is mixed in grease and grease looks cloudy Remove the cover 3 of the carbody and the discharge port cover 4 and discharge old grease when changing it 4 Attach the discharge port...

Page 96: ...ve the lock pin Remove the tooth 2 Clean the adapter It is recommended that the rubber lock pin should be replaced every time the tooth is replaced 4 Attach the rubber lock pin to the nose 5 Insert th...

Page 97: ...link and the removed pins Apply grease to the holes and pins 2 Replace the O rings if they are damaged or worn Attach new O rings to the bosses of the bucket temporarily 3 Lower the arm slowly fit th...

Page 98: ...3 Move the O ring to above the boss and measure the clearance of the bucket and arm 4 Remove the shim to adjust the clearance if the clearance is 1 mm or more The thickness of the shim is 0 8 mm Do no...

Page 99: ...d new one Cutting of Steel Cord Replace immediately if more than half of the steel cord layer on one side has been cut If this is left as it is the rubber tracks breaks suddenly during operation there...

Page 100: ...are used they may be slipped off Inspect and adjust their tension as the necessity requires Inspection 1 Raise the machine using the attachment and blade until the crawler tracks become apart from the...

Page 101: ...is discharged 3 Rotate the crawler track forward and backward slightly if grease is hardly discharged 4 Tighten the check valve when the crawler tracks are tensioned properly Tightening torque 59 to...

Page 102: ...5 Clean the level plug and oil filler plug then attach them Change Oil 1 Locate the drain port to the lower position and stop the engine 2 Place the container under the drain port 3 Remove the filler...

Page 103: ...and lower the internal pressure Hydraulic Oil Level and Refilling 1 Check the oil level gauge 1 If the oil level is between H and L it is proper The oil level differs with the oil temperature The fol...

Page 104: ...rushed and the top surface of the cartridge is brought into contact with the head 4 it is the limit of tightening 4 Start the engine and make sure that no oil leaks from the gasket of the cartridge 5...

Page 105: ...e tank by pressing the air breather button 2 5 Place the container under the drain plug Remove the drain plug to discharge oil Tighten the drain plug after discharging oil 6 Loosen the hose clamp 3 di...

Page 106: ...ng posture and check the oil level Refill hydraulic oil if insufficient Breaker work is done in severer conditions than normal digging works and hydraulic oil is deteriorated earlier If the machine is...

Page 107: ...Engine Oil Level and Refill 1 Pull out the oil level gauge 1 clean it with cloth insert it fully again and pull it out slowly 2 The oil level is proper if it is between the marks of the upper and low...

Page 108: ...detach it using the filter wrench 6 Clean dust and foreign matters from the filter mounting surface 7 Apply engine oil thinly onto the gasket of a new filter 8 Attach the filter by rotating towards th...

Page 109: ...with the engine key x If fuel overflows or spills it may cause a fire Wipe off spilt fuel completely x If the strainer is dismounted and fuel is refilled the engine may become defective Do not dismou...

Page 110: ...ring connector 3 Open the drain plug to discharge water and foreign matters to the container 4 Turn the cup 5 counterclockwise to detach it 5 Take out the float 1 from inside of the cup 6 Discharge wa...

Page 111: ...tenance of the fuel filter or water separator is carried out or the fuel tank is emptied 1 Fill the fuel tank full with fuel 2 Turn the engine key switch to the ON position and keep it at that positio...

Page 112: ...engine cools down x Do not remove the cap when the coolant is hot Hot water may spout out Rotate the cap slowly to relief the pressure after the coolant temperature lowers 1 Coolant x A new machine is...

Page 113: ...ator cap 1 3 Open the drain cock 2 at the bottom of the radiator and drain the water Next open the drain cock 3 of the cylinder block and drain the water 4 Close the drain cocks at the two locations p...

Page 114: ...igh speed for 30 minutes after the belt is replaced Check and adjust belt tension then 1 Check 1 Push a point in the middle of the clank pulley and alternator pulley at approximately 98 N 10 kg The be...

Page 115: ...dust scattered matters compressed air high pressure water or steam 1 Blow out dust with compressed air at 0 2 MPa or less from the fins Be careful not to damage the fins with compressed air 2 Clean t...

Page 116: ...or replace the element immediately if the red signal is indicated 3 Push the reset button of the dust indicator to reset the red signal after cleaning or replacing the element Clean or replace the ele...

Page 117: ...particularly thin portions or if the seal portion is damaged 6 After the cleaning is completed affix the element again 7 Attach with the arrow mark is towards the up direction and fix with a fixing m...

Page 118: ...sing the valves Improper adjustment will cause the engine to run noisily resulting in poor engine performance and engine damage Check of Fuel Injection System Proper operation of the fuel injectors is...

Page 119: ...Circuit name 1 20 A Cabin working lamp 2 30 A Cabin wiper 3 10 A No 3 AUX 4 10 A Heater 5 10 A No 2 AUX 6 10 A Working lamp 7 2 A Backup 8 10 A Main relay Throttle controller 9 20 A Horn High Low spee...

Page 120: ...level line on the battery Maintain the level to the upper level of the sight level line with distilled water when required Level of electrolyte must never fall below tops of plates Clean the battery...

Page 121: ...lybdenum disulfide grease to the threads and the bearing surfaces of the nuts and tighten at the specified torque As for the travel reduction gear and drive sprocket of the travel unit apply thread lo...

Page 122: ...N m kgf m 1 Engine bracket M12 19 106 10 8 2 Vibration proof bracket M12 17 106 10 8 4 Counterweight No Tightening position Bolt size Wrench size mm Tightening torque N m kgf m 1 Counterweight M24 36...

Page 123: ...olts Bolt size Wrench size mm Coarse thread Fine thread N m kgf m N m kgf m M8 13 23 2 3 25 2 5 M10 17 47 4 8 50 5 1 M12 19 83 8 5 91 9 3 M14 22 134 13 7 135 13 8 M16 24 208 21 2 221 22 5 M20 30 411 4...

Page 124: ...p the mixing ratio of the long life coolant at 49 Lubricant and grease Exchange engine oil and hydraulic oil with proper oil having viscosity appropriate for the outer temperature Refer to RECOMMENDED...

Page 125: ...to prevent rust keep good ventilation and gas poisoning by window or entrance x Warm up the machine and carry out traveling swinging and a series of operations including attachment operations once ev...

Page 126: ...int Brake valve Brake valve Arm Swing Boom swing Code Name Pressure MPa kgf cm 2 MR1 Main relief valve P1 Pump 24 5 250 MR2 Main relief valve P2 Pump 24 5 250 MR3 Main relief valve P3 Pump 20 6 210 OR...

Page 127: ...MAINTENANCE 45V4 55V4 60V4 ENG 3 41 This page is intentionally left blank...

Page 128: ...MAINTENANCE 45V4 55V4 60V4 ENG 3 42 ELECTRIC SYSTEM DIAGRAM 27 12 43 13 42 23 25 40 11 51 50 52 44 24 47 17 16 1 2 3 5 9 4 HORN...

Page 129: ...MAINTENANCE 45V4 55V4 60V4 ENG 3 43 28 41 14 26 57 19 53 46 49 54 55 48 56 18 15 10 22 21 20 45 7 8 6 38 37 39 29 30 31 32 33 36 35 34 QUICK HITCH 3RD CHG SOL...

Page 130: ...Control lock limit switch 41 Flip flop relay 13 Control lock solenoid 42 Neutral start lamp relay 14 Travel speed select solenoid 43 Neutral start relay 15 Fuel level sensor 44 Horn switch 16 Fuse box...

Page 131: ...45V4 55V4 60V4 ENG SPECIFICATIONS...

Page 132: ...45V4 55V4 60V4 ENG...

Page 133: ...rack 4670 4820 Base machinery mass kg Rubber track 3500 3650 Steel track 3540 3690 Average ground bearing pressure kg Rubber track 27 kPa 28 kPa Steel track 27 kPa 28 kPa 55V4 4 post ROPS Cabin Machin...

Page 134: ...d General digging 0 08 400 350 3 89 OPT Ditching 0 11 500 450 3 100 OPT Long arm 0 14 600 450 4 118 u OPT Reinforced 0 14 600 550 4 115 u OPT With hook 0 16 650 600 4 119 u OPT Loading 55V4 Standard c...

Page 135: ...th Mass kg Compatibility Applied Specification Heaped With side cutter Without side cutter Standard arm Long arm 0 18 700 650 4 123 u Standard General digging 0 08 400 350 3 89 OPT Ditching 0 11 500 4...

Page 136: ...5 G Clearance height under upper structure 640 640 H Ground clearance of undercarriage 320 320 I Undercarriage overall length 3090 3090 J Blade height 385 385 K Blade width 1990 1990 L Overall length...

Page 137: ...learance height under upper structure 640 640 H Ground clearance of undercarriage 320 320 I Undercarriage overall length 3090 3090 J Blade height 385 385 K Blade width 1990 1990 L Overall length Blade...

Page 138: ...learance height under upper structure 640 640 H Ground clearance of undercarriage 320 320 I Undercarriage overall length 3090 3090 J Blade height 385 385 K Blade width 1990 1990 L Overall length Blade...

Page 139: ...3590 D Reach at maximum digging depth 2190 2140 E Maximum height of cutting edge 5380 5470 F Reach at maximum height 3290 3560 G Maximum dumping height 3720 3820 H Reach at maximum dumping height 3020...

Page 140: ...0 E Maximum height of cutting edge 5470 5610 F Reach at maximum height 3560 3760 G Maximum dumping height 3820 3960 H Reach at maximum dumping height 3260 3460 I Minimum dumping height 1330 1080 J Rea...

Page 141: ...0 E Maximum height of cutting edge 5710 5860 F Reach at maximum height 3590 3790 G Maximum dumping height 4050 4200 H Reach at maximum dumping height 3340 3530 I Minimum dumping height 1470 1220 J Rea...

Page 142: ...RANGE FOR OFFSET DIGGING Unit mm 45V4 Standard arm Long arm Minimum radius of equipment at maximum front offset A 2100 2190 B 2010 2100 Unit mm 55V4 Standard arm Long arm Minimum radius of equipment a...

Page 143: ...SPECIFICATIONS 45V4 55V4 60V4 ENG 4 11 Unit mm 60V4 Standard arm Long arm Minimum radius of equipment at maximum front offset A 2220 2240 B 2120 2130...

Page 144: ...SPECIFICATIONS 45V4 55V4 60V4 ENG 4 12 RATED OBJECT HANDLING CAPACITIES TABLE 45V4...

Page 145: ...SPECIFICATIONS 45V4 55V4 60V4 ENG 4 13 55V4...

Page 146: ...SPECIFICATIONS 45V4 55V4 60V4 ENG 4 14 60V4...

Page 147: ...diting Publishing Office Product Support Department 236 8611 3174 3174 Showa machi Kanazawa ku Yokohama Kanagawa 236 8611 Japan All rights reserved 45V4 55V4 60V4 2014 2 First Edition February 2014 Or...

Reviews: