42
7
MANUTENZIONE
MANUTENZIONE
MANUTENZIONE
MANUTENZIONE
MANUTENZIONE
7.1
7.1
7.1
7.1
7.1
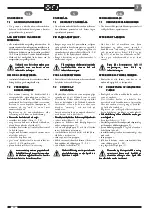
MANUTENZIONE ORDINARIA
MANUTENZIONE ORDINARIA
MANUTENZIONE ORDINARIA
MANUTENZIONE ORDINARIA
MANUTENZIONE ORDINARIA
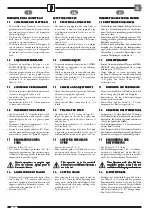
• Le operazioni di manutenzione ordinaria sono
di competenza di personale generico e quindi
non specializzato.
OGNI FINE LAVORO:
OGNI FINE LAVORO:
OGNI FINE LAVORO:
OGNI FINE LAVORO:
OGNI FINE LAVORO:
• pulire accuratamente ogni parte della macchina,
rimuovendo trucioli ed altri residui di lavorazio-
ne, in modo particolare nel guidalama, all’inter-
no delle ganasce della morsa ,e sulla rete
metallica (filtro) (4 - F. 4) del coperchio (3)
serbatoio liquido di refrigerazione.
• Pulire accuratamente anche l’area di lavoro (in
prossimità della segatrice).
Non utilizzare per la pulizia, getti d’aria
Non utilizzare per la pulizia, getti d’aria
Non utilizzare per la pulizia, getti d’aria
Non utilizzare per la pulizia, getti d’aria
Non utilizzare per la pulizia, getti d’aria
compressa, ma pennello e aspiratore
compressa, ma pennello e aspiratore
compressa, ma pennello e aspiratore
compressa, ma pennello e aspiratore
compressa, ma pennello e aspiratore
industriale.
industriale.
industriale.
industriale.
industriale.
OGNI 40 ORE DI LAVORO:
OGNI 40 ORE DI LAVORO:
OGNI 40 ORE DI LAVORO:
OGNI 40 ORE DI LAVORO:
OGNI 40 ORE DI LAVORO:
• verificare il corretto serraggio di tutte le viti,
aventi una certa importanza meccanica.
7.2
7.2
7.2
7.2
7.2
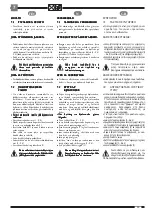
SOSTITUZIONE LIQUIDO
SOSTITUZIONE LIQUIDO
SOSTITUZIONE LIQUIDO
SOSTITUZIONE LIQUIDO
SOSTITUZIONE LIQUIDO
REFRIGERANTE
REFRIGERANTE
REFRIGERANTE
REFRIGERANTE
REFRIGERANTE
• La perdita delle proprietà originali del liquido
refrigerante, è una condizione difficilmente
valutabile. Si consiglia pertanto di sostituirlo
periodicamente ad intervalli prestabiliti o quan-
do risulti molto “sporco” e saturo d’impurità.
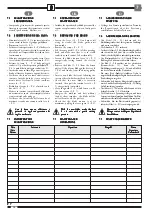
Registrare sulla scheda di manutenzione ogni
sostituzione, con data e firma.
• Per sostituire il liquido refrigerante, procedere
Per sostituire il liquido refrigerante, procedere
Per sostituire il liquido refrigerante, procedere
Per sostituire il liquido refrigerante, procedere
Per sostituire il liquido refrigerante, procedere
come segue:
come segue:
come segue:
come segue:
come segue:
• rimuovere il coperchio/filtro (3 - F. 4);
• procurarsi un recipiente di adeguata capacità e
posizionare sotto il tappo di scarico (5);
• rimuovere il tappo di scarico (5) e lasciare
defluire tutto il liquido all’interno del conteni-
tore;
• svuotato completamente il serbatoio, se neces-
sario, sciacquarlo con acqua;
• riavvitare il tappo;
• immettere nel serbatoio il liquido “vergine”
fino a sfiorare la paratia (2 - F. 4);
• riposizionare il coperchio/filtro (3).
Interpellare un’azienda specializzata ed
Interpellare un’azienda specializzata ed
Interpellare un’azienda specializzata ed
Interpellare un’azienda specializzata ed
Interpellare un’azienda specializzata ed
autorizzata per lo smaltimento degli oli
autorizzata per lo smaltimento degli oli
autorizzata per lo smaltimento degli oli
autorizzata per lo smaltimento degli oli
autorizzata per lo smaltimento degli oli
esausti. Non disperdere il liquido refri-
esausti. Non disperdere il liquido refri-
esausti. Non disperdere il liquido refri-
esausti. Non disperdere il liquido refri-
esausti. Non disperdere il liquido refri-
gerante nell’ambiente.
gerante nell’ambiente.
gerante nell’ambiente.
gerante nell’ambiente.
gerante nell’ambiente.
MAINTENANCE
MAINTENANCE
MAINTENANCE
MAINTENANCE
MAINTENANCE
7.1
7.1
7.1
7.1
7.1
ORDINARY MAINTENANCE
ORDINARY MAINTENANCE
ORDINARY MAINTENANCE
ORDINARY MAINTENANCE
ORDINARY MAINTENANCE
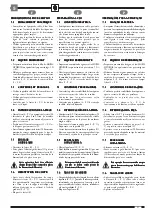
• Ordinary maintenance operations are to be
executed by the generic, unskilled
personnel.
AT EACH END OF JOB:
AT EACH END OF JOB:
AT EACH END OF JOB:
AT EACH END OF JOB:
AT EACH END OF JOB:
• Clean any machine part thoroughly, removing
chips and other processing waste, in particular
in the blade guide, in the vise jaws and on the
metal net (filter) (4 – F. 4) of the cooling liquid
tank cover (3).
• Clean the working area thoroughly too (next to
the sawing machine).
For cleaning, do not use compressed air
For cleaning, do not use compressed air
For cleaning, do not use compressed air
For cleaning, do not use compressed air
For cleaning, do not use compressed air
jets, but use the brush and industrial
jets, but use the brush and industrial
jets, but use the brush and industrial
jets, but use the brush and industrial
jets, but use the brush and industrial
aspirator.
aspirator.
aspirator.
aspirator.
aspirator.
EVERY 40 WORKING HOURS:
EVERY 40 WORKING HOURS:
EVERY 40 WORKING HOURS:
EVERY 40 WORKING HOURS:
EVERY 40 WORKING HOURS:
• Check that all screws which are important from
a mechanical viewpoint, are properly tightened.
7.2
7.2
7.2
7.2
7.2
REPLACING THE COOLING
REPLACING THE COOLING
REPLACING THE COOLING
REPLACING THE COOLING
REPLACING THE COOLING
LIQUID
LIQUID
LIQUID
LIQUID
LIQUID
• The loss of the cooling liquid original properties,
is a condition which is difficult to assess. Thus,
it is recommended to replace it periodically at
scheduled intervals or when it is very “dirty” or
saturated with impurities.
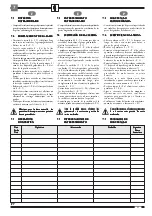
• Record any replacement on the maintenance
schedule card with date and signature.
• To replace the cooling liquid, act as
To replace the cooling liquid, act as
To replace the cooling liquid, act as
To replace the cooling liquid, act as
To replace the cooling liquid, act as
follows:
follows:
follows:
follows:
follows:
• Remove the cover/filter (3 – F. 4);
• Take a container with appropriate capacity and
position it under the drain plug (5);
• Remover the drain plug (5) and let all the liquid
in the container flow down;
• Once the tank has been completely emptied, if
necessary, rinse it with water;
• Re-screw the plug;
• Pour the “virgin” liquid into the tank until it
touches the firewall (2 – F. 4);
• Reposition the cover/filter (3).
Contact a specialised and authorised
Contact a specialised and authorised
Contact a specialised and authorised
Contact a specialised and authorised
Contact a specialised and authorised
company to dispose of the exhausted
company to dispose of the exhausted
company to dispose of the exhausted
company to dispose of the exhausted
company to dispose of the exhausted
oils. Do not throw the cooling liquid in
oils. Do not throw the cooling liquid in
oils. Do not throw the cooling liquid in
oils. Do not throw the cooling liquid in
oils. Do not throw the cooling liquid in
the environment.
the environment.
the environment.
the environment.
the environment.
WARTUNG
WARTUNG
WARTUNG
WARTUNG
WARTUNG
7.1
7.1
7.1
7.1
7.1
GEWÖHNLICHE WARTUNG
GEWÖHNLICHE WARTUNG
GEWÖHNLICHE WARTUNG
GEWÖHNLICHE WARTUNG
GEWÖHNLICHE WARTUNG
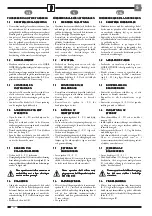
• Die gewöhnlichen Wartungsarbeiten sind
Aufgabe einfachen Bedienungspersonals ohne
spezielle Qualifikation.
NACH JEDER ARBEITSSCHICHT:
NACH JEDER ARBEITSSCHICHT:
NACH JEDER ARBEITSSCHICHT:
NACH JEDER ARBEITSSCHICHT:
NACH JEDER ARBEITSSCHICHT:
• Alle Maschinenteile sorgfältig säubern. Späne
und sonstige Rückstände, insbesondere in des
Blattführung, im Innern der Spannbacken des
Schraubstocks sowie auf dem Metallnetz (Filter)
(4 - F. 4) des Kühlflüssigkeitstankdeckels (3)
entfernen.
• Die Betriebsumgebung der Sägemaschine ist
ebenfalls sorgfältig zu säubern.
Für die Säuberung keine
Für die Säuberung keine
Für die Säuberung keine
Für die Säuberung keine
Für die Säuberung keine
Druckluftstrahlen sondern Pinsel und
Druckluftstrahlen sondern Pinsel und
Druckluftstrahlen sondern Pinsel und
Druckluftstrahlen sondern Pinsel und
Druckluftstrahlen sondern Pinsel und
Industriesauger verwenden.
Industriesauger verwenden.
Industriesauger verwenden.
Industriesauger verwenden.
Industriesauger verwenden.
ALLE 40 BETRIEBSSTUNDEN:
ALLE 40 BETRIEBSSTUNDEN:
ALLE 40 BETRIEBSSTUNDEN:
ALLE 40 BETRIEBSSTUNDEN:
ALLE 40 BETRIEBSSTUNDEN:
• Den festen Anzug aller Schrauben von
mechanischer Bedeutung kontrollieren.
7.2
7.2
7.2
7.2
7.2
AUSWECHSELN DER
AUSWECHSELN DER
AUSWECHSELN DER
AUSWECHSELN DER
AUSWECHSELN DER
KÜHLFLÜSSIGKEIT
KÜHLFLÜSSIGKEIT
KÜHLFLÜSSIGKEIT
KÜHLFLÜSSIGKEIT
KÜHLFLÜSSIGKEIT
• Es ist schwierig zu beurteilen, wann die Kühlflüssigkeit
ihre Originaleigenschaften verliert. Es empfiehlt sich
daher eine regelmäßige Auswechselung in zuvor festgelegten
Zeitabständen oder immer dann, sobald sie sich als sehr
“schmutzig” beziehungsweise mit Verunreinigungen
gesättigt erweist. Registrieren Sie auf der Wartungskarte
jede Auswechselung und versehen Sie den Vorgang mit
Datum und Unterschrift.
••••• Für die Auswechselung der Kühlflüssigkeit wie folgt
Für die Auswechselung der Kühlflüssigkeit wie folgt
Für die Auswechselung der Kühlflüssigkeit wie folgt
Für die Auswechselung der Kühlflüssigkeit wie folgt
Für die Auswechselung der Kühlflüssigkeit wie folgt
vorgehen:
vorgehen:
vorgehen:
vorgehen:
vorgehen:
• den Deckel/Filter (3 - F.4) abnehmen;
• einen Behälter ausreichenden Fassungsvermögens
bereitstellen und unter dem Auslaßstöpsel (5) positionieren;
• den Auslaßstöpsel (5) abnehmen und die gesamte
Kühlflüssigkeit in den Behälter fließen lassen;
• den Tank vollständig entleeren und gegebenenfalls mit
Wasser ausspülen;
• den Stöpsel wieder aufschrauben;
• die “reine” Kühlflüssigkeit in den Tank leiten, bis die
Höhe der Scheidewand (2 - F.4) gerade erreicht wird;
• Deckel/Filter (3) wiedereinsetzen.
Wenden Sie sich für die Entsorgung der
Wenden Sie sich für die Entsorgung der
Wenden Sie sich für die Entsorgung der
Wenden Sie sich für die Entsorgung der
Wenden Sie sich für die Entsorgung der
verbrauchten Öle an eine diesbezüglich
verbrauchten Öle an eine diesbezüglich
verbrauchten Öle an eine diesbezüglich
verbrauchten Öle an eine diesbezüglich
verbrauchten Öle an eine diesbezüglich
spezialisierte und zugelassene Firma.
spezialisierte und zugelassene Firma.
spezialisierte und zugelassene Firma.
spezialisierte und zugelassene Firma.
spezialisierte und zugelassene Firma.
Die Kühlflüssigkeit darf nicht in die Umwelt
Die Kühlflüssigkeit darf nicht in die Umwelt
Die Kühlflüssigkeit darf nicht in die Umwelt
Die Kühlflüssigkeit darf nicht in die Umwelt
Die Kühlflüssigkeit darf nicht in die Umwelt
geleitet werden.
geleitet werden.
geleitet werden.
geleitet werden.
geleitet werden.
I
UK
D
Summary of Contents for PH160
Page 51: ......


