P 4
For assistance please contact customer care on: 01636 821215
Mercia Garden Products Limited,
Sutton On Trent,
Newark,
Nottinghamshire,
NG23 6QN
www.merciagardenproducts.co.uk
Please retain product label and instructions for future reference
Pre drill
hole
50mm
screw
8
8
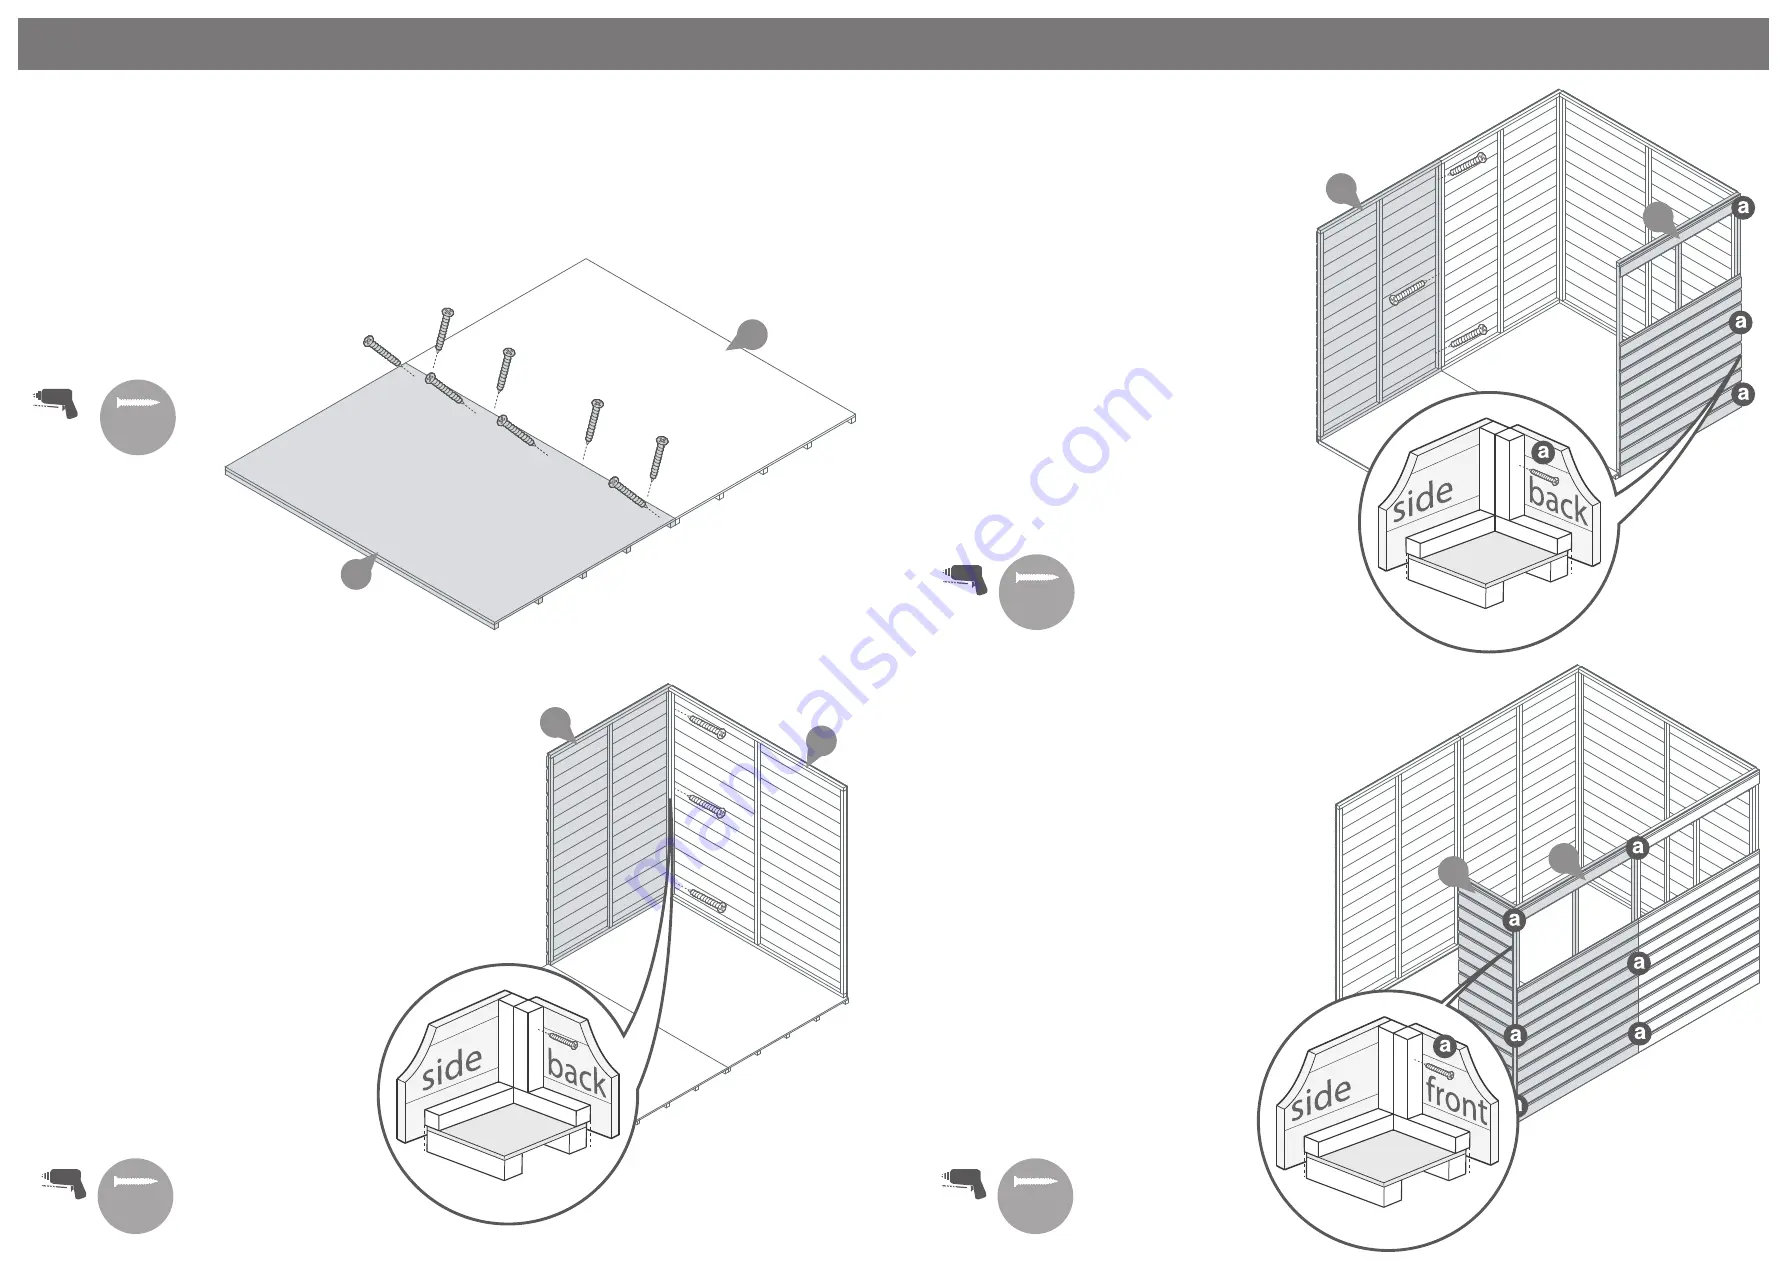
Step 2
Parts needed - No. 8 QTY 2
Place the floor panels
(No. 8)
onto a firm and
level base. Ensure the base has suitable
drainage, free from areas where standing water
can collect.
Secure the floors together using 8x50mm screws
through the floor bearers in an alternating
pattern.
8x50mm Screws
50mm
screw
Pre drill
hole
5
4
Step 3
Parts needed - No. 4, or 1, (or 2 QTY 1)
No. 5 QTY 1
**Please note: The side panels are all
interchangeable and can be positioned in a
variety of configurations. Decide which
works best before assembly. See Page 2 for
suggested options.**
Fix the corners of the Large Plain Side
(No. 5)
and a Medium Plain Side Panel
(No. 4)
(or
panel of your choice) with 50mm screws as
shown in diagram.
**Do not secure the building to the floor until
the roof has been fitted.
Position the panels so there is equal spacing
between the floor and cladding on all sides.
3x50mm Screws
50mm
screw
Pre drill
hole
2
4
Step 4
Parts needed - No. 2, (or 1, or 4 QTY 1)
No. 4, (or 1, or 2 QTY 1)
Fix the corners of the Large Plain Side
(No. 5)
and a Window Panel
(No. 2)
(or panel of your
choice) with 50mm screws as shown in
diagram.
Fix the end of the Medium Plain Side Panel
(No. 4)
(or panel of your choice) to the already
standing chosen panel with 50mm screws as
shown in diagram.
**Do not secure the building to the floor until
the roof has been fitted.
Position the panels so there is equal spacing
between the floor and cladding on all sides.
6x50mm Screws
50mm
screw
Pre drill
hole
3
2
Step 5
Parts needed - No. 2, (or 1, or 4 QTY 1)
No. 3 QTY 1
Fix the end of the Window Panel
(No. 2)
(or
Panel of your choice) to the already
standing chosen panel with 50mm screws
as shown in diagram.
Fix the corners of the
Small Plain Panel
(No.3)
to either side of the front of the
building depending on preference with
50mm screws as shown in the diagram.
Do not secure the building to the floor until
the roof has been fitted,
Position the panels so there is equal spacing
between the floor and cladding on all sides.
6x50mm Screws


