Button
P 5
Please retain product label and instructions for future reference
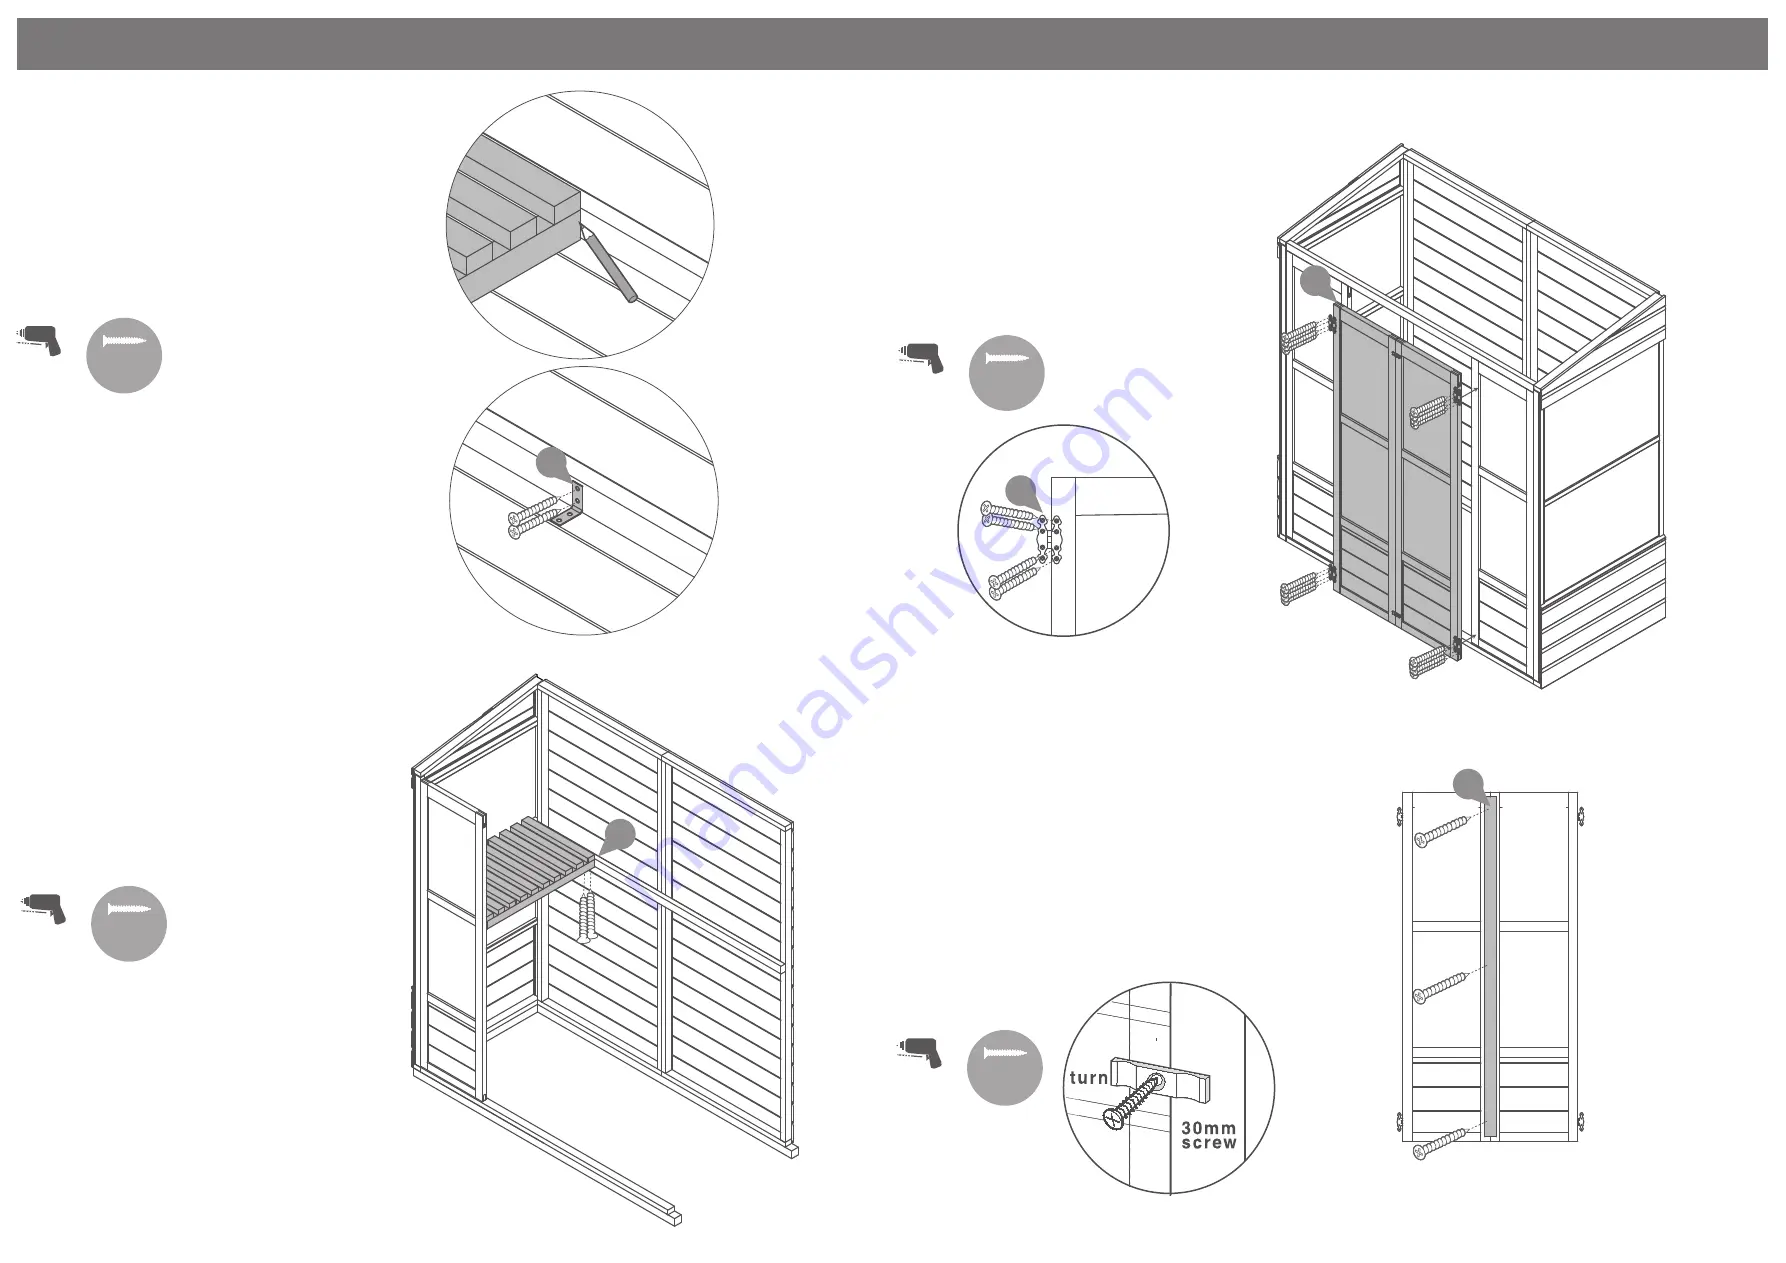
Step 8
Fix the ‘L’ brackets
(No. 17)
in postion
with 2x20mm screws per bracket. To
obtain the correct postion place Shelf A
into the desired postion and mark the
positon with a pencil.
Repeat for second shelf.
8x20mm screws.
Pre drill
hole
20mm
screw
Step 9
Fix Shelf A
(No. 6)
into postion from
underneath through the ‘L’ bracket with
2x20mm screws per bracket.
Repeat for second shelf.
8x20mm screws.
Step 10
Attach the Butterfly hinges
(No. 21)
to
the Doors
(No. 4)
using 4x30mm screws
per hinge as shown.
Fix the Doors to the building as shown
using 4x30mm screws
16x30mm screws.
Pre drill
hole
20mm
screw
Step 11
Once the Doors are fitted. Determine
which door is to be the Master door and
attach 2xTurn buttons
(No. 18)
to the
outside of the door with 2x30mm black
screws
so that, when turned horizontal,
they overlap both Doors.
To the Door designated as the slave Door
attach the Door Trim
(No. 12)
with
3x30mm screws.
3x30mm screws.
2x30mm black screws
Pre drill
hole
30mm
screw
C
Pre drill
hole
30mm
screw
17
6
4
21
12


