12
Setting up the instrument and
consumables
Unpacking the instrument
Remove the instrument components from all packaging without
damaging the packing materials.
Save the original packaging materials for use if the instrument
must be shipped for maintenance at a later date.
The shipping kit contains the following items:
• One media preparation unit box with:
– One media preparation unit assembly
– One barcode scanner
– One barcode scanner stand
– One RS232 cord for barcode scanner
– One RJ45 cable
– One inlet water tubing
– One tubing for water outlet
– One USB card with the user manual and safety instructions
• One dispensing unit box with:
– One media dispensing unit base
– One stand with dispensing arm
• One standard bag holder box
• One large bag holder box
• One power cord
• One mesh strainer
•
One sanitization kit
Installing the instrument
Install the media unit on a bench or on a trolley supporting a mass
of 30 kg.
Install the dispensing unit close to the media unit (less than 1 m
distance). It is also possible to position the dispensing unit in a
laminar flow cabinet.
Connect the provided RJ45 cable to the dispensing unit connector
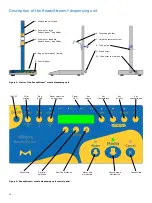
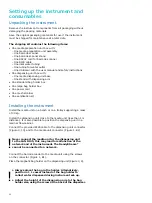
(Figure 3, 10) and to the media unit connector (Figure 1, B2).
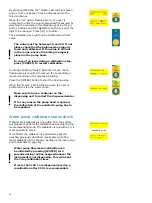
Never connect the media unit or the dispensing unit
to the LAN RJ45, this may lead to malfunction of the
network and of the instrument. The ReadyStream
®
cannot be connected to a network.
Connect the barcode reader to the media unit using the screws
on the connector (Figure 1, B1).
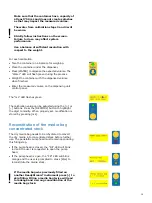
Place the magnetic bag holder on the dispensing unit (Figure 3, 4).
• Always place the bag in the holder. Alternatively,
position a 1 L vessel instead of the bag holder to
collect water dispensed during instrument set-up.
• Adjust the height of the dispensing arm to the bag
holder size, using the screw at the back of the dispenser.
!
!


