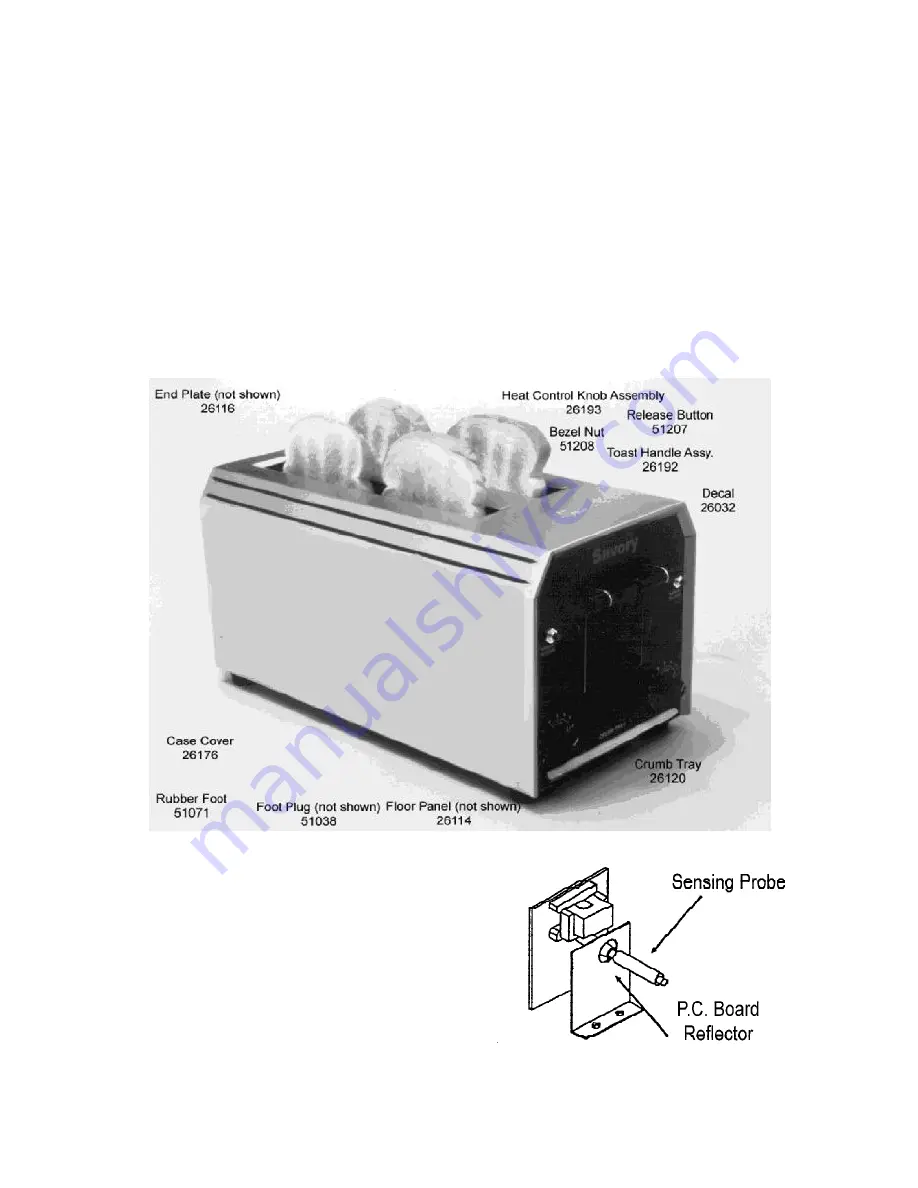
REMOVAL, INSTALLATION AND ADJUSTMENTS
CAUTION:
UNPLUG UNIT AND ALLOW TO COOL BEFORE ATTEMPTING ANY SERVICE PROCEDURES IN THIS MANUAL
A. CASE COVER / CONTROL PANEL
1. Carefully place toaster upside down on a non-abrasive surface
2 Remove crumb tray.
3. Pry our rubber foot plugs adn use 1/3” nut driver to remove legs.
4. Push panel sides outward to gain clearance and slide out floor panel.
5. Push panel sides outward and lift out toaster chassis.
6. Unscrew both toast level handles and remove.
7. Remove one screw securing control panel to upper chassis.
8. Remove 2 screws securing control panel to lower chassis.
9. Gently pull control panel forward to gain access tothe inner workings.
B. RELEASE BUTTON
1. Remove case cover adn control panel. (Section A)
2. Remove bezel nut and star washer from release
button.
3. Push release button through panel and remove
push terminals #3 and #4 from p.c. board.
4. When re-attaching new push terminals to p.c.
board, polarity is not a factor. Refer to wiring diagram.
5.
IMPORTANT:
When installing new release button,
make sure both wires are positioned behind p.c.
board.
Figure 1
Figure 2
5
Summary of Contents for POP-2/4
Page 8: ...Figure 5 Figure 6 8 ...


