background image

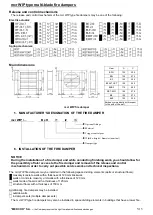
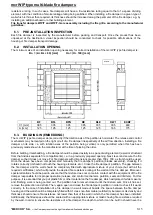
mcr WIP type multi-blade fire dampers 


“MERCOR” S.A. – 

the Company reserves the right to make modifications and changes. 


8/15 


1. 

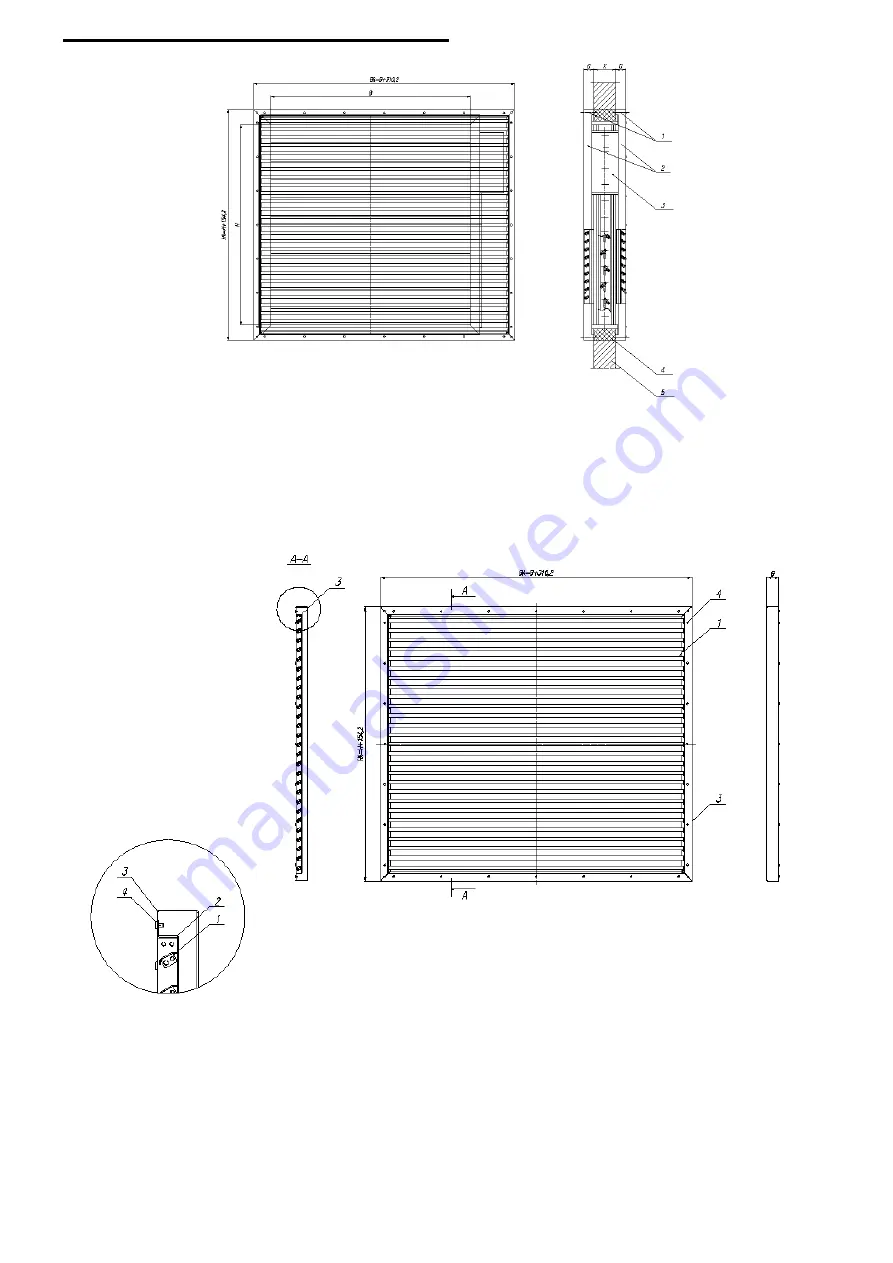
Wall plug with M6 screw


2. 

Protective grid


3. Mcr WIP type fire damper, W x H


4. E.g. cement mortar


5.

 Masonry wall


X – wall thickness


G – protective grid thickness


Installation of the protective grid for the mcr WIP type fire damper. 


Protective grid thickness G (shown in the figures) should have 30÷50mm, depending on the thickness of the wall, in 


1.  Grid blades 
2.  Internal frame 
3.  External frame 
4.  4.8 diameter rivet 


Modular protective grid for the mcr WIP type fire damper 


A  modular  protective  grid  may  be  supplied  by  the  manufacturer  of  the  fire  damper  or  made  by  the  person 
installing the product, provided that the following requirements are met: 


Summary of Contents for mcr WIP Series

Page 1: ...Ul Grzegorza z Sanoka 2 80 408 Gdańsk Phone 0 58 341 42 45 OPERATION AND MAINTENANCE MANUAL OMM mcr WIP fire damper Rev WIP 18 11 14 15 FIRE VENTILATION SYSTEMS DEPARTMENT ...

Page 2: ...NG PRINCIPLE OF THE FIRE DAMPER 4 5 MANUFACTURER S DESIGNATION OF THE FIRE DAMPER 5 6 INSTALLATION OF THE FIRE DAMPER 6 6 1 PRE INSTALLATION INSPECTION 6 6 2 INSTALLATION OPENING 6 6 3 BUILDING IN THE FIRE DAMPER 7 6 4 ELECTRICAL CONNECTIONS 12 7 TRANSPORT AND STORAGE CONDITIONS 16 8 MAINTENANCE AND SERVICE REPAIRS 16 9 WARRANTY TERMS AND CONDITIONS 16 Markings used in the OMM Option available Opt...

Page 3: ...ce of fire damper installation Manufacturing versions The mcr WIP type fire dampers may be manufactured as rectangular fire dampers rectangular fire dampers with circular connections round fire dampers Series of types of dimensions The mcr WIP type fire dampers are manufactured in the following dimensions width from 120 to 1 000 mm height from 160 to 1 000 mm rectangular fire dampers width 140 mm ...

Page 4: ...thout a return spring after applying voltage to the appropriate contact After widespread of the fire the damper closes after activation by the building fire protection system by applying voltage to the appropriate contact of the damper If dampers remain open during normal operation safety position air transfer closing them takes places automatically by actuation of the thermoelectric release manua...

Page 5: ...le conducting finishing work you should allow for the possibility of later access to the fire damper and removal of the release and control mechanism in order to carry out possible service work and technical inspections The mcr WIP fire dampers may be installed in the following space dividing elements walls or structural floors masonry concrete walls with a thickness of 120 mm brickwork walls or c...

Page 6: ...ially in a space dividing element a wall or structural floor that divides separate fire compartments i e in a previously prepared opening Next level and secure the fire damper so that it does not move For fire dampers with dimensions greater than 700 x 700 a strut should be used Once the above have been completed start manually the fire damper s partition blades assembly checking if it rotates cor...

Page 7: ...ectly When installing the mcr WIP type fire dampers ensure in particular that the thermal release fusible component is not damaged It should not be exposed to high temperature fire welders soldering irons which causes its actuation it is a component that has been designed to be used once only and will not be replaced under warranty Similarly the intumescent seals installed in the housing of the fi...

Page 8: ...nstallation of the protective grid for the mcr WIP type fire damper Protective grid thickness G shown in the figures should have 30 50mm depending on the thickness of the wall in 1 Grid blades 2 Internal frame 3 External frame 4 4 8 diameter rivet Modular protective grid for the mcr WIP type fire damper A modular protective grid may be supplied by the manufacturer of the fire damper or made by the...

Page 9: ...ations of the mcr WIP dampers modules can be made consisting of two or more dampers while maintaining the minimum distances between the dampers according to the drawing above 6 4 ELECTRICAL CONNECTIONS Once a fire damper has been correctly installed it is necessary to connect it to the electrical wiring system using the wiring system s cables if the fire damper is equipped with controls or other c...

Page 10: ...rating IP 54 IP 54 IP 54 IP 54 auxiliary switch activation point degrees 2 x PDT 3 0 5 A AC 250V 2 x PDT 3 0 5 A AC 250V 2 x SPDT 3 0 5 A 250 V 2 x SPDT 3 0 5 A 250 V 5 80 5 80 5 80 5 80 Torque motor spring 4 Nm 3 Nm 4 Nm 3 Nm 9 Nm 7 Nm 9 Nm 7 Nm Wire connection motor length 0 9 m auxiliary switch 2 x 0 75 mm2 6 x 0 75 mm2 2 x 0 75 mm2 6 x 0 75 mm2 2 x 0 75 mm2 6 x 0 75 mm2 2 x 0 75 mm2 6 x 0 75 m...

Page 11: ... T actuators Wiring diagram for BFL24 T BFL230 T BFN24 T and BFN230 T actuators Notice 24 V connection through a safety transformer Several actuators may be connected in parallel Power consumption should be monitored Notice 24 V connection through a safety transformer Several actuators may be connected in parallel Power consumption should be monitored ...

Page 12: ...d by the warranty conditions Technical data actuators EXBF 24 EXBF 230 Power supply 24 V AC 20 50 60 Hz 24 VDC 10 20 230 V AC 14 50 60 Hz Power demand when putting the spring under tension when in standby 7 W 2 W 8 W 3 W Apparent power 10 VA 12 5 VA IP rating IP 66 IP 66 Auxiliary switch activation point 2 x SPDT 6 A 3 max 250 V AC 5 80 2 x SPDT 6 A 3 max 250 V AC 5 80 Torque motor spring 18 Nm 12...

Page 13: ... NC type normally closed Wire no 7 8 NC type normally closed Warning Location of limit switches of the mechanism was shown for the damper safety position For proper operation of a device equipped with electrical actuators it is recommended that the rated voltage housed tolerance of 24V 2 or 230V 2 Power supply devices other than listed above may cause malfunction and will not be covered by the war...

Page 14: ...1 42 45 extension number 170 fax 058 341 39 85 8 am 4 pm Mon Fri 9 WARRANTY TERMS AND CONDITIONS 1 MERCOR S A gives a 12 month quality warranty for the products and unless an agreement provides otherwise the warranty period begins on the day of purchase 2 Should physical defects be identified in the warranty period MERCOR S A undertakes to rectify them no later than 21 days from the receipt of a w...

Page 15: ... in the following cases If the buyer warranty holder makes any modifications to the original design on their own i e without consulting MERCOR S A beforehand If the periodic technical inspections and maintenance are not carried out in time or are carried out by unauthorised persons or personnel of service stations not authorised by MERCOR S A or if the product have been used improperly If any tamp...

Reviews: