MAINTENANCE
SERVICE MANUAL NUMBER 24
Page 1B-18
90-861327--1 OCTOBER 1999
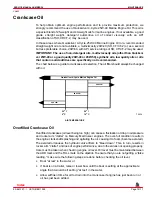
Checking Engine Oil Level / Filling
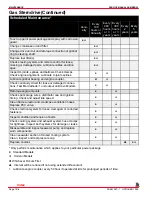
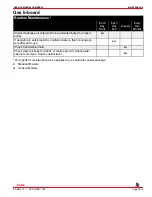
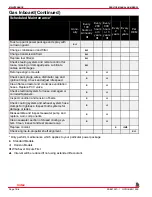
IMPORTANT: ENGINE CRANKCASE OIL MUST BE CHECKED AT INTERVALS
SPECIFIED IN “MAINTENANCE SCHEDULE” CHART. It is normal for an engine to use
a certain amount of oil in the process of lubrication and cooling of the engine. The
amount of oil consumption is greatly dependent upon engine speed, with
consumption being highest at wide-open-throttle and decreasing substantially as
engine speed is reduced.
1. Stop engine and allow boat to come to a rest.
2. Allow oil to drain back into oil pan - approximately 5 minutes.
3. Remove dipstick.
4. Wipe clean and reinstall. Push dipstick all the way into dipstick tube.
5. Remove dipstick and note the oil level.
6. Oil level must be between the FULL or OP RANGE and ADD marks.
7. If oil level is below ADD mark, proceed to Steps 8. and 9.
8. Remove oil filler cap from valve rocker arm cover.
9. Add required amount of oil to bring level up to, but not over, the FULL mark on dipstick.
Changing Oil and Filter
1. Start engine and run until it reaches normal operating temperatures.
IMPORTANT: Change oil when engine is warm from operation, as it flows more freely,
carrying away more impurities.
2. Stop engine.
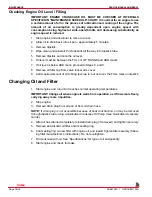
3. Remove drain plug from oil pan or from oil drain hose.
NOTE: If drain plug is not accessible because of boat construction, oil may be removed
through dipstick tube, using a Quicksilver Crankcase Oil Pump. (See Quicksilver Accessory
Guide.)
4. After oil has drained completely, reinstall drain plug (if removed) and tighten securely.
5. Remove and discard oil filter and its sealing ring.
6. Coat sealing ring on new filter with engine oil, and install. Tighten filter securely (follow-
ing filter manufacturer’s instructions). Do not overtighten.
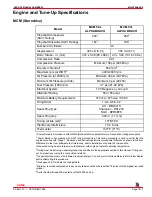
7. Fill crankcase with oil. See “Specifications” for type of oil and quantity.
8. Start engine and check for leaks.
Index

