CLOSED COOLED MODELS
SERVICE MANUAL NUMBER 24
90-861327--1 OCTOBER 1999
Page 6B-5
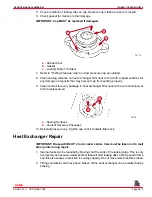
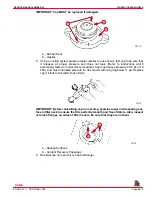
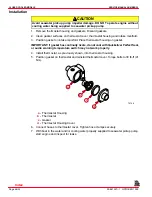
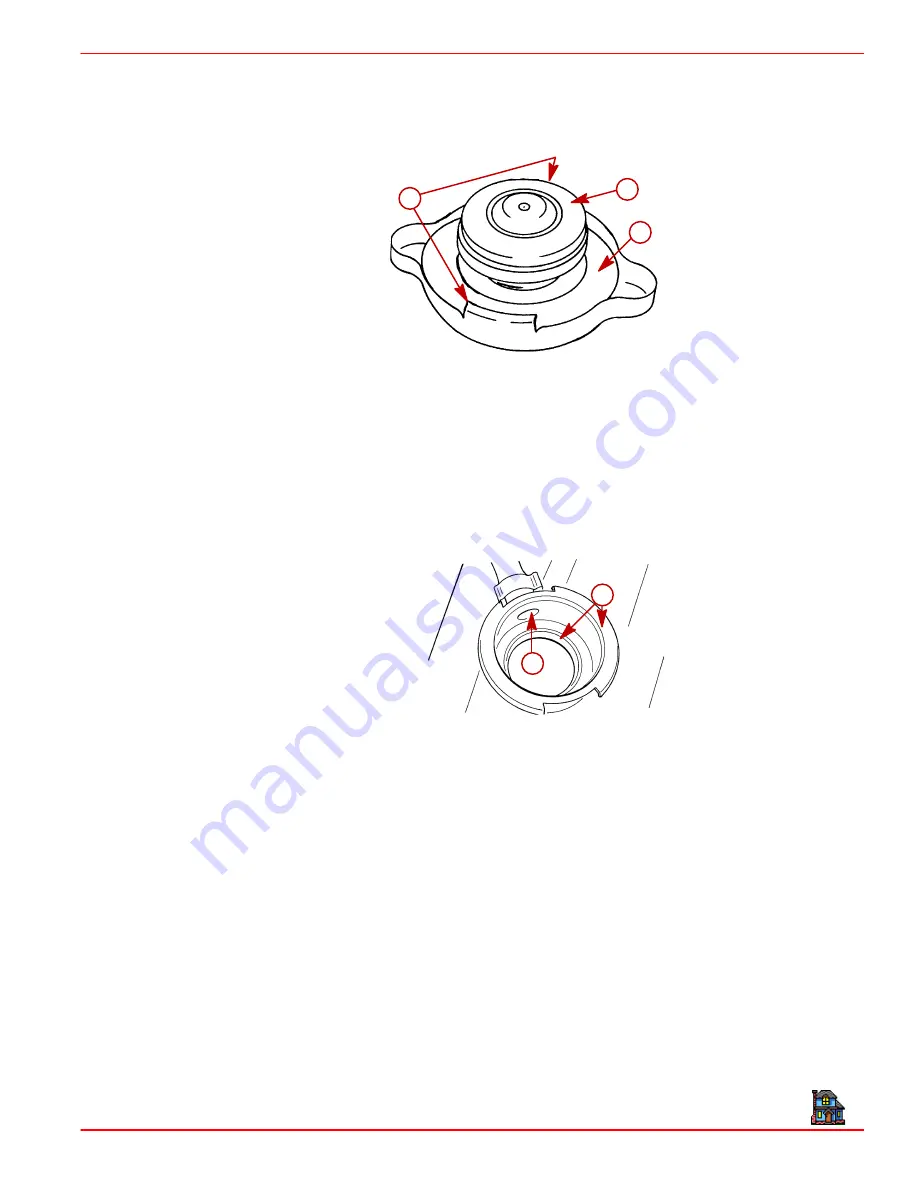
5. Check condition of locking tabs on cap. Replace cap if tabs are bent or cracked.
6. Check gasket for cracks or other damage.
IMPORTANT: Cap MUST be replaced if damaged.
72714
a
b
c
a -
Rubber Seal
b -
Gasket
c -
Locking Tabs (1 Hidden)
7. Refer to “Testing Pressure Cap” and test pressure cap as outlined.
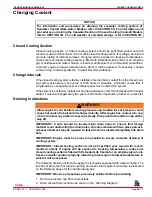
8. Clean sealing surfaces on heat exchanger filler neck with a cloth. Inspect surfaces for
any damage or deposits that may prevent cap from sealing properly.
9. Clean coolant recovery passage in heat exchanger filler neck with a wire and blow out
with compressed air.
72715
a
b
a -
Sealing Surfaces
b -
Coolant Recovery Passages
10. Reinstall pressure cap. Tighten cap until it contacts filler neck.
Heat Exchanger Repair
IMPORTANT: Braze with BCUP 2 rod or silver solder. Care must be taken not to melt
other joints during repair.
1. Internal leaks can be repaired by brazing shut the ends of the leaking tube. This is only
a temporary fix because usually another tube will start leaking after a short period of time
and this also causes a reduction in cooling capacity. Do not close more than three tubes.
2. Fittings and drains that have been broken off the heat exchanger can be reattached by
brazing.
Index

