90-823224--2 796
454 CID (7.4L) / 502 CID (8.2L) - 3A-39
Cleaning and Inspection
1. Wash all parts in cleaning solvent and dry with
compressed air.
2. Inspect pump body and cover for cracks or ex-
cessive wear.
3. Inspect pump gears for damage and excessive
wear.
4. Check for loose drive gear shaft in pump body.
5. Inspect inside of pump cover for wear that would
permit oil to leak past ends of gears.
6. Inspect pickup screen and pipe assembly for
damage to screen and pipe.
7. Check pressure regulator valve for fit.
IMPORTANT: Oil pump is not serviceable. If any
parts are worn or damaged, replacement of entire
pump assembly and pickup tube is necessary.
Reassembly
IMPORTANT: Oil internal parts liberally before in-
stallation.
1. Install pressure regulator valve and related parts.
2. Install drive gear in pump body.
3. Install idler gear in pump body with smooth side
of gear toward pump cover opening. Align marks
made in disassembly.
4. Fill gear cavity with engine oil.
5. Install pump cover and torque attaching screws
to 80 lb. in. (9 N·m).
6. Turn extension shaft by hand to check for smooth
operation.
Installation
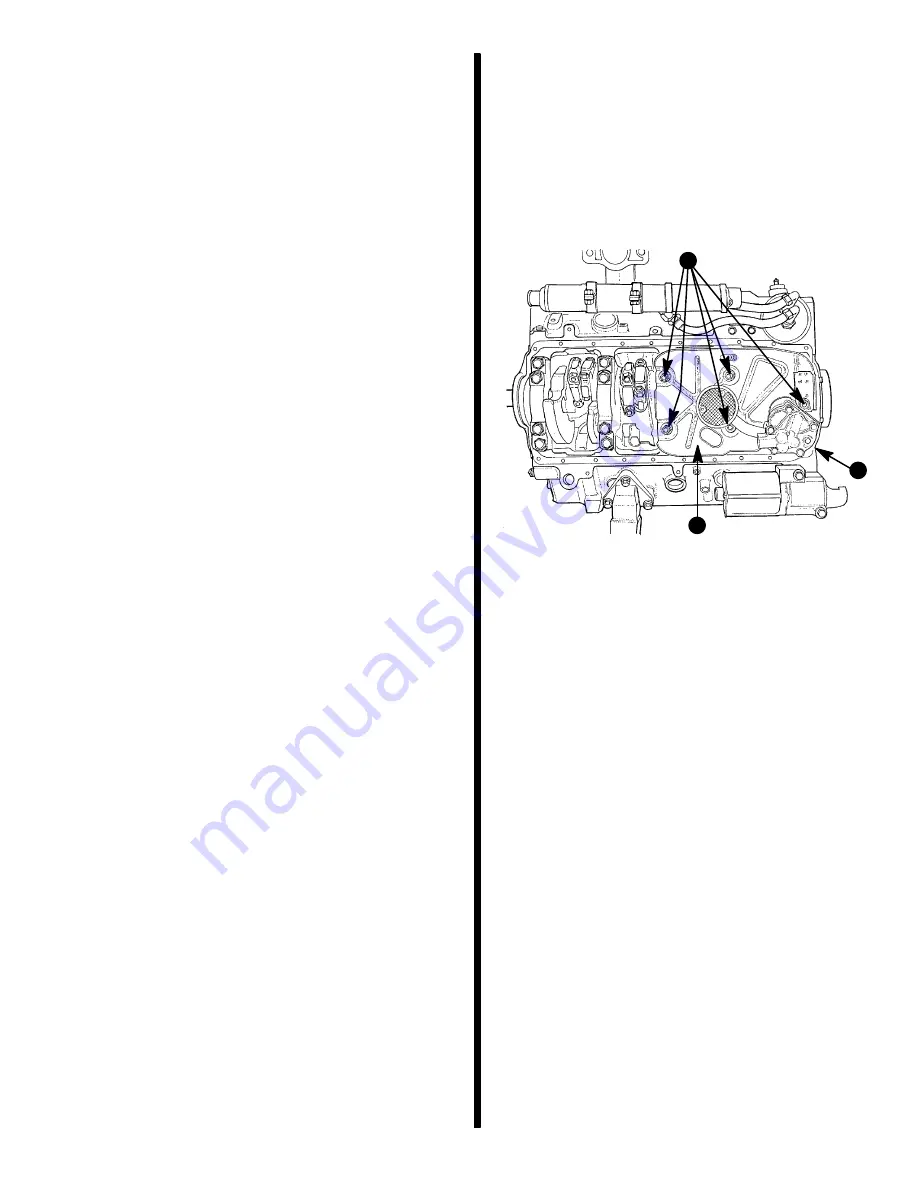
1. Install pump, with extension shaft, to rear main
bearing, aligning extension shaft with distributor
drive shaft.
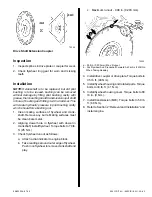
2. Install baffle. Tighten baffle nuts to 25 lb. ft. (34
N·m). Tighten oil pump bolt to 70 lb. ft. (95 N·m).
b
c
72545
a
a - Nuts (5)
b - Baffle
c - Oil Pump
3. Install oil pan as outlined. The one-piece gasket
for the oil pan may be reused if still pliable and not
cracked, torn, etc.
Torsional Damper
Removal
1. Remove drive belts.
2. Remove drive pulley and water pump pulley, then
remove torsional damper retaining bolt.

