9
TE9000 / 93000 Service
5. CLEAN ANCHOR PIN BUSHES, ANCHOR
BRACKET AND CAM HEAD
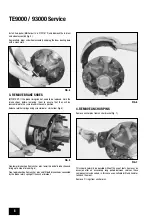
Using a wire brush, clean each side of the anchor bracket in the area of
anchor pins, clean the bore of the anchor pin bushes, if necessary using
emery cloth.
Clean working surfaces of cam head using strip of coarse emery cloth.
Apply a small amount of grease to the bores of the anchor pin bushes and
smear a thin coating of grease on both sides of the anchor bracket around
the anchor pin bushes.
If the axle is fitted with anti-lock sensors, clean exposed sensor with a
cloth and push sensor from rear until it protrudes fully forwards.
6. CLEAN SPINDLE
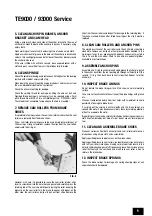
Check the spindle for damage and remove any fretting/rust on the bearing
journals with medium emery cloth strip.
Clean down the oil seal mounting wiping brake dust and rust away from
the area immediately behind the seal journal.
Check the oil seal mounting for damage.
Check the spindle thread for damage by fitting the end nut by hand.
Provided thread damage is not severe it can be repaired using a 2mm
pitch thread file or M36 x 2 die nut (Meritor part no. 21224408). (Note:
The thread is not accessible for repair once the hub is mounted.)
7. REMOVE CAM ROLLERS FROM BRAKE
SHOES
It is preferable to always renew the cam roller retainer clips when the cam
rollers are removed from the brake shoes.
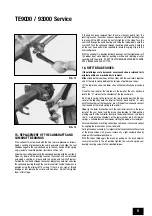
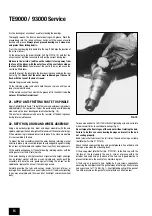
If new cam roller retainer clips are to be used simply prise rollers out of
shoes using a strong screwdriver, remove the clips from the cam rollers
and discard them (fig. 8).
However, with care it is possible to reuse the cam roller retainer clips,
insert a screwdriver into the hole in brake gusset and carefully press the
retaining tab of the cam clip whilst gently pulling the roller, keeping the
pressure on the cam roller turn the brake shoe over and repeat on the
other side, the cam roller and clip will pull out from shoe. Remove the
clips from the cam rollers and inspect for damage to the retaining tabs, if
they have cracked, broken off or failed to spring out the clip it must be
replaced.
8. CLEAN CAM ROLLERS AND ANCHOR PINS
The working surfaces of the cam rollers and the anchor pins should be
cleaned to remove any build up of compressed debris adhered to the
working surfaces. In our experience the quickest and easiest way to do
this is to use the wire wheel fitted to one end of a pedestal grinder,
available in most workshops.
9. ASSEMBLE ANCHOR PINS
Assemble one ‘O’ ring to anchor pin and apply grease to anchor pin, install
in the anchor bush from the rear pushing pin through sufficiently to fit the
second ‘O’ ring, then push back to central position. Repeat for other
anchor pin.
10. INSPECT BRAKE LININGS
Do not disturb the brake lining surface if this shows a normal working
surface.
Take care not to contaminate the surface of the brake linings with grease
etc.
Clean out compressed debris from rivet holes with screwdriver to avoid
possibility of damage to brake drum.
If carrying out the service in winter months and the brake linings are
soaked with water it may be necessary to dry these by careful application
of heat to evaporate the water.
Brake lining surface may be carefully linished by hand using coarse emery
cloth if contaminated by dirt, mud etc., but do not use any form of power
tool.
11. CLEAN AND ASSEMBLE BRAKE SHOES
Clean any corrosion from both anchor pin and cam roller pivot areas on
brake shoes using emery cloth and a screwdriver.
Apply specified grease to pivots areas on the brake shoes.
Apply specified grease to cam rollers, reassemble cam clips onto rollers
and refit cam rollers into shoes making sure retainer tabs locate in the
holes in the brake shoe gussets. Wipe excess grease from surface of cam
roller that contacts the cam head and make sure cam roller is free to
rotate in the brake shoe.
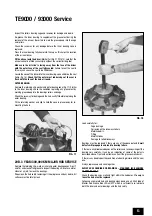
12. INSPECT BRAKE SPRINGS
Check the brake springs for damage, any spring showing signs of coil
separation should be replaced.
FIG. 8


