Section 3
Prepare Parts for Assembly
Copyright 2002
Maintenance Manual MM-0230
Page 14
ArvinMeritor, Inc.
Issued 07-02
3.
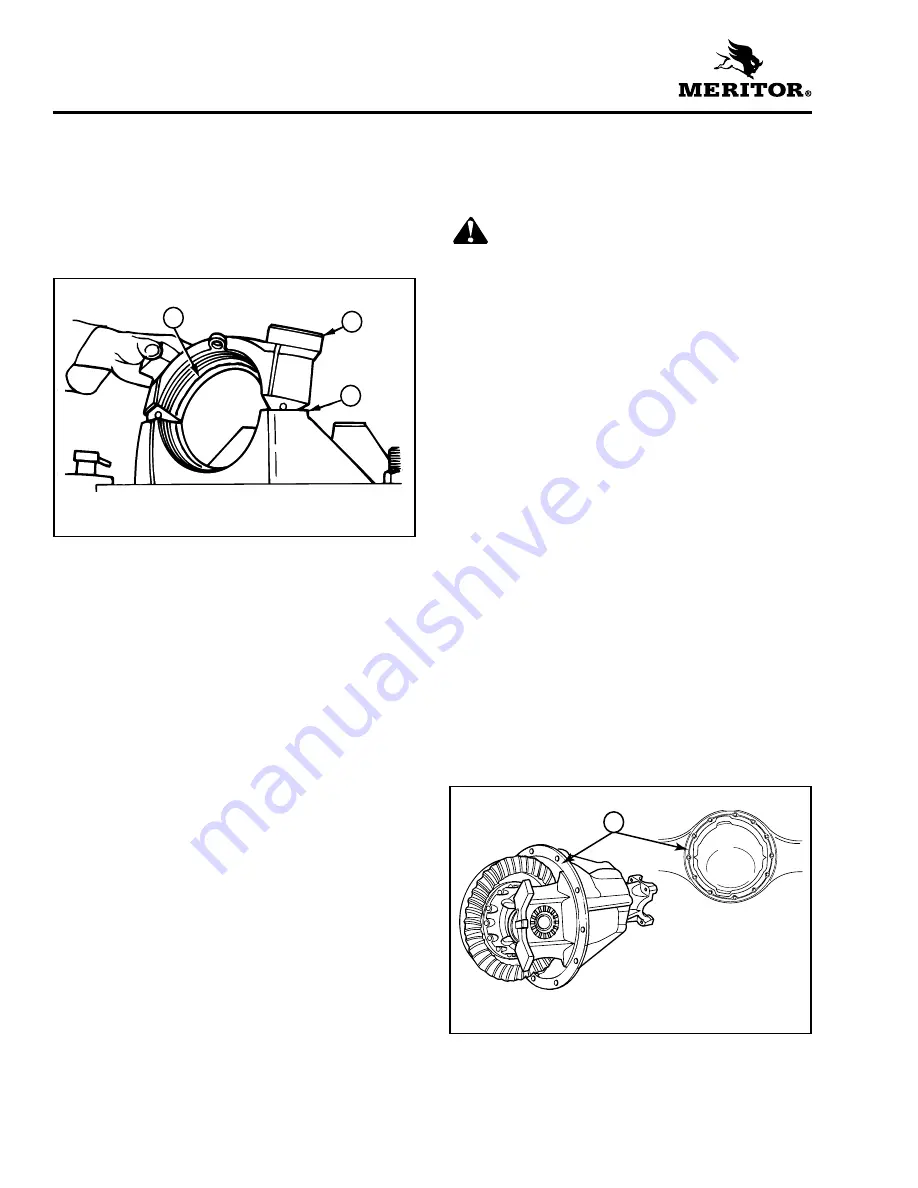
Apply a single continuous bead of adhesive to
the bearing bores in the carrier and bearing
cap. Apply the adhesive around the
circumference of the smooth, ground surfaces
only. On the integral cap side, apply the
adhesive near the thread end. Do not apply
adhesive onto the threaded areas. Figure 3.12.
NOTE: Meritor specification 2297-T-4180 adhesive
will dry in approximately two hours. Perform
Steps 4 and 5 within two hours from the time you
apply the adhesive. If two hours have passed since
application, clean the adhesive from the parts and
apply new adhesive.
4.
Install the main differential assembly, bearing
cups and bearing cap into the carrier. The
bearing cup of the integral bearing cap side
must be assembled from the thread side. Refer
to Section 4. Remove excess adhesive after
assembly.
5.
Adjust the preload of the differential bearings,
backlash and tooth contact patterns of the
gear set as required. Refer to Section 4.
Applying Three Bond 1216, or
Equivalent, Silicone Gasket
Material
WARNING
When you apply some silicone gasket materials,
small amounts of acid vapor are present. To
prevent serious personal injury, ensure that the
work area is well ventilated. If the silicone gasket
material gets into your eyes, flush them with
water for 15 minutes. Have your eyes checked by
a physician as soon as possible.
NOTE: The following silicone gasket products or
equivalent can be used for Meritor components:
O
Three Bond Liquid Gasket number TB 1216
(Grey)
O
Loctite
®
Ultra Grey Adhesive/Sealant number
18581
O
Meritor part number 2297-F-7052 gasket
material. To obtain this gasket material, refer to
the Service Notes page on the front inside cover
of this manual.
1.
Use a tool with a flat blade, if required, to
remove all old gasket material from surfaces.
Figure 3.13.
2.
Use a cleaning solvent to clean the surfaces
where you will apply silicone gasket material.
Remove all oil, grease, dirt and moisture
without damaging the mating surfaces.
Figure 3.13.
3.
Dry surfaces.
Figure 3.12
1
ADHESIVE
2
BEARING CAP
3
CARRIER LEG
1
2
3
Figure 3.13
1
Remove old sealant material.
HOUSING AND CARRIER SHOWN
1


