17
WIRING
24 V BAT
POW
24 V
POWER BOARD
THE PROTECTOR SYSTEM™ (IR BEAMS) (OPTIONAL)
NOTE: Merlin strongly recommends that The Protector System™ (IR Beams) be installed on all gate openers.
Compatible Protector System™ (IR Beams) are 772ANZ and GPS15 Monitored Safety Beams.
The Protector System™ (IR Beams) can be configured to function differently when connected to IR1, IR2 or IR3
inputs.
1. Connect the Protector System™ (IR Beams) to IR1/GND or IR2/GND and or IR3/GND.
2. The IR Beams can be configured to monitor in the open or close direction or both (see section 23 IR Behaviour).
3. The IR Beams will automatically learn to the opener after they have been connected and are default to monitor the close direction.
4. If you need to remove the IRs, you will need to unlearn them from the opener. This is done by switching off the mains power off
and on again twice.
INSTALL ENTRAPMENT PROTECTION DEVICES
16
EDGE SENSOR
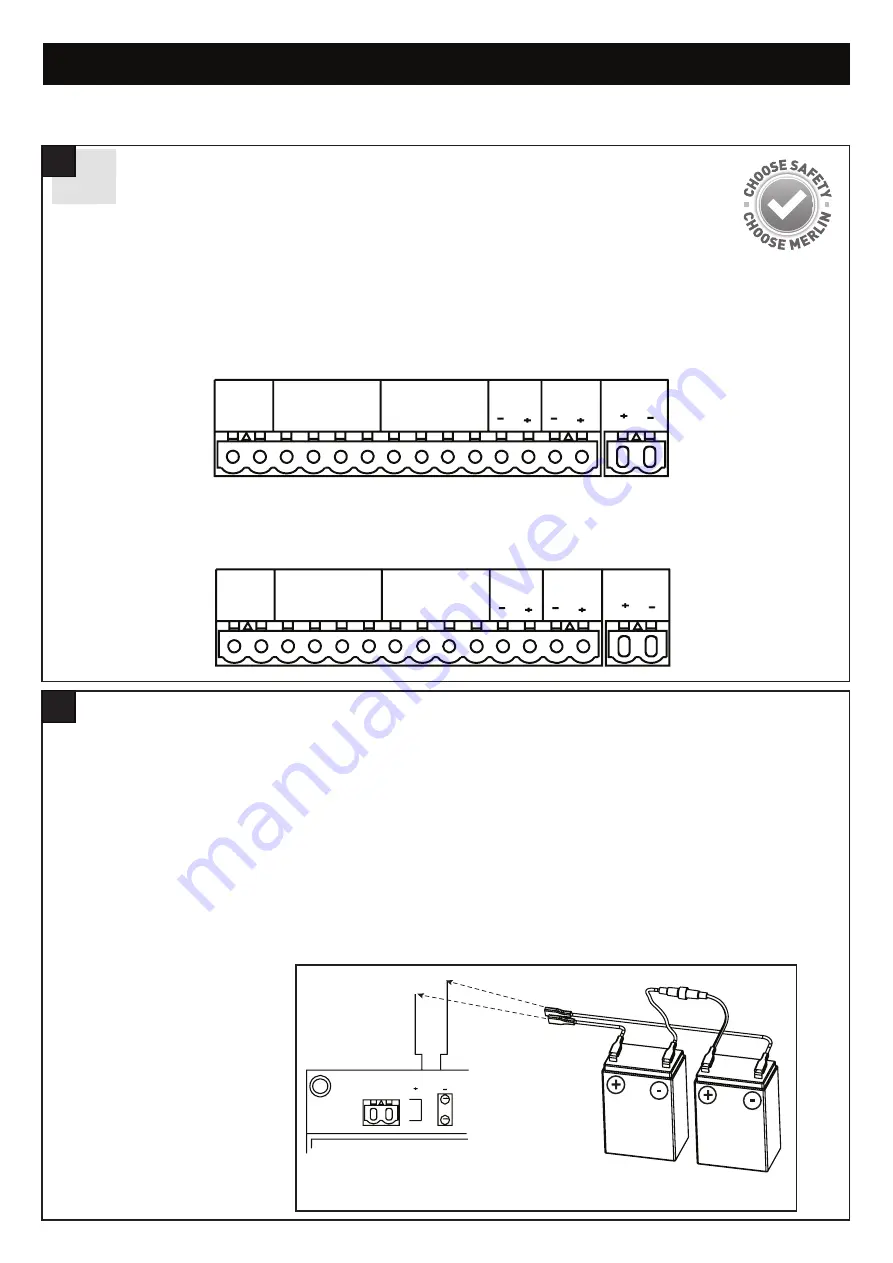
The Edge sensor can only be connected to the Edge inputs.
1. Remove the 8.2k resistor from the Edge inputs.
2. Connect the 8.2k compatible edge sensor to the Edge inputs.
EDGE
SE SE
IR SENSOR
GND IR3 IR2 IR1
COMMAND
GND IN3 IN2 IN1
FLA
E-LK
SPEC
EDGE
SE SE
IR SENSOR
GND IR3 IR2 IR1
COMMAND
GND IN3 IN2 IN1
FLA
E-LK
SPEC
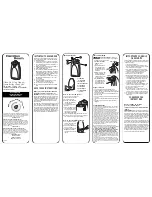
BATTERY BACKUP (OPTIONAL)
17
The batteries are charged in the circuit by the integrated transformer. Recommended items for a battery backup application (separate
accessory purchase) 2 x 12V 2.2Ah SLA batteries (model MGBBU).
1. Disconnect AC power to the opener.
2. Insert the battery power wires through the same hole as the AC power wires.
3. Connect the battery cable to the BATTERY terminals on the power board.
4. Place the batteries inside the opener.
5. Connect a jumper with an in-line fuse (10A) between the positive (+) terminal on one battery and the negative (-) terminal on the
other battery.
6. Connect the positive battery cable wire to the positive (+) terminal on the PCB.
7. Connect the negative battery cable wires to the negative (-) terminal on the PCB.
8. Reconnect AC power to the opener.
9. Place cover on the opener.


