33
WIRELESS PROGRAMMING
MYQ SETUP – MYQ GATEWAY INSTALLATION (OPTIONAL) CONTINUED
45
Step 2 – Register The myQ Gateway & Add Devices
Once you have successfully created your myQ® account, you must add the myQ® Gateway to the account. It is easy to do from
your Internet enabled smartphone or tablet.
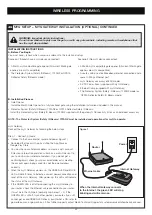
• To add the myQ® Gateway to your account, the GREEN LED on the myQ® Gateway must be on continuously. If the GREEN
LED is not continuously on, see Step 1, Connect & Create. The myQ® Gateway must have an Internet connection for the phone
to find it.
• Using the myQ® app, add the myQ® Gateway. Click on the plus symbol icon (bottom right corner), select “Device” then select
“Internet Gateway” to add the myQ® Gateway.
• If this is the first myQ® Gateway connected to the account, the screen may already be at the step of “Register Gateway”. You will
need the SERIAL NUMBER from the bottom label of the myQ® Gateway. The serial number is a series of ten characters, 0 – 9 or
a – f. Be sure to use the correct characters (e.g., a zero “0” instead of an “O”) and keep the character spacing correct (XXXX-XXX-
XXX).
• Name the myQ® Gateway (e.g., “123 Main Street” or “Home Sweet Home”). Click “Save and Close” to complete this step.
• You can add myQ® devices like the gate opener from the “Device Management” screen in the app. Under “HUBS”, select your
Gateway, click “Add New” and select a device to add, then follow the steps to complete the set-up. Once you click NEXT you
have 3 minutes to go to the gate opener and press it's learn button.
• The myQ® Gateway will pair to the opener. Once a device is programmed, it will appear on the screen. You can then name the
device (e.g., front gate, etc.). The Blue LED light on the Gateway indicates an opener is paired to the Gateway.
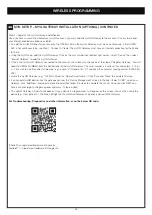
For Troubleshooting, Diagnostics and other information, scan the below QR code:
iPhone® is a registered trademark of Apple Inc
Android™ is a registered trademark of Google Inc.
Summary of Contents for MGLDK
Page 43: ...43 NOTES...


