background image

34

OPERATION AND MAINTENANCE

ERROR CODES

46

To reduce the risk of SEVERE INJURY or DEATH:
• Disconnect ALL power BEFORE performing ANY maintenance.
• ALL maintenance MUST be performed by a professional installer.
• ALWAYS wear protective gloves and eye protection when changing the battery.
• If the supply cord is damaged, it MUST be replaced by the manufacturer, its service agent or similarly 
qualified persons in order to avoid hazard.

Error


Problem

Action Required

How to Clear

ERR: 
APPLICATION

• 

AP is set to 00

• 

Motor application type 
not selected

• 

Check if AP is set to 00. 

• 

If yes, change to correct application setting.

• 

Reset Basic Settings

• 

Press and hold ‘P’ for 5 
seconds to open the Main 
menu.

• 

Scroll though and select 
the correct Motor 
Application.

• 

Press ‘C’ to confirm.

• 

Complete Basic Settings if 
required.

• 

Press and hold P to exit.

ERR: IR1
ERR: IR2
ERR: IR3

• 

IR# is not connected, 
or open circuit

• 

IR# wire has a short 
circuit

• 

IR# is connected 
reverse polarity

• 

IR# is not aligned 
correctly

• 

IR# is sensing an 
obstruction

• 

Check the Protector System has been installed 
and connected correctly.

• 

Check the cables for any breaks or damage.

• 

Check for a short between the IR terminals

• 

Check polarity of the installed Protector System

• 

Check for incorrect accessories wired into the IR 
terminals.

• 

Check the Protector System for alignment or an 
obstruction.

• 

Auto reset once 
obstruction is clear or 
Protector System is 
realigned. (may take up to 
16 seconds)

ERR: SAFETY 
EDGE

• 

The Safety Edge is not 
connected

• 

The Safety Edge is not 
connected with an 
8.2KΩ resistor

• 

The Safety Edge has a 
short circuit

• 

The Safety Edge being 
pressed

• 

Check the Safety Edge has been installed and 
connected correctly.

• 

Check the 8.2KΩ resistor is connected.

• 

Check for a short in the cabling

• 

Check for incorrect accessories wired into the 
Safety Edge terminals.

• 

Check the Safety Edge is not being pressed. 

• 

Auto reset once Safety 
Edge is not pressed (may 
take up to 16 seconds)

ERR: STOP 
INPUT

• 

STOP switch is open

• 

STOP Switch is not 
connected

• 

Check if the STOP switch is open circuit or 
damaged.

• 

Check if the STOP switch has been 
disconnected. If so, reconnect, or install a small 
loop wire to replace the STOP switch closed 
contact.

• 

Auto reset once the issue 
has been resolved. (may 
take up to 16 seconds)

ERR: 
MAGNET

• 

Limit Switch Sensor is 
not connected or is 
connected incorrectly.

• 

Limit Switch Magnet 
and Limit Switch 
Sensor not aligned.

• 

The fuse is blown

• 

Check if the Limit Switch Sensor is connected 
correctly.

• 

Check if the Limit Switch Magnet and Limit 
Switch Sensor are aligned.

• 

Check if the fuse is blown.

• 

Auto reset once the issue 
has been resolved. (may 
take up to 16 seconds)

Summary of Contents for MGLDK

Page 1: ...Gate Opener MGLSK MGLDK MGLSK LV MGLDK LV Installation and Operating Instructions Owners Copy SAVE THESE INSTRUCTIONS for future reference gomerlin com au gomerlin co nz Visit the Swing L 300 landing...

Page 2: ...ates a potentially hazardous situation which if not avoided could result in death or serious injury Indicates a potentially hazardous situation which if not avoided could result in minor or moderate i...

Page 3: ...y respecting the given safety distances in accordance with the AS NZS 60335 1 in conjunction with AS NZS 60335 2 103 and or with safety devices e g safe edge Testing of the safety function of the driv...

Page 4: ...Learning 20 Remote Control Behaviour 20 IR Behaviour 20 Input Command 21 Pedestrian Command 21 Delay Motor 2 in Open and Close Direction 21 22 Timer To Close TTC 22 Reversal Time 23 E Lock Ram Blow Mo...

Page 5: ...g SPECIFICATIONS SWING L 300 MGLSK MGLDK MGLSK LV MGLDK LV 1 1 2 3 4 5 6 7 8 9 10 11 12 13 Manual 14 Quick Reference guide 15 SALES KIT INVENTORY MGLSK MAINS VOLTAGE 240V OR MGLSK LV LOW VOLTAGE 24V S...

Page 6: ...Live Post Bracket 7 2 x Hairpin Clip 8 Clevis Pin 9 8 x M8x60 Masonry Anchors 10 2 x Gate Mounting Bracket 11 4 x M10x30 Bolts 12 2 x 13mm Bolt and Washer 13 2 x Four Button Remotes E970M 14 Quick Ref...

Page 7: ...4V SWING GATE OPENER LINEAR ACTUATOR DUAL KIT OVERVIEW OF THE GATE OPENER 4 Gate Opener MGLX Remote Control Single Swing Gate Control Box MGEB or MGEB LV Control Box MGEB or MGEB LV Gate Opener MGLX R...

Page 8: ...MGLDK LV low voltage 24V sales kit Transformer Box mounted near 240V power supply MGTR3 120VA NOTE Only required for MGLDK LV low voltage 24V sales kit Gate Opener MGLX Remote Control Single Swing Ga...

Page 9: ...se to the opener by a licensed electrician 2 The 24V AC opener will require a low voltage power supply from the transformer box MGTR3 120VA to the gate opener 3 The recommended cable sizes for the con...

Page 10: ...55mm Max 350mm w o hardstops Max 300mm with hardstops 95mm 137mm figure 1 figure 2 figure 3 DETERMINE THE POSITION OF THE POST BRACKET 7 1 Determine the A and B dimension in base on the opening angle...

Page 11: ...osition the gate mounting bracket as shown figure 3 6 Temporarily secure the gate bracket to the gate with a clamp 7 Manually open and close the gate to the required positions Ensure the opener does n...

Page 12: ...not supplied 4 Move the gate to the open position and secure the hardstop in the desired position using the Allen key Re engage the release mechanism 5 If the internal opener hardstops are not used i...

Page 13: ...pping It is advised that you must have full view of the gates when programming the logic board Install the control box in an appropriate and accessible position The installation has to be done in acco...

Page 14: ...otor1 Connection NOTE The opener wired to the MOTOR 1 terminal will always open first and close last 1 Feed the motor1 cable through the selected cable gland 2 Connect motor cables to the MOTOR1 termi...

Page 15: ...5 5 9 10 12 10 0 0 0 0 4 3 2 1 1 2 3 3 1 2 1 2 12 13 14 4 11 10 9 8 7 6 5 1 3 2 3 4 2 1 3 2 1 2 1 3 2 1 3 2 1 2 1 1 2 1 2 2 1 2 1 1 2 1 2 5 4 3 2 1 6 7 8 9 10 2 1 1 1 1 2 1 1 1 1 IN1 IN1 IN2 IN2 IN3...

Page 16: ...nsor can only be connected to the Edge inputs 1 Remove the 8 2k resistor from the Edge inputs 2 Connect the 8 2k compatible edge sensor to the Edge inputs EDGE SE SE IR SENSOR GND IR3 IR2 IR1 COMMAND...

Page 17: ...change the value on display The programming of the boards is divided in two steps 1 Basic including Initial Setup 2 Advanced Password Protected Settings Initial Set up includes Selection of motor typ...

Page 18: ...E Lock E Lock 30 Ram Blow Setup additional electronic lock E Lock or Mag Lock options 31 Flashing Light Setup flashing light accessory 32 Pre Flashing Adjust pre flashing of flashing light accessory 3...

Page 19: ...splayed on the LCD 5 Press the P button to select The screen will change to show PRESS HOLD GATE OPENING YES P NO S 6 Press and hold The gate will start to move a If it moves in the OPEN direction pre...

Page 20: ...tons to navigate through the options 3 You can select the following options OPEN CLOSE OPEN OPEN STOP CLOSE STOP OPEN STOP CLOSE OPEN OPEN ONLY 4 To confirm the setting press the P button to save and...

Page 21: ...ing options No Second Delay Second Delay 3 Second Delay 4 Second Delay 4 To confirm the setting press the P button to save and return to the main menu screen S P MAIN MENU DELAY MOTOR 2 OPEN figure 1...

Page 22: ...ELAY MOTOR 1 CLOSE figure 1 TIMER TO CLOSE TTC 29 Within the Basic Setting navigate through the menu screen until you find MAIN MENU TIMER TO CLOSE 1 Press the P button to enter this setting figure 1...

Page 23: ...COND REVERSAL S P REVERSE TO LIMIT S P CLOSE REV TO OPEN LIMIT OPEN REV 2 SECONDS figure 1 figure 2 figure 3 figure 4 BASIC SETTINGS E LOCK 31 Within the Basic Setting navigate through the menu screen...

Page 24: ...U FLASHING LIGHT 1 Press the P button to enter this setting figure 1 2 Press the or buttons to navigate through the options 3 You can select the following options Disabled Continuous Flashing 4 To con...

Page 25: ...ind MAIN MENU SOFT HARD START SETTING 1 Press the P button to enter this setting figure 1 2 Press the or buttons to navigate through the options 3 You can select the following options Soft Hard Start...

Page 26: ...WORD CHANGE PASSWORD S P ENTER OLD PW 0000 S P ENTER NEW PW 0000 figure 1 figure 2 figure 3 CHANGE PASSWORD 1 Navigate the Menu screen till you get to MAIN MENU PASSWORD by pressing the and or buttons...

Page 27: ...e force by 15 30 or 50 4 To confirm the setting press the P button to save and return to the main menu screen PASSWORD 38 ENTER PASSWORD 1 Navigate the Menu screen till you get to MAIN MENU PASSWORD b...

Page 28: ...you find MAIN MENU SPEED MOTOR 1 2 CLOSE PW 1 Press the P button to enter this setting figure 1 2 Press the or buttons to navigate through the options 3 You can increase the speed by 10 20 30 or 50 In...

Page 29: ...this setting figure 1 2 Press the or buttons to navigate through the options 3 You can select the following options Execute Factory Reset Exit 4 To confirm the setting press the P button to save and...

Page 30: ...NDBY screen NOTE The transmitter s supplied with your opener are preprogrammed by the factory If you purchase additional transmitters the gate opener must be programmed to accept the new transmitter c...

Page 31: ...n gate opener is installed Purchase the gate myQ Connectivity Kit that includes 1 x myQ Gateway and 1 x 772ANZ Protector System Safety IR Beams Ensure the 772ANZ Protector System Safety IR Beams or GP...

Page 32: ...the gate myQ Connectivity Kit or as an individual accessory NOTE The Protector System Safety IR Beams 772ANZ must be installed and operational for myQ to operate myQ Gateway Connect the myQ Gateway b...

Page 33: ...BER from the bottom label of the myQ Gateway The serial number is a series of ten characters 0 9 or a f Be sure to use the correct characters e g a zero 0 instead of an O and keep the character spacin...

Page 34: ...m Check for incorrect accessories wired into the IR terminals Check the Protector System for alignment or an obstruction Auto reset once obstruction is clear or Protector System is realigned may take...

Page 35: ...te Auto reset once the issue has been resolved may take up to 16 seconds ERR MOTOR1 RPM ERR MOTOR2 RPM Motor is stalled or RPM is damaged Check if the motor is stalled or RPM is damaged Auto reset onc...

Page 36: ...t shown 18 002A2331 6 Pin Wire Harness not shown 19 Model Vary Flashing Lamps not shown 20 Model Vary Sounders not shown 21 PU100 Emergency Stop Switch not shown 22 AT000 Timer 24h not shown WARNING T...

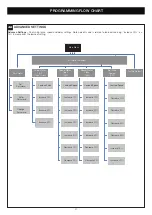
Page 37: ...GGS1000 Articulated Arm Single Articulated Arm Dual Linear Arm Single Linear Arm Dual 2nd Direction Motor 1 Press Hold Gate Opening Yes P no S Change Direction P to Execute 3rd Direction Motor 2 Chang...

Page 38: ...ontrol Behaviour Open Only Open Stop Close Stop Open Stop Close Open Open Close Open IR 1 2 3 Behaviour IR1 2 3 CLOSE DIR IR1 2 3 OPEN DIR IR1 2 3 OPEN CLOSE DIR IR1 2 3 CLOSE DIR IMMEDIATE CLOSE Inpu...

Page 39: ...ing TTC 20 Seconds Setting TTC 30 Seconds Setting TTC 45 Seconds Setting TTC 1 Minute Setting TTC 2 Minutes Setting TTC 3 Minutes Setting TTC 5 Minutes Disable Ram Blow 1 Second Ram Blow 2 Seconds Rev...

Page 40: ...30 Seconds 45 Seconds 60 Seconds 90 Seconds Soft Hard Start Setting 120 Seconds 180 Seconds 240 Seconds 300 Seconds Disabled 1 Second 2 Seconds 3 Seconds 4 Seconds 5 Seconds Soft Start Enabled Hard S...

Page 41: ...Increase 30 Increase 50 Soft Stop Speed PW Factory Default Learned Speed Decrease 10 Decrease 20 Decrease 30 Decrease 50 Increase 10 Increase 20 Learned Speed Increase 10 Increase 20 Increase 30 Incre...

Page 42: ...or gomerlin co nz warranty Get Connected with Visit www gomerlin com au or www gomerlin co nz for more details Additional purchase of the myQ Connectivity Kit is required to enable myQ functionality D...

Page 43: ...43 NOTES...

Page 44: ...period if you are concerned that the Unit may be defective call the Professional Dealer that sold installed the opener or our service centre on the toll free number below and a Chamberlain technician...

Reviews: