background image

 C

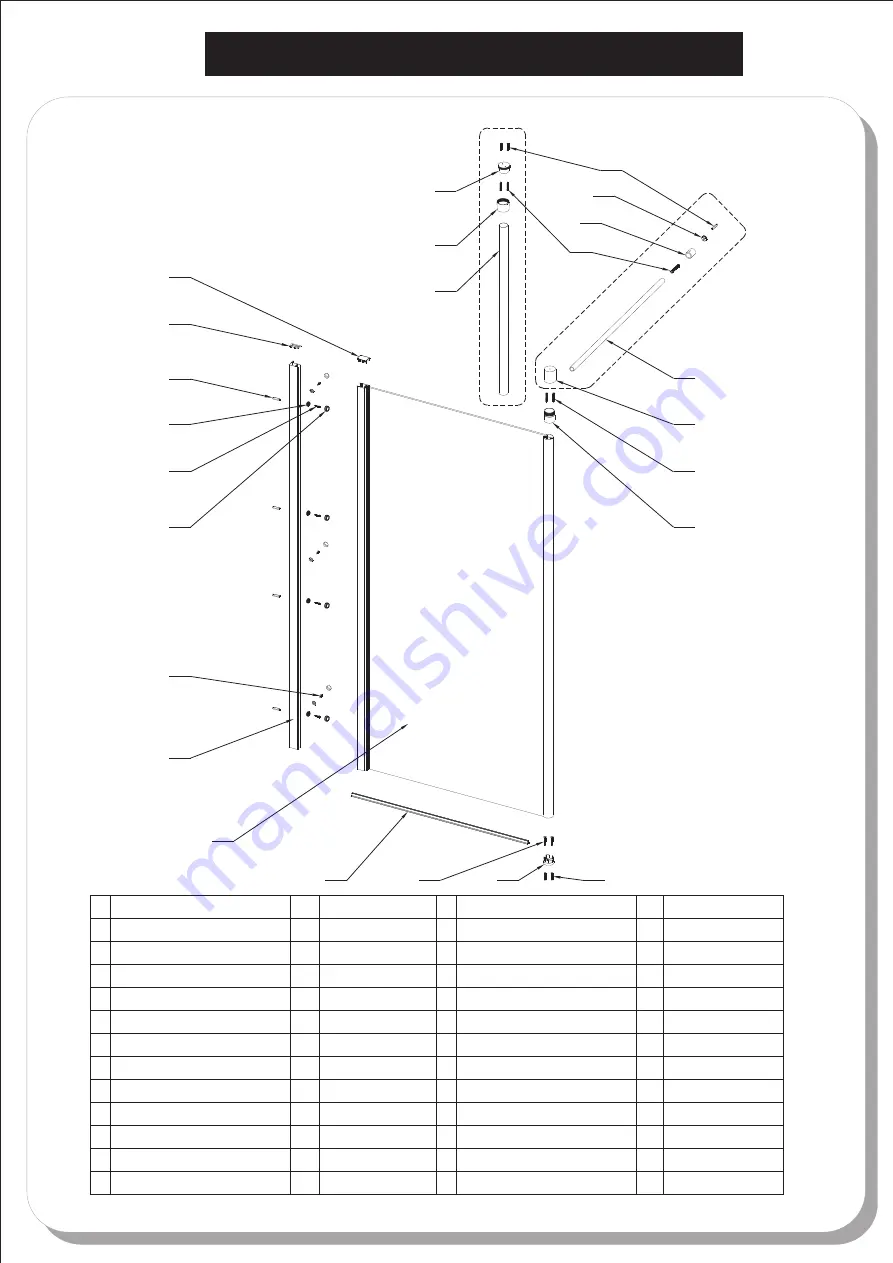
OMPONENTS AND BOX CONTENTS

1


Support


bar


ferule

Horizontal


support


bar


holder


Small


fixing wall


1

Screw cover cap


Bottom


water


seal


Cover cap for wall profile

6 30 wall plug

X

Screw cover cap 


clip

Wall


profile

Top


cover


cap L/R

6

5

2

9

8

7

10

11

12

13

14

15

1

3

Description

No.

QTY

Description

QTY

Part No.

No.

Part No.

1

1

3

6

3

1

1

2

1

1

B


head


screw ST4 30

X


Note:Further part details for fixing kit available on page 2

3

4

B head screw ST4 12

X


6

Small


fixing wall


2

V6


V4111

Flat


fixed


panel

Bottom fixed bracket


Rail


to wall

16

A

6

7

4

3

2

5

8

9

1

1 0

11

1 3

1 5

1 4

18

19

17

1 6

1 2

2 0

ST5 50 countersunk screw

X


countersunk screw

ST4 40 

X

17

18

19

20

 ST5

X

50 countersunk screw


wall plug

X

7 36 

V6MLN05

V6LP8076L/R

V6113

V2114

V2115

V4110

V6BM31950

V6H081100

V8123

V4115

V6S6SW05

V6ST4 40

X

V8119

V1121

V4115

V8121

V8122

V8125

2

1

1

1

2

1

1

4

2 1

2 2

2 3

21

22

23

Rail


to ceiling

Vertical


cover


sleeve


Vertical


ceiling


mount


1

1

1

V1120

V6S6SW07A

V8118

Rail


ferule

Wall


mount

6

7

4

3

2

5

8

9

1

10

11

13

15

14

18

19

17

16

12

20

21

22

23

20

Summary of Contents for 6 Series

Page 1: ...y The wall plugs supplied with the installation kit are for use in solid walls Hollow or stud partition walls will require alternative fixings Please consult a hardware supplier for the correct type It may also be necessary to consult your tiling supplier about the correct method for drilling your tiles VIVID 10 IMPORTANT Any parts missing or damaged must be reported to your supplier within 5 days...

Page 2: ...e 2 3 4 B head screw ST4 12 X 6 Smallfixing wall 2 V6 V4111 Flat fixed panel Bottom fixed bracket Rail to wall 16 A 6 7 4 3 2 5 8 9 1 10 11 13 15 14 18 19 17 16 12 20 ST5 50 countersunk screw X countersunk screw ST4 40 X 17 18 19 20 ST5X50 countersunk screw wall plug X 7 36 V6MLN05 V6LP8076L R V6113 V2114 V2115 V4110 V6BM31950 V6H081100 V8123 V4115 V6S6SW05 V6ST4 40 X V8119 V1121 V4115 V8121 V8122...

Page 3: ...tiles or other wall finishing should be effectively sealed at the tray edges 3 Tiles should extend at least to the corners of the tray and a minimum of 2 0 metres from the top of the tray FIXING KIT COMPONENTS TOOLS REQUIRED SITE 2 V8124 1 X V6113 X3 V8125 X4 V4111 X3 V2115 6 X V2114 X6 V6ST4 40 2 X V4115 X4 V6M5 5 3 X X 1 V6115 X V6LP8076 L X1 V6LP8076 R X1 V6MLN05 X1 V8121 X1 V8122 X1 V8119 X1 V...

Page 4: ...om tile TRAY MUST BE SEALED FULLY AROUND WHERE THE TRAY MEETS THE WALL V6113 Inside 6mm masonry bit V6BM31950 V4111 V2114 MAX 950mm Step 1 The max distance from the inside face of the profile to the wall is 950mm Place the wall profile in from the front edge of the shower tray plumb mark drill holes Step 2 Fix the wall profile into position with wall plugs and screws V4111 Do not silicone behind w...

Page 5: ...ed with label showing from outside Step 5 Note If fitting on a tiled floor ONLY option to screw floor Position panel A into wall profile and mark position on floor V8123 remove panel and fix V8123 to floor using plugs V8125 V8123 to and screws V4115 ANTI SLIP PADS V8126 V8127 ARE OPTIONAL Step 6 Press the seal gasket V6H081100 onto the bottom edge of the glass NOTE This can be sealed to the floor ...

Page 6: ...ferrule V8121 V8122 at the other end Level the bar and mark the position remove the bar and ferrule assembly V1121 to size DO NOT CUT TOO SHORT Step 10a Align and secure the wall mount horizontal support bar wall ferrule V8121 using plugs sad screws V4115 V8122 for the Step 11a Screw the ferrule the wall mount Insert the support bar V1121 right into the holder V8119 then slide it back into the wal...

Page 7: ...ove the bar and fix the mount to the ceiling using plugs and screws V8125 V4115 THE CEILING MOUNT MUST BE SECURED TO A JOIST OR OTHER SOLID COMPONENT Step 10b Slide the cover sleeve over the bar and insert the bar into the ceiling mount V6S6SW07A Screw the bar down onto the support ferrule V6S6SW05 Tighten the grub screws in the ceiling mount V8118 Step 12b Screw the cover sleeve up onto the ceili...

Page 8: ...V6LP8076 Seal at vertical joints on bottom of frame on outside only SEALING INSIDE INSIDE SEALING OUTSIDE OUTSIDE 24 HRS TROUBLE SHOOTING GUIDE 1 Is the tray floor level where the shower wall is located 2 Is the shower wall sealed correctly to the floor and wall in the correct location 3 Is the wall profile plumb 4 Top rail will not reach the back wall Ensure that the back wall is not leaning back...

Reviews: