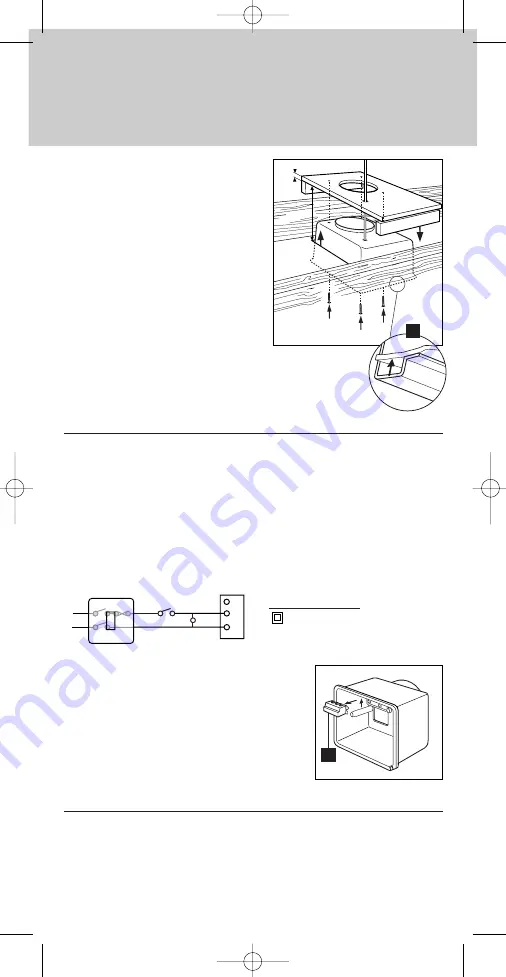
5. Transfer the template for the
mounting holes and the cable entry
hole for the housing onto the
wooden frame. Create an opening
for pipe NW100 (as illustrated).
6. Feed the cable through the conduit
entry hole in the fan case. Make sure
knock-out hole for cable has smooth
edge to avoid damage to supply
cable insulation.
7. Attach the grommet ring to the
housing connector piece and screw
the fan housing to the wooden
frame. Ensure that (E) ends flush
with the ceiling.
9. Connect the ventilation pipe.
Electrical Connection
Warning:
●
Isolate electricity supply before starting work on the unit.
●
Only a qualified electrician is permitted to install the electrical
connections in accordance with the applicable regulations.
●
The voltage and frequency must tally with the rating plate.
●
The fans are double insulated and do not require a protective earth.
●
Fans must be connected using flexible supply cord.
●
The fan must be connected to a switch connection unit having contact
separation of at least 3 mm at each pole.
Connection Data:
230V~50Hz,
power consumption: 25W.
●
Connect the terminal block (F) to the mains
electricity supply and insert the fan unit (C)
into the housing.
●
Tighten the middle retaining screw.
●
Fit inner cover (B).
●
Fit front plate (A) and integral cover.
●
Fit outer grille in accordance with
DIN 31001.
Cleaning instructions:
Always isolate the electricity supply before cleaning the fan.
Do not use any solvents to clean the fan.
L
N
ON/OFF Switch
L
N
L1
Optional
Lighting
Remote control
switch/light switch
Fan
124mm
12mm
F
E
Montageanleitung L 100 U.qxd 25.11.2005 18:35 Uhr Seite 5


