Pod Quickstart Guide
pg 6 | Pod Quickstart Guide | www.mersive.com | © Copyright 2019 Mersive
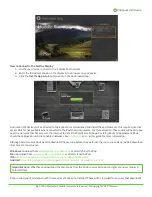
You can also access a menu of additional content-specific options by long clicking on an individual shared post. These
options include making the post full screen, deleting it, creating a stack of multiple posts, and accessing info about the post.
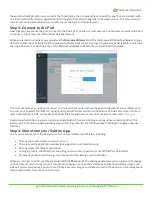
Next, go back to the
Share
panel and share a video by selecting the media file option and navigating to a video saved on your
device to experience the high-quality 1080p playback. Note that a video playback menu also appears over the post on the
Layout
panel.
L
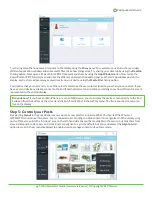
astly, you can try out Solstice’s moderator mode by enabling session moderation in the
Settings
menu of the Solstice client.
For a walkthrough of moderator mode, check out the moderator mode portion of the
or read
more about moderator mode in the
Scenario 2: Your Initial Rollout
In Scenario 1, only the WAP mode was used
to demo Solstice’s end
-user collaboration features. However, for your initial
rollout, we recommend attaching your Pods to your existing WiFi/Ethernet networks for improved performance, security,
user workflows, and to give users access to the internet while using Solstice. In this section,
we’ll cover th
is and other
important rollout considerations.
Rollout Considerations
There are 4 core considerations for any Solstice deployment:
•
How are the Pods attached to your network(s)?
•
How do users connect to the Pods?
•
How should the Pods be configured, functionally and visually?
•
What is the long-term management plan?
By following the steps in this section, we’ll address the options for each of these considerations.
However,
it’s
also
important to think through each rollout consideration within the context of your organization and involve the appropriate
stakeholders, such as the IT department for attaching Pods to your host networks, each step along the way.
Before You Begin
There are a few ways to configure your Solstice Pods that you should be aware of before you begin. Every Solstice Pod can
be configured via the individual
Pod’s configuration panel. The Pod’s config
uration panel can be accessed locally by
connecting a USB mouse/keyboard to the Pod, or it can be accessed via web browser from a separate device by entering the
Pod’s IP address and
clicking the Settings icon in the lower right-hand corner of the quick connect page. Note that the
browser configuration can be password-protected but Pods ship without a password to make the initial configuration easy.
In addition to the Pod’s individual configuration panel, Pods with Enterprise Edition licenses can also be configured via
the
Solstice Dashboard software application which provides additional features and capabilities including one-to-many
management. If you have purchased Enterprise Edition licenses and want more information about how to use the
Dashboard for one-to-many management, check out the
The steps below access the local configuration panel via a USB mouse and keyboard connected to the Pod. This method will
work for every Pod individually.
Step 1: Name the Pod
All Pods are shipped with the default name of
“
SolsticePod
”
, so we recommend changing the name for identification
purposes. Pods should be named based on the location they will be deployed in, e.g.
“
Conference Room 201
”
or
“Dave’s
Office
”
.
Did you know?
The Solstice Dashboard allows technology managers to monitor, configure, and update all Solstice hosts
on their network from a single screen.


