background image

41

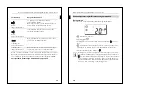
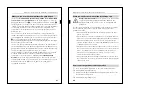
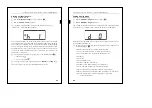
Setting the room temperature control unit/display view

Setting workday/day off

From the standard display:

1

1 x

 key 

medium

 – 

longer

 key press (Figure 

?

).

2

2 x

 key 

centre

 – 

short

 key press.

The "setting working day/day off" menu command is shown, for 

example, h 1 = Working day (h = 

h

ere).

Your electrical installer can set the room temperature control unit with an 
external time switch in such a way that certain weekdays are considered 
as workdays (for  example, Mon-Fri), and others as days off. Depending 
on the setting, the heating is for  example turned down on days off also 
during the day in order to save energy. If you nevertheless want to heat 
the room on a day considered a day off or vice versa, you can make the 
appropriate setting here.

3

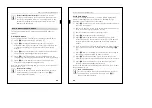
Switch by pressing the left or right key on the display (Figure 

?

):

• h 0 = day off 

• h 1 = working day 

4

Save the new desired setting by giving the 

centre

 key a 

long

 press.

The new setting is stored; the standard display is shown.

42

Setting the room temperature control unit/display view

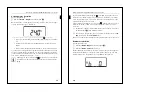
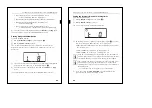
Setting display mode

From the standard display:

1

1 x

 key 

medium

 – 

longer

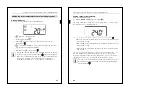
 key press (Figure 

?

).

2

3 x

 key 

medium

 – 

longer

 key press.

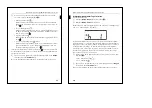
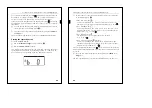
The "setting the display mode" menu command is shown with the display 
mode last set, for  example, d 0 = actual temperature (d = 

d

isplay).

With this menu command you can specify which values you want to see 
in the standard display view.

3

Switch to the next display mode by pressing the left or right key on 
the display (Figure 

?

):

• d 0 = Actual temperature (without decimal point)

• d 1 = Setpoint temperature (to 0.5 degree accuracy)

• d 2 = Temperatur from external temperature sensor

• d 3 = Date

• d 4 = Time

• d 5 = Ventilation level

• d 6 = Date and time alternately

• d 7 = Date, time and ventilation level alternately

• d 8 = Actual and setpoint temperature alternately

• d 9 = Actual/setpoint temperature and time (alternating)

• d10= Actual/setpoint temperature and ventilation level alternately

• d11=Temperatur from external temperature sensor and

actual temperature

Summary of Contents for 6232 Series

Page 1: ...Internet www merten de Bei technischen Fragen wenden Sie sich bitte an unsere InfoLine Telefon 49 1805 212581 oder 49 800 63783640 Telefax 49 1805 212582 oder 49 800 63783630 E Mail infoline merten d...

Page 2: ...B 100 6 mm 23 mm 24 9 mm 23 mm A B D C 2 4 6 8 1 3 5 7...

Page 3: ...s Sie ber Voreinstellungen wissen m ssen 9 Was Sie ber das Tastenfeld wissen m ssen 9 Was Sie ber Raumtemperaturregler Display wissen m ssen 10 Das Display kennenlernen 10 Mit dem Bedienermen umgehen...

Page 4: ...olgenden UP Modul genannt an den EIB angeschlossen und vom Elektroinstallateur ber die EIB Tool Software ETS parametriert Dabei wird z B die Tastenbele gung das Verhalten der Status LEDs und des Summe...

Page 5: ...ie den Taster in Betrieb So montieren Sie den Taster 6 So montieren Sie den Taster 5 Bild Setzen Sie die Abdeckung des Displays an der Unterseite zu erst in das Geh use und dr cken Sie es links und re...

Page 6: ...Mit dieser Software k nnen Sie Folien im gew nschten Format und nach Ihren eigenen Vorstellungen bedrucken Sie k nnen sich auch mit einem beliebigen Layout Programm entspre chende Folienvorlagen erst...

Page 7: ...ster mit jeder Merten IR Fernbedienung steuern k n nen Jede Bet tigung einer Taste 1 8 an der Fernbedienung l st die Funk tion der entsprechenden Taste aus Bild 1 8 Was Sie ber Voreinstellungen wissen...

Page 8: ...st aktiviert Wird nur angezeigt wenn zweistufiges Heizen K hlen eingestellt ist Bei Heizen und K hlen 1 Der Regler heizt 2 Der Regler k hlt C Temperaturanzeige in Grad Celsius F Temperaturanzeige in G...

Page 9: ...Bedienermen Links Rechts langer Tastendruck Damit ver ndern Sie automatisch die einzel nen Werte schneller Vor bzw R cklauf 14 Raumtemperaturregler Displayanzeige einstellen Basisanzeige Hier sehen Si...

Page 10: ...echsel oder dauerhaft g ltig 16 Raumtemperaturregler Displayanzeige einstellen Ihr Elektroinstallateur hat festgelegt innerhalb welcher Grenzen Sie diesen Wert ver ndern k nnen beispielsweise innerhal...

Page 11: ...sart durch einen langen Tastendruck auf die mittlere Taste Die neue Betriebsart wird gespeichert die Basisanzeige ist zu sehen 18 Raumtemperaturregler Displayanzeige einstellen Arbeitstag arbeitsfreie...

Page 12: ...eratursensor und Isttemperatur 20 Raumtemperaturregler Displayanzeige einstellen d12 Temperatur von externem Temperatursensor Isttemperatur und Uhrzeit im Wechsel d13 Ist Solltemperatur Datum sowie Uh...

Page 13: ...scht einzustellen kurzer Tastendruck schrittweises Ver stellen langer Tastendruck kontinuierliches Verstellen 6 Dr cken Sie kurz die mittlere Taste Die Minutenziffern blinken nun 7 Dr cken Sie die lin...

Page 14: ...it 3 Schaltzeit 4 ___ ___ Uhr ___ ___ Uhr ___ ___ Uhr ___ ___ Uhr Funktion ____________________________________________ Schaltzeit 1 Schaltzeit 2 Schaltzeit 3 Schaltzeit 4 ___ ___ Uhr ___ ___ Uhr ___...

Page 15: ...utton 27 For the Electrician What you need to know about the installation site 28 How to put the push button into operation 28 How to mount the push button 29 2 fold push button 29 4 fold push button...

Page 16: ...ored key functions the behaviour of the status LEDs and the buzzer for example are configured in this way For the Electrician What you can do with the multi function push button 28 What you need to kn...

Page 17: ...How to mount the push button 30 How to mount the push button 4 fold push button To mount the 4 gang push button you need a Merten 2 gang frame without central bridge piece M PLAN art no 587300 design...

Page 18: ...ps Closing the labelling field 1 Figure Insert coloured foil strip D in the labelling field of the push button Lay the labelled transparent foil strip on top of it 2 Close the cover Figure C so that i...

Page 19: ...t standby setpoint temperature Night operation The heating is adjusted to the set night setpoint temperature 34 What you need to know about the room temperature control unit display Time control is ac...

Page 20: ...the room temperature control unit display If you don t press any key within a period of approx 1 min the room temperature control unit automatically returns to the standard display The values that we...

Page 21: ...control unit display view Setting setpoint temperature From the standard display 1 1 x key centre long key press Figure The menu command setting the setpoint temperature is shown with the value last...

Page 22: ...nding symbol for example b 0 house with person operating mode b base mode comfort 40 Setting the room temperature control unit display view 3 Switch to the next operation mode by pressing the left or...

Page 23: ...e key a long press The new setting is stored the standard display is shown 42 Setting the room temperature control unit display view Setting display mode From the standard display 1 1 x key medium lon...

Page 24: ...ress The new brightness level is saved the standard display is shown 44 Setting the room temperature control unit display view Setting the internal time and switching times From the standard display 1...

Page 25: ...tting the operating mode is displayed with the last set value Change the value by pressing the left or right key on the display The value is directly applied you don t have to save separately After ap...

Page 26: ...Adjustment limit min _____ C max _____ C Night _____ C Adjustment limit min _____ C max _____ C Frost protection ____ C Heat protection ____ C 48 Technical data Power supply from Flush mounted module...

Reviews: