34
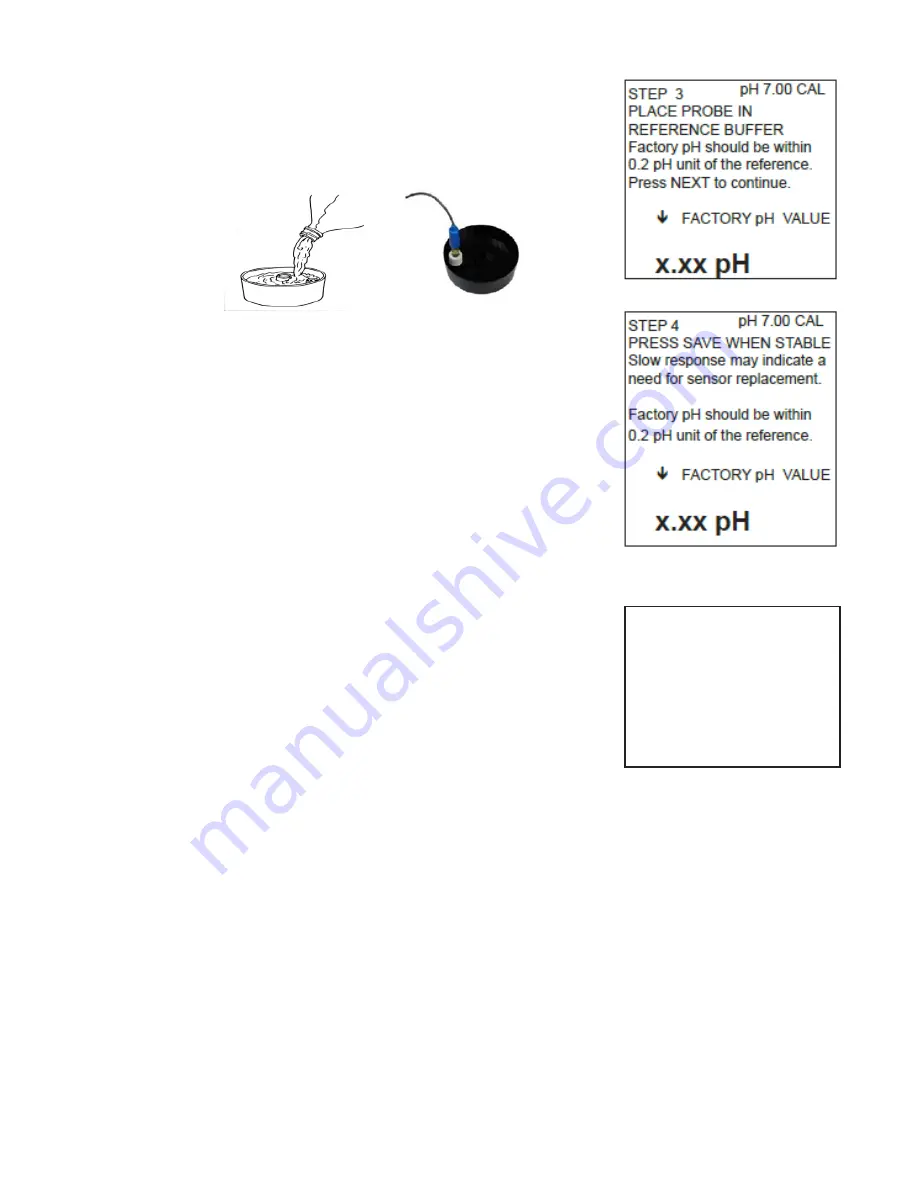
Step 3
- Pour about 50 ml of fresh buffer solution into
the sample tray. Place the pH sensor in the outer
sensor holder and allow reading to stabilize. The
displayed factory pH value should be within 0.2 pH
unit of the reference solution value. Press NEXT to
continue.
Step 4 -
When the pH reading stabilizes on the
display, press the SAVE button. Slow stabilization
times may indicate a need to replace the pH
electrode. As in the previous step, the displayed
factory pH value must be within 0.2 pH unit of the
reference used.
OR
pH sensor module calibration has failed. Call Mesa
Labs for assistance.
OR
Final Step -
Store your pH sensor module with the
soaker bottle attached filled with enough soaker
solution or 4.0 pH buffer solution to cover the glass
bulb.
NOTE:
If the Factory pH value is “out of range”, the
pH sensor may have exceeded normal life (12-18
months with proper care) and may need to be
replaced. Call Mesa Labs for assistance.
To replace the pH probe, grasp the black base of the
probe and gently twist it counterclockwise to unlock it,
then pull it straight out. Plug the new
one in. After it is seated, twist gently clockwise to lock
it in. Do not allow fluids to enter the sensor module
connection while the probe is not installed. Calibrate
the new probe according to the procedure starting on
the previous page.
FINAL STEP
CALIBRATION FAILED
Factory value and reference
differ by more than 0.2 pH.
Sensor may
need replacing. Press
Abort to continue.


