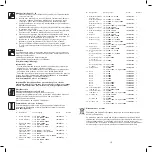
background image

10

11

Item Designation 

Pump Type 

Art.-No. 

Number

  7 

Right screen insert  eco-X 4500 - 20000 

104/003443 

1


eco-X plus 10000 - 20000

  8 

Front screen insert  eco-X 4500 - 20000 

104/003440 

1


eco-X plus 10000 - 20000

  9 

Handle 

eco-X 4500 - 20000 

104/003444 

1


eco-X plus 10000 - 20000

11 

Socket 1 1/4˝ 

eco-X 4500, eco-X 7500 

104/002641 

1


Socket 1 1/2˝ 

eco-X 10000, eco-X 13000 

104/001967 

1


eco-X 16000, eco-X plus 10000


Socket  2˝ 

eco-X 20000 

104/003425 

1


eco-X plus 15000, eco-X plus 20000

14 

Rubber lagging C3  eco-X 4500 - 20000 

104/003452 

3


eco-X plus 10000 - 20000

12 

Pump housing 1 1/4˝ eco-X 4500, eco-X 7500 

104/003279 

1


Pump housing 1 1/2˝ eco-X 10000, eco-X 13000 

104/003280 

1


eco-X 

16000


Pump housing  

eco-X plus 10000 

104/003570 

1


1 1/2˝ - Ø 35


Pump housing 2˝ 

eco-X 20000 

104/003409 

1


Pump housing  

eco-X plus 15000 

104/003508 

1


2˝ - Ø 45 

eco-X plus 20000

13 Connection 

fl ange   eco-X 20000 

104/003410 

1


C3 2˝ 

eco-X plus 15000, eco-X plus 20000

15 

Rotor assembly 

eco-X 4500 

168/009128 

1


Rotor assembly 

eco-X 7500 

168/009129 

1


Rotor assembly 

eco-X 10000 

168/009130 

1


Rotor assembly 

eco-X 13000 

168/009131 

1


Rotor assembly 

eco-X 16000 

168/009132 

1


Rotor assembly 

eco-X 20000 

168/009133 

1


Rotor assembly 

eco-X plus 10000 

168/009134 

1


Rotor assembly 

eco-X plus 15000 

168/009135 

1


Rotor assembly 

eco-X plus 20000 

168/009136 

1

16 

O-ring 96 x 3 

eco-X 4500 - 20000 

112/000030 

1


eco-X plus 10000 - 20000

17 

O-ring 105 x 3 

eco-X 20000 

112/000047 

1


eco-X plus 15000, eco-X plus 20000

18 

Screw M 6 x 16 

eco-X 4500 - 16000 

114/000048 

4


eco-X plus 10000


Screw M 6 x 20 

eco-X 20000 

114/000079 

4


eco-X plus 15000, eco-X plus 20000

19 

Screw Ø 3,5 x 13 

eco-X 20000 

114/000078 

2


eco-X plus 15000, eco-X plus 20000

Waste disposal

waste disposal of electronic devices by the user in private households
of the EU

It is not allowed to dispose the product along with the regular waste
disposal, instead it has to be collected separately. It is your
responsibility to dispose and recycle the device in a proper place and 
protect the environment through this. More information, where to
dispose your devices can be obtained at the local departments.

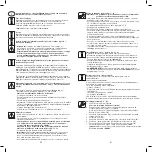
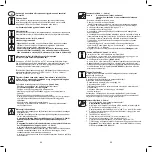
Assembly (see fi g. 5 - 9)

1. 

Push the O-ring (16) onto the starting point on the motor housing (10).

2. 

Carefully slide the rotor assembly (15) into the motor housing (10) and


twist the bearing cover so that the two holes fi t onto the pins on the  


motor housing (10).

3. 

Check whether the rotor assembly can be rotated easily.

4. 

Check the position of the O-ring (16) on the motor housing (10).

5. 

Put the pump housing (12) on the motor housing (10) and attach it 


fi rmly and evenly with the 4 screws (18).

 6. 

Put the pump (10) into the lower shell (2) in the desired position (the  


out let of the pump housing (12) directed upwards or sidewards).

7. 

Attach the upper shell (1) to the rear hook of the lower shell (2) and  


lock it into the front fl aps.

8. 

Insert the respective screen inserts into the openings on top (3 or 4)  


and on the left (5 or 6) or on the front (8) and on the right (7).
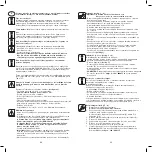
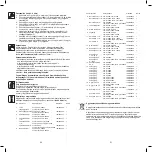
Maintenance

In order to prolong the service life of your pump signifi cantly and to keep it 
in sound operating condition, it is recommended to carry out maintenance 
and cleanup regularly.
This can be done by everyone, quickly and easily. 

See „Dismantling/

Assembly“

Servicing intervals

-  In the beginning check proper performance of your pump every day.
  If necessary, clean the fi lters.
-  Since servicing intervals (complete cleaning) will vary depending on the  
level of pond pollution, repeat the periodic service to your pump in    
accordance with the pollution of the pond water .
Should you determine that there are 

damaged or worn parts

, replace

them. 

See „Spare parts“

Important! When used in calcareous water, the rotor assembly (15)
and the stainless steel can split tube in the motor housing (10) should 
be cleaned at regular intervals.

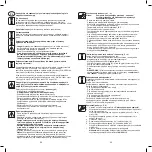
Pump care in wintertime
Protect your pump from freezing-up!

Take the pump out of your pond in autumn.
Clean the pump completely according to the instructions.
During the winter months store the pump in a tank fi lled with water to 
prevent the bearings from drying out.
Store the tank in a frostproof room.
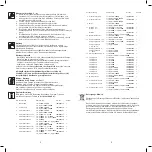
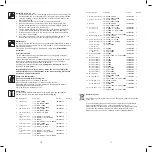
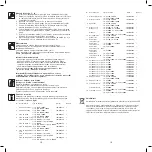
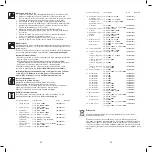
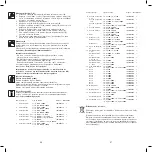
Spare parts

To order spare parts, please indicate the pump type, the designation
and the Art.-No. from the table below 

(see also fi g. 9)

.

 Item Designation 

Pump Type 

Art.-No. 

Number

  1 

Upper shell  

eco-X 4500 - 20000 

104/003438 

1


eco-X plus 10000 - 20000

  2 

Lower shell 

eco-X 4500 - 20000 

104/003439 

1


eco-X plus 10000 - 20000

  3 

Top screen insert 

eco-X 4500 - 20000 

104/003441 

1


eco-X plus 10000 - 20000

  4 

Top screen insert  

eco-X 4500, eco-X 7500 

104/003451 

1

   1 

1/4˝


Top screen insert  

eco-X 10000, eco-X 13000 

104/003450 

1


1 1/2˝ 

eco-X 16000, eco-X plus 10000 


Top screen insert 2˝  eco-X 20000 

104/003449 

1


eco-X plus 15000, eco-X plus 20000

  5 

Left screen insert  

eco-X 4500 - 20000 

104/003442 

1


eco-X plus 10000 - 20000

  6 

Left screen insert  

eco-X 4500, eco-X 7500 

104/003448 

1

   1 

1/4˝


Left screen insert  

eco-X 10000, eco-X 13000 

104/003447 

1


1 1/2˝ 

eco-X 16000, eco-X plus 10000


Left screen insert 2˝  eco-X 20000 

104/003446 

1


eco-X plus 15000, eco-X plus 20000

Summary of Contents for eco-X

Page 1: ...e és alaírása Vásárlás idöpontja Pieczątka i podpis sprzedawcy Data zakupu Штамп и подпись продавца дата покупки Myyjän leima ja allekirjoitus Ostopäivämäärä Pečiatka a podpis predajcu Dátum kúpy Razítko a podpis prodejce Datum koupě Žig in podpis prodajalca Datum nakupa _______________________________________________________________ _______________________________________________________________ ...

Page 2: ...lußleitung fest im Motorgehäuse vergossen ist Pumpe niemals an der Netzanschlußleitung aufhängen oder transportieren D Inbetriebnahme siehe Abb 1 4 Wichtig Die Pumpe darf nicht trocken laufen Schäden am Gerät sind dann nicht ausgeschlossen Tauchen Sie die Pumpe komplett in Ihren Teich Dabei dringt Wasser in den Pumpenkörper Für den Unterwasserbetrieb ist ein Wasserstand von ca 25 cm erforderlich d...

Page 3: ... läßt 4 Lage des O Ring 16 am Motorgehäuse 10 prüfen 5 Pumpengehäuse 12 auf Motorgehäuse 10 stecken und mit den 4 Schrauben 18 gleichmäßig fest anziehen 6 Die Pumpe 10 in der gewünschten Stellung den Auslauf des Pumpengehäuses 12 nach oben oder zur Seite in die Unterschale 2 legen 7 Die Oberschale 1 an den hinteren Haken der Unterschale 2 ansetzen und in die vorderen Laschen einrasten 8 Die entspr...

Page 4: ...preiniger Art Nr 168 009115 NL Personen welke niet vertrouwd zijn met de gebruiksvoorschriften mogen geen gebruik maken van de pomp Bouwwijze Deze pomp modern en groot in capaciteit heeft een wisselstroommotor splijtbusmotor met condensator de motor is waterdicht ingegoten in Epoxy hars IP68 en beveiligd tegen overbelasting Aanvullende technische gegevens kunt u op het type plaatje vinden Toepassi...

Page 5: ... van de motorhuls 10 2 Duw zorgvuldig de looppaseenheid 15 in de motorhuls 10 Roteer het deksel van de opslag zodanig dat de twee gaten op de spelden bij de motorhuls passen 3 Onderzoek of de looppaseenheid gemakkelijk beweegbaar is 4 Onderzoek de situatie 16 van de O ring bij de motorhuls 10 5 Zet de pomphuls 12 op de motorhuls 10 en draai de 4 schroeven gelijk aan 6 Zet de pomp 10 in de gewenste...

Page 6: ...case of massive calcination please use Meßner decalcifier for pumps art no 168 009115 Please read the instructions thoroughly before using the pump Otherwise you may not use it Construction These modern powerful pumps are equipped with a single phase alternating current motor canned motor with capacitor The motor is waterproof encapsulated in synthetic resin IP68 and provided with an overload prot...

Page 7: ...ated easily 4 Check the position of the O ring 16 on the motor housing 10 5 Put the pump housing 12 on the motor housing 10 and attach it firmly and evenly with the 4 screws 18 6 Put the pump 10 into the lower shell 2 in the desired position the out let of the pump housing 12 directed upwards or sidewards 7 Attach the upper shell 1 to the rear hook of the lower shell 2 and lock it into the front f...

Page 8: ...s le cas d un entartrage trop important veuillez utiliser le nettoyeur Meßner Art N 168 009115 S il vous plaît veuillez lire attentivement le mode d emploi suivant avant d utiliser la pompe Modèle Cette pompe moderne et efficace est mue par un moteur à courant alternatif monophasé rotor noyé cage d écureuil avec condensateur Le moteur est totalement étanche isolé dans un bloc de résine plastique I...

Page 9: ...oteur 10 3 Veuillez vérifier que le rotor puisse tourner librement en l entraînant légèrement en rotation 4 Veuillez vérifier la position correcte du joint d étanchéité rond 16 dans le carter du moteur 10 5 Enfoncez le corps de la pompe 12 sur le carter du moteur 10 puis fixer celui ci en vissant de manière homogène les 4 vis 18 6 Placez ensuite la pompe 10 suivant la configuration voulue dans la ...

Page 10: ... En caso de una fuerte calcificación favor de utilizar el limpiador de bombas Meßner Art N 168 009115 Es necesario leer con cuidado las instrucciones de servicio antes de trabajar con la bomba Tipo Esta bomba moderna y eficiente está dotada de un motor monofásico de corriente alterna motor de inducción en cortocircuito y con condensa dor Es un motor totalmente estanco encapsulado con resinas plást...

Page 11: ...ubierta del motor 10 5 Ponga la cubierta de la bomba 12 en la cubierta del motor 10 y apriete fuertemente con los 4 tornillos 18 6 La bomba 10 en su posición deseada la descarga de las cubiertas de las bombas 12 para arriba o a un lado puesta en la cubierta de abajo 7 Colocar la cubierta de arriba 1 en el gancho posterior de la cubierta de abajo 2 y enganchar las placas de enfrente 8 Meter los fil...

Page 12: ...liarità con le presenti istruzioni per l uso Tipo di costruzione Queste pompe moderne e potenti dispongono di un motore a corrente alternata monofase motore del collimatore con condensatore Il motore è impermeabile all acqua ed è collegato a tenuta a resina artificiale IP68 e protetto contro i sovraccarichi I dati tecnici sono specificati nella targhetta Scopo Queste pompe sono realizzate per l al...

Page 13: ...l coperchio del cuscinetto in modo che le due aperture calzino bene sui perni dell involucro del motore 10 3 Controllare se l unita di cammino si lascia girare più facilmente 4 Controllare la posizione del O anello 16 all involucro del motore 10 5 Infilare l involucro della pompa 12 sull involucro del motore 10 e serrare uniformemente con le 4 viti 18 6 Mettere la pompa 10 nella posizione desidera...

Page 14: ...ão utilize o limpador de bombas Meßner artigo n 168 009115 Pessoas que não se sintam seguras com os procedimentos contidos no manual de instruções não devem utilizar a bomba Tipo de construção Bomba moderna e altamente eficiente dotada de um motor monofásico de corrente alterna motor com induzido em curto circuito e com condensador É totalmente estanque imergida em resinas plásticas sólidas IP68 e...

Page 15: ...da caixa do motor 10 2 Empurre com cuidado o rotor 15 para dentro da caixa do motor 10 e gire a cobertura da bobina de forma que os dois orifícios se alinhem aos pinos na caixa do motor 10 3 Cheque se o rotor gira com facilidade 4 Cheque a posição do O Ring 16 na caixa do motor 10 5 Coloque a caixa da bomba 12 na caixa do motor 10 e fixe com os 4 parafusos 18 uniformemente 6 Colocar a bomba 10 no ...

Page 16: ...em Erős vízkőlerakódás esetében használja a Meßner szivatty útisztítót cikkszám 168 009115 A szivattyú használata előtt olvassa át figyelmesen a használati útmutatót Gyártási típus Ezek a modern nagyteljesítményű pumpák egyfázisú váltóárammo torral kondenzátoros forgómotor vannak felszerelve A motor vízálló műgyantával IP68 bevont illetve túlterhelés ellen védett A műszaki adatokat a gyártási címk...

Page 17: ...dítsa el a csapágy fedelet úgy hogy a két lyuk a motorház 10 csapjaira illeszkedjen 3 Győződjön meg róla hogy a futóegység könnyen forgatható 4 Győződjön meg róla hogy az O gyűrű 16 megfelelően helyezkedik el a motorházon 10 5 Csúsztassa a szivattyúházat 12 a motorházra 10 és rögzítse szorosan a 4 csavar 18 segítségével 6 Helyezze a szivattyút 10 a kívánt helyzetben a szivattyúház 12 menetvégződés...

Page 18: ...ejszą instrukcją obsługi nie mogą użytkować pompy Typ konstrukcji T e nowoczesne i wydajne pompy posiadają jednofazowy silnik prądu zmiennego silnik z rurką szczelinową z kondensatorem Silnik jest zatopiony w żywicy syntetycznej co gwarantuje jego wodoszczelność IP68 oraz posiada zabezpieczenie przed przeciążeniem Dane techniczne są umieszczone na tabliczce znamionowej Cel zastosowania Niniejsze p...

Page 19: ...ka 10 2 Jednostkę obiegową 15 wsunąć ostrożnie i kadłub silnika 10 i przekręcić pokrywkę łożyska tak aby oba otwory dopasowały się na kołki kadłuba silnika 10 3 Sprawdzić czy jednostka obiegowa da się łatwo okręcić 4 Sprawdzić położenie pierścienia uszczelniającego 16 przy kadłubie silnika 10 5 Odbudowe pompy 12 wsadzić na kadłub silnika 10 i równomiernie dokręcić za pomocą 4 śrub 18 6 Położyć pom...

Page 20: ...вом по эксплуатации пользоваться насосом не разрешено Конструкция В этих современных и мощных насосах использован однофазовый двигатель переменного тока погружной электродвигатель с конденсатором Двигатель защищён от проникновения воды синтетической смолой со степенью защиты IP68 и от перегрузки Технические данные приведены на типовой табличке Назначение Эти насосы предусмотрены для подачи воды дл...

Page 21: ...Осторожно протолкните ходовой узел 15 в корпус двигателя 10 и поверните таким образом чтобы две дырки совпали со штифтами на корпусе двигателя 10 3 Проверьте ходовой узел должен легко вращаться 4 Проконтролируйте положение резинового кольца 16 на корпусе двигателя 10 5 Наденьте корпус насоса 12 на корпус двигателя 10 и равномерно закрепите с помощью 4 х винтов 18 6 Вложите насос 10 с учётом желаем...

Page 22: ...le tutustuneet käyttöohjeisiin eivät saa käyttää pumppua Rakenne Yrityksemme modernit ja tehokkaat pumput toimivat yksivaiheisella vaihtovirtamoottorilla kondensaattorilla varustettu umpioitu moottori Moottori on suojattu vesitiiviiksi valamalla päälle synteettinen hartsikuori suojausluokka IP68 ja se on ylikuormitussuojattu Tekniset tiedot ilmenevät tyyppikilvestä Käyttötarkoitus Nämä pumput on t...

Page 23: ...5 9 1 Työnnä O rengas 16 moottorikotelossa 10 olevaan vaippaan 2 Siirrä käyntiyksikkö 15 varovasti moottorikoteloon 10 ja käännä laakerinkantta sen verran että molemmat reiät sopivat moottorikotelon 10 puikkoihin 3 Tarkista että käyntiyksikkö on helposti pyöritettävissä 4 Tarkista että O rengas 16 istuu kunnolla moottorikotelossa 10 5 Aseta pumppukotelo 12 moottorikotelon 10 päälle ja kiinnitä se ...

Page 24: ... výrobku 168 009115 Osoby ktoré sa neoboznámili s návodom na obsluhu nesmú čerpadlo používať Konštrukcia Tieto moderné a výkonné čerpadlá majú jednofázový striedavý motor motor so štrbinovou rúrkou s kondenzátorom Motor je vodotesne zaliaty syntetickou živicou IP68 a chránený pred preťažením Technické údaje nájdete prosím na výrobnom štítku Účel použitia Tieto čerpadlá sú predurčené pre prečerpáva...

Page 25: ...e dierky pasovali na tyčky na telese motora 10 3 Uistiť sa či sa dá obežná jednotka bez problemov otáčať 4 Odskúšať polohu tesniaceho krúžku 16 na telese motora 10 5 T eleso čerpadla 12 nasunúť na teleso motora 10 a so 4 skrútkami 18 rovnako silno zatiahnuť 6 Čerpadlo 10 v ľubovolnej polohe odtok telesa čerpadla 12 smerom hore alebo do strany vložiť do spodnej panvy 2 7 Hornú panvu 1 nasadiť na za...

Page 26: ... Osoby které nejsou seznámeny s návodem k obsluze nesmějí čerpadlo používat Konstrukce T ato moderní a vysoce výkonná čerpadla mají motor na jednofázový střídavý proud motor s mokrým rotorem a kondenzátorem Stator je vodotěsný zalitý v syntetické pryskyřici IP68 a chráněný proti přetížení Technické údaje najdete na výrobním štítku Účel použití T ato čerpadla jsou určena pro čerpání vody k pohonu f...

Page 27: ...by oba kolíky na tělese motoru 10 zapadly do děr na krytu ložisek 3 Zkontrolujte zda se rotor snadno otáčí 4 Zkontrolujte polohu O kroužku 16 na tělese motoru 10 5 Těleso čerpadla 12 nasuňte na těleso motoru 10 a pomocí 4 šroubů 18 je rovnoměrně a pevně přišroubujte 6 Čerpadlo 10 v požadované pozici tlakový výstup z tělesa čerpadla 12 nahoru nebo do strany uložte do spodního krytu 2 7 Horní kryt 1...

Page 28: ...ni zaapnitvi uporabite prosim Meßnerjevo sredstvo za čiščenje črpalk kat št 168 009115 Črpalk ne smejo uporabljati osebe ki niso seznanjene z navodili za obratovanje Konstrukcija T e sodobne in zmogljive črpalke imajo enofazni izmenični motor motor s kondenzatorjem Motor je vodotesno ulit z umetno smolo IP68 in zaščiten pred preobremenitvijo Tehnični podatki so navedeni na tipski ploščici Namen up...

Page 29: ... ohišju motorja 10 3 Preverite če se pogonska enota lahko rahlo vrti 4 Preverite lego O obroča 16 na ohišju motorja 10 5 Namestite ohišje črpalke 12 na ohišje motorja 10 in ga enakomerno pritrdite s 4 imi vijaki 18 6 Namestite črpalko 10 v želenem položaju iztok ohišja črpalke 12 navzgor ali na stran v spodnjo skodelico 2 7 Pristavite zgornjo skodelico 1 na zadnjih kljukicah spodnji skodelici 2 in...

Page 30: ...á el recibo de compra Durante el periodo de garantía podremos elegir entre restituir o reparar gratuitamente las piezas defectuosas por defectos de fabricación o de material La garantía no cubre los daños ocasionados por las siguientes causas uso incorrecto errores de montaje incrustaciones calcáreas manteni mientodeficiente acciones de heladas desgaste normal o intentos incorrectos de reparación ...

Page 31: ...ytön seurannaisvahingoista Toiminta mahdollisessa takuutapauksessa lähetä pumppu ja ostotodistus meille maksutta sen ammattiliikkeen kautta josta ostit pumpun ZÁRUČNÉ PODMIENKY Na toto čerpadlo máte záruku na dobu 60 mesiacov ktorá začína plynúť v deň dodávky Ak dôkaz platí doklad o kúpe Škody ktoré spočívajú v materiáli alebo chybách počas spracovania opravíme v rámci našej záručnej doby bezplatn...

Page 32: ...9 4 8 7 3 2 6 5 1 17 13 19 1 9 12 16 10 3 4 11 8 12 2 6 5 14 14 7 18 eco X 20000 eco X plus 15000 eco X plus 20000 ...

Reviews: