


16
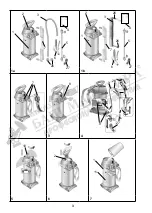
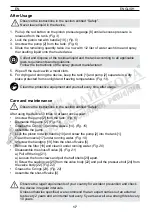
1. Pull up the red button on the piston pressure gauge [8] until all excess pressure is
released from the tank.
(Fig. 3)
2. Press the piston rod with handle [10] down and turn it counterclockwise.
Ź7KHSLVWRQURGZLWKKDQGOHLVORFNHG
)LJ
3. Unscrew the pump [2] from the tank.
(Fig. 6)
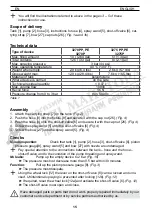
Spraying pressure
6SUD\LQJUDWHZLWKÀDWMHWQR]]OHRULJLQDOHTXLSPHQW
1.5 bar (21.8 psi)
0.49 l/min
2.0 bar (29.0 psi)
0.56 l/min
3.0 bar (43.5 psi)
0.69 l/min
EN ENGLISH
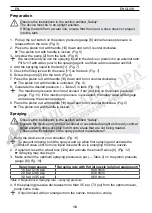
Preparation
+
:HUHFRPPHQG\RXPL[WKHVSUD\LQJOLTXLGLQWKHGHYLFHRUSUHPL[LWLQDQH[WHUQDOWDQN
)LOOWRZLWKZDWHUSRXULQWKHVSUD\LQJDJHQWDQGWKHQDGGPRUHZDWHUXQWLOIXOO
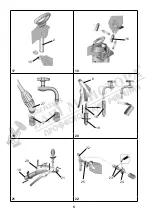
4. Add the spraying liquid to the tank [1].
(Fig. 7)
&KHFNWKH¿OOLQJOHYHOZLWKWKHVFDOH>@RQWKHWDQN
(Fig. 7)
6. Screw the pump [2] into the tank.
(Fig. 8)
7. Press the piston rod with handle [10] down and turn it counterclockwise.
Ź7KHSLVWRQURGZLWKKDQGOHLVXQORFNHG
(Fig. 9)
8. Generate the desired pressure
ĺ7DEOH
in tank
(Fig. 10).
+
7KHPD[LPXPSUHVVXUHVKRXOGQRWH[FHHGEDUUHGOLQHRQWKHSLVWRQSUHVVXUH
JDXJH)LJ,IWKHPD[LPXPSUHVVXUHLVH[FHHGHGWKHVDIHW\YDOYHZLOOHQJDJH
DQGUHOHDVHWKHH[FHVVSUHVVXUH
9. Press the piston rod with handle [10] down and turn it counterclockwise.
)LJ
Ź7KHSLVWRQURGZLWKKDQGOHLVORFNHG
Spraying
+
7RSUHYHQWGULSSLQJKROGWKHVSUD\ZDQGXSZKHQ¿UVWVSUD\LQJDQGDFWLYDWHWKH
VKXWR௺YDOYHXQWLOQRPRUHOLTXLGPL[HGZLWKDLULVHPHUJLQJIURPWKHQR]]OH
,IUHTXLUHGUHVHWWKHZKHHOORFN>D@DQGDFWLYDWHWKHVKXWRႇYDOYH>@
(Fig. 12)
Ź6SUD\LQJPD\QRZEHJLQ
3. Make certain the optimum spraying pressure is set
ĺ7DEOH
) on the piston pressure
gauge [8]
(Fig. 10)
.
7DEOH'HSHQGHQFH6SUD\LQJUDWH±VSUD\LQJSUHVVXUH
4. If the spraying pressure decreases more than 0.5 bar
(7.3 psi)
from the optimum level,
pump some more.
+
,IOLTXLGPL[HGZLWKDLUHPHUJHVIURPWKHQR]]OHWKHWDQNLVHPSW\
Observe the instructions in the section entitled „Safety“.
The device must be in an upright position.
,I¿OOLQJWKHWDQNIURPDZDWHUOLQHHQVXUHWKDWWKHOLQHRUDKRVHGRHVQRWSURMHFW
into the tank.
Observe the instructions in the section entitled “Safety”.
Operate the device only while it is vertical or suspended upright and nearly vertical.
Avoid allowing drops of spray to drift onto areas that are not being treated.
Observe the instructions of the spray product manufacturer!
1. Hang the device over your shoulder.
(Fig. 11)


