23
ENGLISH
7.
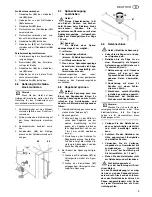
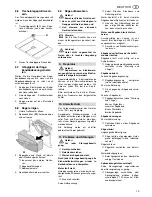
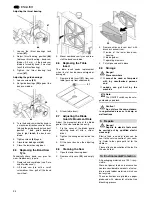
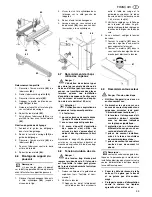
Fit a fresh band saw blade. Observe
correct position: the teeth point
towards the front (door) side of the
saw.
8.
Center band saw blade on the rub-
ber tyres of the band saw wheels.
9.
Tighten quick release lever until
blade does no longer slip off the
band saw wheels.
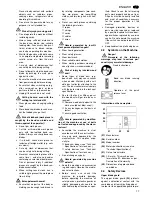
10. Close lower blade guard .
A
Danger!
Close housing doors only
when the lower blade guard is in its
closed position.
11. Close both housing doors.
12. Then:
tension band saw blade (see "Ini-
tial operation");
align band saw blade (see "Care
and Maintenance");
align blade guides (see "Care
and Maintenance");
let saw test run for at least one
minute;
stop saw, unplug and recheck
settings.
8.2
Aligning the Band Saw
Blade
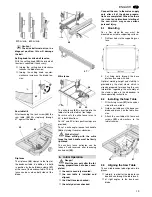
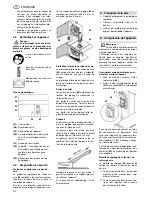
If the band saw blade does not run in the
centre of the rubber tyres, the tracking
needs to be corrected by adjusting the
tilt of the upper band saw wheel:
1.
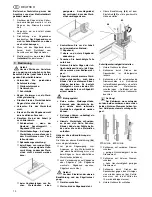
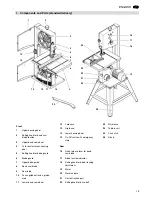
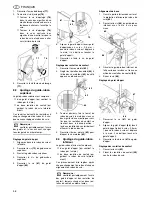
Loosen lock nut
(77)
.
2.
Turn setting knob
(78)
:
Turn setting knob
(78)
clockwise
if the band saw blade runs
towards the front of the saw.
Turn setting knob
(78)
counter-
clockwise if the band saw blade
runs towards the rear of the saw.
3.
Tighten lock nut
(77)
.
8.3
Aligning the Upper Blade
Guide
The upper blade guide consists of:
a thrust bearing (supporting the
band saw blade from the rear),
two guide bearings (providing lateral
support).
All bearings need to be readjusted after
every band saw blade change and/or
tracking adjustment.
3
Note:
Periodically check all bearings for
wear, if necessary replace both guide
bearings at the same time.
Adjusting the thrust bearing
1.
If necessary, align and tighten the
band saw blade.
2.
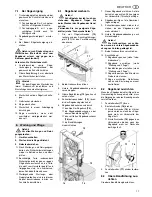
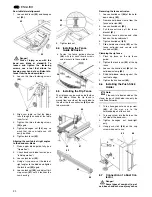
Loosen fixing screw
(79)
of the
upper blade guide.
3.
Align upper blade guide
4.
Tighten the upper blade guide's fix-
ing screw.
5.
Loosen the thrust bearing's
(81)
lock
screw
(80)
.
6.
Adjust thrust bearing position (dis-
tance thrust bearing - band saw
blade = 0.5 mm – if the band saw
blade is turned by hand, it must not
touch the thrust bearing).
7.
Tighten the thrust bearing lock
screw.
Adjusting the guide bearings
1.
Loosen knurled nut
(83)
.
2.
Set guide bearings
(84)
with the
knurled thumb screws
(82)
against
the band saw blade.
3.
Turn band saw wheel by hand in a
clockwise direction several times to
bring the guide bearings in correct
position – both guide bearings
should just touch the band saw
blade.
4.
Retigthen knurled nut
(83)
to lock
the knurled thumb screw
(82)
.
8.4
Aligning the Lower Blade
Guide
The lower blade guide consists of:
a thrust bearing (supporting the
band saw blade from the rear),
two guide bearings (providing lateral
support).
These parts need to be readjusted after
every band saw blade change or track-
ing adjustment:
3
Note:
Periodically check thrust bearings
and guide bearings for wear, if neces-
sary replace both guide bearings at the
same time.
Basic alignment
1.
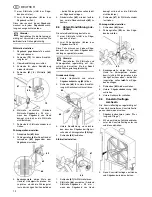
Open lower housing door and the
lower blade guard
(85)
.
2.
Loosen lower blade guide fixing
screw
(86)
with an open jaw wrench.
3.
Adjust position of lower blade guide
until band saw blade is centred
between the guide bearings
(90)
.
4.
Tighten screw
(86)
.
72
73
74
75
76
77
78
79
80
81
82
84
83
85
86
Summary of Contents for BAS 317 Precision WNB
Page 53: ...ZA0091_1 fm 3 1 2 4 6 5 ...
Page 54: ......
Page 55: ......
Page 56: ...U4BA_M1 FM ZINDEL AG Technische Dokumentation und Multimedia www zindel de www metabo com ...

