ENGLISH
en
12
Use suitable accessories for special work. In this
way, fewer particles enter the environment in an
uncontrolled manner.
Use a suitable extraction unit.
Reduce dust exposure with the following measures:
- do not direct the escaping particles and the
exhaust air stream at yourself or nearby persons
or on dust deposits,
- use an extraction unit and/or air purifiers,
- ensure good ventilation of the workplace and keep
clean using a vacuum cleaner. Sweeping or
blowing stirs up dust.
- Vacuum or wash the protective clothing. Do not
blow, beat or brush.
Transport of li-ion battery packs:
The shipping of li-ion battery pack is subject to laws
related to the carriage of hazardous goods (UN
3480 and UN 3481). Inform yourself of the currently
valid specifications when shipping li-ion battery
packs. If necessary, consult your freight forwarder.
Certified packaging is available from Metabo.
Only send the battery pack if the housing is intact
and no fluid is leaking. Remove the battery pack
from the machine for sending. Prevent the contacts
from short-circuiting (e.g. by protecting them with
adhesive tape).
Illustrations are provided at the beginning of the
operating instructions.
Symbol explanation:
Movement direction
Slow
Fast
First gear
Second gear
Screws
Drill bit
Without torque limitation
Impact drilling
Torque
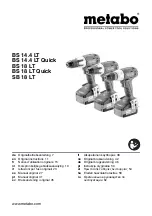
Fig. A
1 Keyless chuck
2 Sleeve (torque, drilling, impact drilling)*
3 Switch (1st/2nd gear)
4 Rotation selector switch (rotation setting,
transport lock) - both sides of the machine
5 Bit depot *
6 Belt hook *
7 Battery pack release button
8 Capacity indicator button
9 Capacity and signal indicator
10 Battery pack
11 LED lights
12 Trigger switch
*equipment-specific
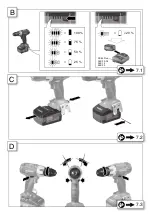
7.1 Battery pack, capacity and signal display
Fig. B
Charge the battery pack before use.
If performance diminishes, recharge the battery
pack.
The ideal storage temperature is between 10°C and
30°C.
7.2 Removing, replacing battery pack
Fig. C
7.3 Setting direction of rotation, transporting
safety device (switch-on lock)
Fig. D
7.4 Selecting gear stage
Fig. E
Do not set the switch (3) unless the motor has
7.5 Setting torque limitation,
drilling, impact drilling
Fig. F
7.6 Switching on/off, setting speed
Fig. A
Switching on, speed:
speed can be changed by pressing in the
trigger.
Switching off:
release the trigger (12). Note: The
noise that the machine makes when it switches
off is due to the design (quick stop) and has no
influence on the function or the service life of
the machine.
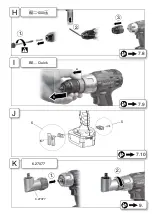
7.7 Keyless chuck
Fig. G
With a soft tool shank, retightening may be required
after a short period of operation.
Notes on machines with the designation SB...:
1. The ratchet sound which can possibly be heard
after opening the drill chuck is functional and is
switched off by a reverse rotation of the sleeve.
2. Clamping tool:
Turn sleeve in direction "GRIP, ZU" until the
noticeable mechanical resistance has been
overcome.
Caution! The chuck is not yet fully tight-
ened!
Keep turning the sleeve (
it must "click"
when turning)
) until it cannot be turned any
further -
only now
is the tool
safely
clamped.
Cleaning:
From time to time, hold the machine
vertically with the keyless chuck facing
downwards and turn the sleeve fully in direction
"GRIP, ZU" and then turn fully in direction
5. Figures
6. Overview
Nm
7. Use

