background image

8

ENGLISH

1.

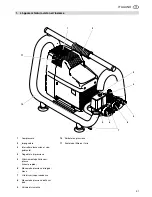
Device overview ..........................7

2.

Please Read First! .......................8

3.

Safety ...........................................8

3.1 Specified conditions of use ...........8

3.2 General safety information ............8

3.3 Safety devices...............................9

4.

Operation .....................................9

4.1 Mains connection ..........................9

4.2 Generating compressed air...........9

5.

Care and Maintenance ................9

5.1 Periodic maintenance....................9

5.2 Device storage ..............................9

6.

Trouble Shooting ........................9

7.

Repairs .......................................10

8.

Environmental Protection ........10

9.

Technical Specifications ..........10

Read these instructions before use.
Pay special attention to the safety
information. 

If you notice transport damage while
unpacking, notify your supplier
immediately. 

Do not

 operate the

device! 

Dispose of the packing in an envi-
ronmentally friendly manner. Take
to a proper collecting point. 

Keep these instructions for refer-
ence on any issues you may be
uncertain about. 

If you lend or sell this device be sure
to have the instructions to go with it. 

3.1

Specified conditions of use

This device is intended to generate com-
pressed air required for the operation of
air tools. 

Any use for medical purposes, food
processing as well as filling of oxygen
cylinders for breathing equipment is not
permitted. 

Explosive, combustible gases or gases
detrimental to health may not be com-
pressed. Operation in hazardous loca-
tions is not permitted. 

Any other use is not as specified. Use
not as specified, alteration of the device
or use of parts that are not approved by
the equipment manufacturer, can cause
unforeseeable damage! 

Children, juveniles and persons not hav-
ing been instructed in its usage are not
permitted to operate this device and any
air tools connected to it. 

3.2

General safety information

When using this electric tool observe the
following safety instructions, to exclude
the risk of personal injury or material
damage. 
Please also observe the special safety
instructions in the respective chapters; 
Keep all documents, supplied with the
device, for future reference. 
Observe the statuary accident insurance
institution regulations and regulations for
the prevention of accidents pertaining to
the operation of air compressors and air
tools, where applicable. 

A

General hazard! 

Keep your work area tidy – a messy
work area invites accidents. 
Be alert. Know what you are doing. Set
out to work with reason. Do not operate
electric tool while under the influence of
drugs, alcohol or medication. 
Consider environmental conditions. 
Keep work area well lighted. 
Prevent adverse body positions. Ensure
firm footing and keep your balance at all
times. 
Do not operate electric tool near inflam-
mable liquids or gases. 
Keep bystanders, particularly children,
out of the work area. Do not permit other
persons to touch the tool or power cable
while the electric tool is running. 
Do not overload electric tool – use it only
within the performance range it was
designed for (see Technical specifica-
tions). 

B

Danger! Risk of electric shock!


Do not expose electric tool to rain. 
Do not operate electric tool in damp or
wet environment.
Prevent body contact with earthed
objects such as radiators, pipes, cooking
stoves or refrigerators when operating
this electric tool. 
Do not use the power cable for any pur-
pose it is not intended for. 

A

Risk of personal injury by

escaping compressed air and parts
hurled about by escaping air!

Never direct compressed air against per-
sons or animals! 
Ensure all air tools and accessories
used are designed for the working pres-
sure or are supplied via a pressure regu-
lator. 
Please note that, when disconnecting
the quick coupler, the compressed air
contained in the pressure hose will
escape all of a sudden. You should
therefore firmly hold the air hose when
disconnecting it. 
Ensure all screwed connections are fully
tightened at all times. 
Do not attempt to repair the device your-

self! Only trained specialists are permit-
ted to service or repair compressors,
pressure vessels and air tools. 

A

Hazard generated by oil-satu-
rated compressed air!

Use oil saturated compressed air only
for air tools requiring such supply. Do
not use an air hose used to supply com-
pressed air containing oil to supply air
tools not designed for operation on com-
pressed air containing oil. Do not fill tires
with compressed air containing oil. 

A

Risk of burns from the sur-

faces of parts carrying compressed
air!

Let device cool off before servicing. 

A

Risk of personal injury and
crushing by moving parts!

Do not operate the device without
installed guards. 
Please note that the device will start
automatically when the pressure falls off
to minimum! – Disconnect from power
supply prior to any servicing. 
Ensure that when switching on (e.g. after
servicing) no tools or loose parts are in
the electric tool. 

A

Hazard generated by insuffi-
cient personal protection gear!

Wear hearing protection. 
Wear safety glasses. 
Wear mask respirator when work gener-
ates dust or mist detrimental to health. 
Wear suitable work clothes When work-
ing outdoors wearing of non-slip shoes is
recommended. 

A

Hazard generated by electric
tool defects! 

Keep electric tool and accessories in
good repair. Observe the maintenance
instructions. 
Prior to any use check the electric tool
for possible damage: before using the
electric tool carefully check safety
devices, protection devices or slightly
damaged parts for proper function as
specified. Check to see that all moving
parts work properly and do not jam. All
parts must be correctly installed and
meet all conditions necessary for the
proper operation of the electric tool. 
Damaged protection devices or parts
must be repaired or replaced by an qual-
ified specialist. Have damaged switches
replaced by a service centre. Do not
operate electric tool if the switch can not
be turned ON or OFF. 
Keep handles free of oil and grease. 

Table of Contents

2.

Please Read First!

3.

Safety

Summary of Contents for Power 260

Page 1: ...2 1 Power 260 Betriebsanleitung 3 Operating Instruction 7 Instructions d utilisation 11 Handleiding 16 Manuale d istruzioni 21 Manual de uso 26 Betjeningsvejledning 31 Bruksanvisning 35 K ytt k sikir...

Page 2: ...get ansvar att denna produkt verensst mmer med f ljande standarder enligt best mmelserna i direktiven provningsrapport genomf rt av Uppm tt Garanterad ljudniv FIN SUOMI NO NORGE VAATIMUKSENMUKAISUUSVA...

Page 3: ...er 2 Tragegriff 3 Ein Aus Schalter 4 Druckregler 5 Druckluft Anschluss Schnellkupplung 6 Manometer Regeldruck 7 Ablass Schrauben f r Kondens wasser 8 Manometer Kesseldruck 9 Sicherheitsventil 10 Druck...

Page 4: ...kei ten oder Gasen Halten Sie Kinder aus dem Arbeitsbe reich fern Lassen Sie w hrend des Betriebs andere Personen nicht das Werkzeug oder das Netzkabel ber hren berlasten Sie dieses Elektroger t nicht...

Page 5: ...Netz stecker aus der Steckdose 4 2 Druckluft erzeugen 1 Ger t einschalten 13 und abwar ten bis der maximale Kesseldruck erreicht ist Kompressor schaltet ab Der Kesseldruck wird am Kessel druck Manome...

Page 6: ...nziehen R ckschlagventil undicht R ckschlagventil in Fachwerk statt berholen lassen Druckluftwerkzeug erh lt nicht gen gend Druck Druckregler nicht weit genug aufge dreht Druckregler weiter aufdrehen...

Page 7: ...2 Carrying handle 3 On Off switch 4 Pressure regulator 5 Compressed air outlet quick coupler 6 Outlet pressure gauge 7 Condensate drain screws 8 Tank pressure gauge 9 Safety valve 10 Pressure vessel...

Page 8: ...d for see Technical specifica tions B Danger Risk of electric shock Do not expose electric tool to rain Do not operate electric tool in damp or wet environment Prevent body contact with earthed object...

Page 9: ...continue working immediately after wards Unplug after switching OFF A Danger Prior to all servicing Switch Off Unplug Wait until the device has come to a complete stop Ensure the device and all air to...

Page 10: ...compres sor and air tool leaky Check air hoses replace defec tive parts if necessary A Danger Repairs to power tools must be carried out by qualified electricians only Electric tools in need of repai...

Page 11: ...3 Interrupteur marche arr t 4 Manostat 5 Alimentation en air comprim raccord rapide 6 Manom tre pression de r gula tion 7 Vis de vidange pour l eau de condensation 8 Manom tre pression de chau di re...

Page 12: ...rage correct Eviter de prendre une position du corps inconfortable Veiller adopter une posi tion stable et garder constamment votre quilibre Ne pas utiliser la machine en pr sence de liquides ou de ga...

Page 13: ...uement des c bles gaine de caoutchouc de section transversale suffisante voir Caract ristiques techniques Ne pas teindre le compresseur en retirant la fiche de contact mais avec l interrupteur marche...

Page 14: ...mpresseur avec l interrupteur marche arr t puis le rallumer Surchauffe du moteur p ex par refroidissement insuffisant ailettes de r frig ration recouvertes Eliminer la cause de surchauffe laisser refr...

Page 15: ...n 2850 Puissance du moteur kW 1 5 Tension de raccordement 50 Hz V 230 Courant nominal A 6 8 Nombre minimum de fusibles A 10 action retard e Indice de protection IP 20 Longueur totale maximale en cas d...

Page 16: ...10 11 1 Compressor 2 Draaggreep 3 Hoofdschakelaar 4 Drukregelaar 5 Persluchtaansluiting snelkoppeling 6 Regeldrukmeter 7 Aftapschroeven voor condensa tiewater 8 Keteldrukmeter 9 Veiligheidsklep 10 Dru...

Page 17: ...is Zorg voor een goede lichaamshouding Zorg ervoor dat u op een stevige onder grond staat en let er vooral op dat u altijd goed in evenwicht bent Gebruik het elektrische toestel niet in de nabijheid...

Page 18: ...beschadigd kan worden door scherpe voorwer pen Als verlengsnoer mag uitsluitend gebruik gemaakt worden van een snoer met voldoende doorsnede zie Technische gegevens Schakel de compressor uit met de ho...

Page 19: ...te trekken terwijl hij in gebruik was Schakel de compressor eerst uit met de hoofdschakelaar en schakel hem vervolgens weer in De motor is oververhit bijvoorbeeld door defecte koeling afgedekte koelri...

Page 20: ...tal min 1 2850 Motorvermogen kW 1 5 Voedingsspanning 50 Hz V 230 Nominale stroomsterkte A 6 8 Zekering min A 10 langzaam Beveiligingsklasse IP 20 Maximale totale lengte bij het gebruik van verlengkabe...

Page 21: ...spe gnimento 4 Regolatore di pressione 5 Allacciamento dell aria com pressa innesto rapido 6 Manometro pressione di regola zione 7 Vite di scarico per condensa 8 Manometro pressione della cal daia 9...

Page 22: ...rico se Vi manca la dovuta concentrazione Tenete in debita considerazione i poten ziali effetti dell ambiente circostante Provvedete ad una buona illuminazione Evitate di assumere posizioni o atteggia...

Page 23: ...Controllate ogni volta se la macchina spenta prima di inserire il connet tore di rete nella presa elettrica Proteggete il cavo di alimentazione contro il calore i fluidi aggressivi e i bordi taglienti...

Page 24: ...te mentre era in funzione Spegnere intanto il compressore utilizzando l interruttore di accen sione spegnimento poi riaccen derlo Il motore surriscaldato ad esem pio a causa di un raffreddamento insuf...

Page 25: ...ero cilindri 1 Velocit min 1 2850 Potenza motore kW 1 5 Tensione di allacciamento 50 Hz V 230 Corrente nominale A 6 8 Fusibile min A 10 ritardato Protezione IP 20 Max lunghezza totale in caso di prolu...

Page 26: ...Regulador de presi n 5 Conexi n de aire comprimido para aire exento de aceite acople r pido 6 Man metro de presi n de regu laci n 7 Tapones de descarga para agua condensada 8 Man metro presi n de rec...

Page 27: ...antener en cual quier momento el equilibrio No utilizar estos aparatos en la cercan a de l quidos inflamables o gases Mantener a los ni os alejados de la zona de trabajo No permitir que durante el ser...

Page 28: ...vos y los bordes afila dos Utilizar solamente cables de exten si n con una secci n transversal suficiente v ase Caracter sticas t c nicas No desconectar el compresor desen chufando el cable de aliment...

Page 29: ...e de alimentaci n de la caja de toma de la red En primer lugar desconectar el compresor con el interruptor Con Desc y luego volver a conectarlo El motor se ha sobrecalentado por ejemplo debido a una r...

Page 30: ...revoluciones min 1 2850 Potencia del motor kW 1 5 Tensi n de conexi n 50 Hz V 230 Intensidad nominal A 6 8 Fusible m nimo A 10 de reacci n lenta Clase de protecci n IP 20 Longitud m xima utilizando c...

Page 31: ...essor 2 B reh ndtag 3 Start stop kontakt 4 Trykregulator 5 Trykluft tilslutning lynkobling 6 Manometer regulatortryk 7 Aftapningsskruer til kondensat 8 Manometer kedeltryk 9 Overtryksventil 10 Trykbeh...

Page 32: ...e data B Der er fare pga elektricitet El v rkt jet m ikke uds ttes for regn Maskinen m ikke anvendes i fugtige eller v de omgivelser Undg under arbejdet med dette v rkt j kropskontakt med jordede dele...

Page 33: ...gen 17 tilsluttes 4 Tilslut trykluftsv rkt j Nu kan der arbejdes med tryklufts v rkt jet 5 Sl maskinen fra n r den ikke umid delbart skal bruges igen Tag deref ter netstikket ud A Fare F r alle arbejd...

Page 34: ...ektrikerv rksted Trykluftsv rkt j f r ikke tilstr kke ligt tryk Der er ikke bnet nok for trykregula toren bn mere for trykregulatoren Slangeforbindelsen mellem kom pressor og trykluftsv rkt j er ut t...

Page 35: ...essor 2 B rhandtag 3 Str mbrytare 4 Tryckregulator 5 Tryckluftsanslutning snabbkoppling 6 Manometer f r reglertryck 7 Avtappningsskruvar f r kon densvatten 8 Manometer f r matartryck 9 S kerhetsventil...

Page 36: ...kniska data B Fara f r elektricitet Undvik att uts tta elmaskinen f r regn Anv nd den inte heller p fuktiga eller v ta arbetsplatser Undvik att komma i ber ring med jor dade delar t ex v rmeelement r...

Page 37: ...med tryck luftsverktyget 5 St ng alltid av kompressorn n r du g r ett uppeh ll i arbetet Dra ur stickkontakten A Fara Innan du b rjar arbeta p kom pressorn St ng av maskinen Dra ur kontakten V nta ti...

Page 38: ...stan Tryckluftsverktyget f r inte nog med tryck Tryckregulatorn r inte ppen ordentligt ppna tryckregulatorn mer Slangkopplingen mellan kompressor och tryckluftsverktyg r inte t t Kontrollera slangkopp...

Page 39: ...pressori 2 Kantokahva 3 P LLE POIS kytkin 4 Paineens din 5 Paineilmaliit nt pikaliitin 6 S t paineen manometri 7 Kondenssiveden tyhjennysruuvi 8 S ili paineen manometri 9 Turvaventtiili 10 Paines ili...

Page 40: ...ty s kennelt ess kosketuksia maadoitettui hin osiin esim l mp patterit putket hellat j kaapit l k yt verkkokaapelia tarkoituksiin johon sit ei ole tarkoitettu A Ulostulevasta paineilmasta ja osista j...

Page 41: ...aan aloittaa 5 Kytke laite pois p lt jos ty sken tely ei v litt m sti haluta jatkaa Ved t m n j lkeen verkkopistoke my s irti A Vaara Ennen kaikkia laitteelle suori tettavia t it kytke laite pois p lt...

Page 42: ...nna ammattikorjaamon korjata takaiskuventtiili Paineilmaty kalu ei saa riitt v sti pai netta paineens dint ei ole avattu tar peeksi avaa paineens dint enemm n kompressorin ja paineilmaty kalun v linen...

Page 43: ......
Page 44: ...U4BA_M1 FM Achtung Diese Seite ersetzen durch More of metabo tools Attention Please replace this page by More of metabo tools...

Reviews: