ENGLISH
en
9
Observe the relevant guidelines for your material,
staff, application and place of application (e.g.
occupational health and safety regulations,
disposal).
Collect the generated particles at the source, avoid
deposits in the surrounding area.
Use suitable accessories for special work. In this
way, fewer particles enter the environment in an
uncontrolled manner.
Use a suitable extraction unit.
Reduce dust exposure with the following measures:
- Do not direct the escaping particles and the
exhaust air stream at yourself or nearby persons
or on dust deposits.
- Use an extraction unit and/or air purifiers.
- Ensure good ventilation of the workplace and
keep clean using a vacuum cleaner. Sweeping or
blowing stirs up dust.
- Vacuum or wash the protective clothing. Do not
blow, beat or brush.
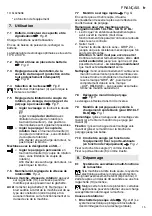
V ............ volts
....... direct current
n
0...............
rated speed
../min ...... revolutions per minute
rpm ......... revolutions per minute
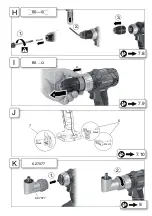
Illustrations are provided at the beginning of the
operating instructions.
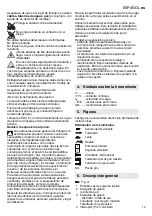
Symbol explanation:
Movement direction
Drill bit
Slow
Fast
First gear
Second gear
Screwdriving / torque limitation
Drilling / max. torque
Impact drilling
Torque
Fig. A
1 Keyless chuck
2 Adjusting sleeve
(Torque limitation)
3 Adjusting sleeve
- Screwdriving / torque limitation
- Drilling / max. torque
- Impact drilling
4 Switch (1st / 2nd gear)
5 Rotation selector switch (rotation setting,
transport lock) - both sides of the machine
6 Bit depot *
7 Belt hook *
8 Battery pack release button
9 Capacity indicator button
10 Capacity and signal indicator
11 Battery pack
12 LED light
13 Trigger switch
*equipment-specific
7.1 Battery pack, capacity and signal
indicator
Fig. B
Charge the battery pack before use.
Recharge the battery pack if performance dimin-
ishes.
The ideal storage temperature is between 10°C and
30°C.
7.2 Removing and inserting the battery pack
Fig. C
7.3 Setting the direction of rotation,
engaging the transporting safety device
(switch-on lock)
Fig. D
7.4 Selecting the gear
Fig. E
Do not set the switch (4) unless the motor has
stopped completely!
7.5 Setting the torque limitation,
screwdriving, drilling and impact drilling
Fig. F
= Set
screwdriving
by turning the sleeve
(3)
set the
torque
(with torque limitation) by
turning the sleeve (2) - intermediate
settings are also possible.
= Set
drilling
by turning the sleeve (3) (max.
torque, without torque limitation)
To avoid overloading the motor, do not
jam the spindle.
Machines with the designation SB...:
= Set
impact drilling
by turning the sleeve
(3) (max. torque, without torque limitation)
To avoid overloading the motor, do not
jam the spindle.
7.6 Switching On/Off, setting the speed
Fig. A
Switching on, speed:
press the trigger switch (13).
Press in the trigger switch to increase the
rotational speed.
Switching off:
release the trigger switch (13). Note:
the noise that the machine makes when it
switches off is due to the design (quick stop)
4. Symbols
5. Figures
6. Overview
Nm
7. Use
Summary of Contents for SB 18 LT
Page 3: ...3 50 100 75 25 50 20 ASC 30 36 ASC ultra SC 60 Plus ASC 30 etc 7 1 7 3 7 2 B C D ...
Page 4: ...4 1 Nm Nm 7 4 7 7 4 1 7 5 2 3 E F G max Nm SB ...
Page 5: ...b a b 7 8 7 9 7 10 9 H 1 1 2 2 3 BS Q I BS Q 6 27077 K J 6 27077 7 6 M5x12 M5x8 M5x8 ...
Page 22: ......
Page 23: ......
Page 24: ...Metabowerke GmbH Metabo Allee 1 72622 Nuertingen Germany www metabo com 170 27 4060 0516 ...


