background image


INSTALLATION INSTRUCTION   

 
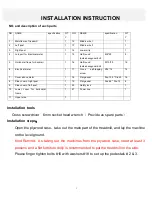
NO. and description of each parts   


NO 

NAME 

specification 

QT

NO. 

NAME 

specification 

QT

Mainframe of treadmill 


12 

Middle wire I 


Left post   


13 

Middle wire II 


Right post 


14 

Lower wire 


Join part for Electrical meter 


15 

Half round   

Inside hexagonal bolt 

M8 *20 

Horizontal frame for handrail 


16 

Half round   

Inside hexagonal bolt 

M10 *20 

16 

Electrical meter 


17 

Cross 

self-tapping 

screw 

ST4*15 

14 

Cover above motor 


18 

Flat gasket 

Dia 10.5 * Dia 20 

16 

Side cover of right post 


19 

Flat gasket 

Dia 8.4 * Dia 15 

Side cover of left post 


20 

Safety lock 


10 

Lower  cover  for  horizontal 

frame 


21 

Power line 


11 

Upper wire 


Installation tools 


Cross screwdriver    6mm socket head wrench

  Provide as spare parts


Installation steps


Open the plywood case

take out the main part of the treadmill, and lay the machine 

on the level ground.   

Kind Remind

As taking out the machines from the plywood case, need at least 3 

persons and a flat furniture dolly is recommended to put the treadmill on the side. 

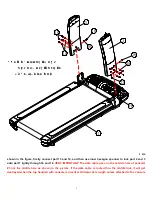
Please finger tighten bolts #16 with washers #18 to set up the pedestals # 2 & 3. 


Summary of Contents for MF-P096L LED

Page 1: ...UIPMENT CO L INSTRUCTIONS OF INSTALLATION USE AND MAINTENANCE MANUAL NOTICE 1 Please read the manual carefully before using the electronic treadmill 2 Please keep the instruction well for future refer...

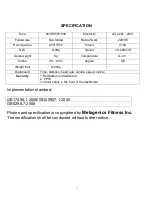
Page 2: ...e 0 40 Incline 0 20 degree SB Weight limit 180Kg Dashboard Time distance heart rate calorie speed incline Security 1 Red button on dashboard 2 PPTC 3 Circuit safety in the front of the dashboard Imple...

Page 3: ...motor 1 18 Flat gasket Dia 10 5 Dia 20 16 8 Side cover of right post 1 19 Flat gasket Dia 8 4 Dia 15 4 9 Side cover of left post 1 20 Safety lock 1 10 Lower cover for horizontal frame 1 21 Power line...

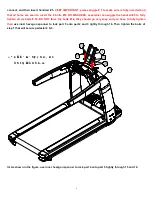
Page 4: ...to lock part 2 and 3 onto part 1 lightly through 16 and 18 VERY IMPORTANT The data cable goes on the outside hole of pedestal 3 not the middle hole as shown in the picture If the data cable is routed...

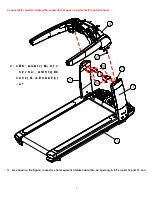
Page 5: ...need to unplug the segment that goes on pedestal 3 outside hole 2 3 16 18 18 1 13 12 1 2 13 5 1 6 18 2 3 5 II As shown in the figure route the short segment of data cable thru an opening in 5 so part...

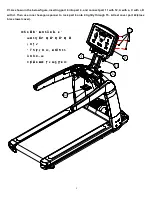
Page 6: ...5 to fully tighten all six bolts 16 DO NOT force the bolts 16 they should go very easy and you have to fully tighten then use inner hexagon spanner to lock part 5 onto part 2 and 3 lightly through 16...

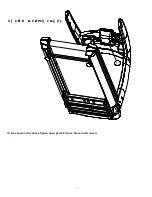
Page 7: ...7 22 22 IV As shown in the above figure open part 22 cross brace lower cover...

Page 8: ...into part 4 and connect part 11 with 12 A with a C with c D with d Then use inner hexagon spanner to lock part 6 onto 4 tightly through 15 At last cover part 22 cross brace lower cover AB C D b c a d...

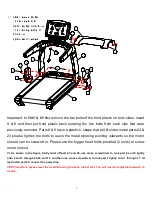
Page 9: ...tighten the bolts to leave the metal opening pointing outwards so the motor shroud can be screwed in Please use the bigger head bolts provided 2 units to screw motor shroud VI As shown in the figure f...

Page 10: ...can only connect the power line after confirming all the parts are installed according to the instructions Kindly reminder Please check whether the security lock reset or not before starting the tread...

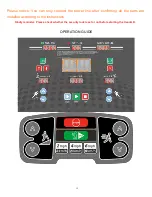
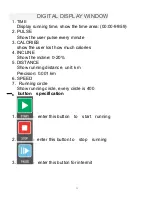
Page 11: ...ALORIES show the user lost how much calories 4 INCLINE Show the incline 0 20 5 DISTANCE Show running distance unit km Precision 0 001 km 6 SPEED 7 Running circle Show running circle every circle is 40...

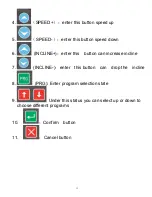
Page 12: ...tton speed down 6 INCLINE enter this button can increase incline 7 INCLINE enter this button can drop the incline 8 PRG Enter program selection state 9 Under this status you can select up or down to c...

Page 13: ...a climate controlled room and the location for treadmill must be clean and flat do not operate it on a thick blanket and the like Use the treadmill only for its intended use as described in the treadm...

Page 14: ...ional part of one treadmill 13 Heart rate sensors are not a medical device so results might not be accurate 14 If you feel unwell during the exercise you should stand on the side rails and stop the tr...

Reviews: