5
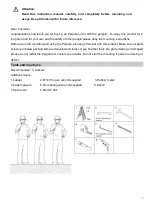
A minimum of three healthy adults are required to move and install the pergola
as the product is big and heavy. Do not try to install the pergola alone. If the pergola
falls, it could cause serious injuries and damages! Contact an authorized assembler for
help.
Do not install the pergola when you find damage parts are that parts are missing.
Contact your dealer.
Keep children and pets out of the working area during assembly and
adjustments.
This product and its fixing parts are only suitable for installation on a plain
cement wall or stable unrendered brickwork. If the wall/brickwork shows cracks
you have to consult a professional.
Nobody is allowed to change the products’ design and structure
without the
permission of manufacture or authorized deputy.
Please make sure that your hands are clean at the time of the assembly; otherwise you
may soil frame.
Nobody is allowed to climb onto the Pergola. Hanging anything on the Pergola is
forbidden.
Sheeting was used to protect the paint. This must be removed afterwards.
This structure is a non-permanent structure and the warranty does not cover damage
incurred under extreme weather conditions including heavy rain, high winds or if
exposed to high heat from heaters or BBQs.
Safety precautions should always be followed when assembling and using this product
to reduce the risk of personal injury and damage to equipment. Please read all
instructions before assembly and use. Never leave children unattended around/under
this pergola. Do not attempt to assemble or use the pergola in moderate or heavy wind
conditions. Always
keep the pergola louver open
and secure it during heavy winds or
extreme weather conditions to avoid damage to the pergola or personal injury.
Mounting and usage
Summary of Contents for GR-102
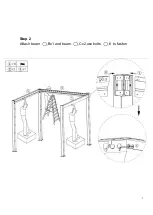
Page 7: ...7 Step 2 Attach beam Bx1 and beam Cx2 use bolts 6 to fasten...
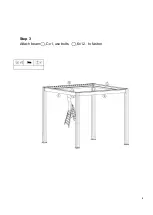
Page 8: ...8 Step 3 Attach beam Cx1 use bolts 6x12 to fasten...
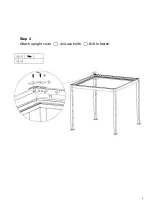
Page 9: ...9 Step 4 Attach upright cover 4x4 use bolts 6x8 to fasten...
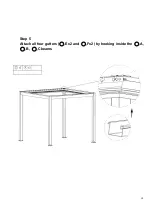
Page 10: ...10 Step 5 Attach all four gutters Ex2 and Fx2 by hooking inside the A B Cbeams...
Page 16: ...16 Motor setup...

