10
HKS 230 | Version 3.06
Settings and commissioning
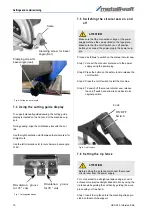
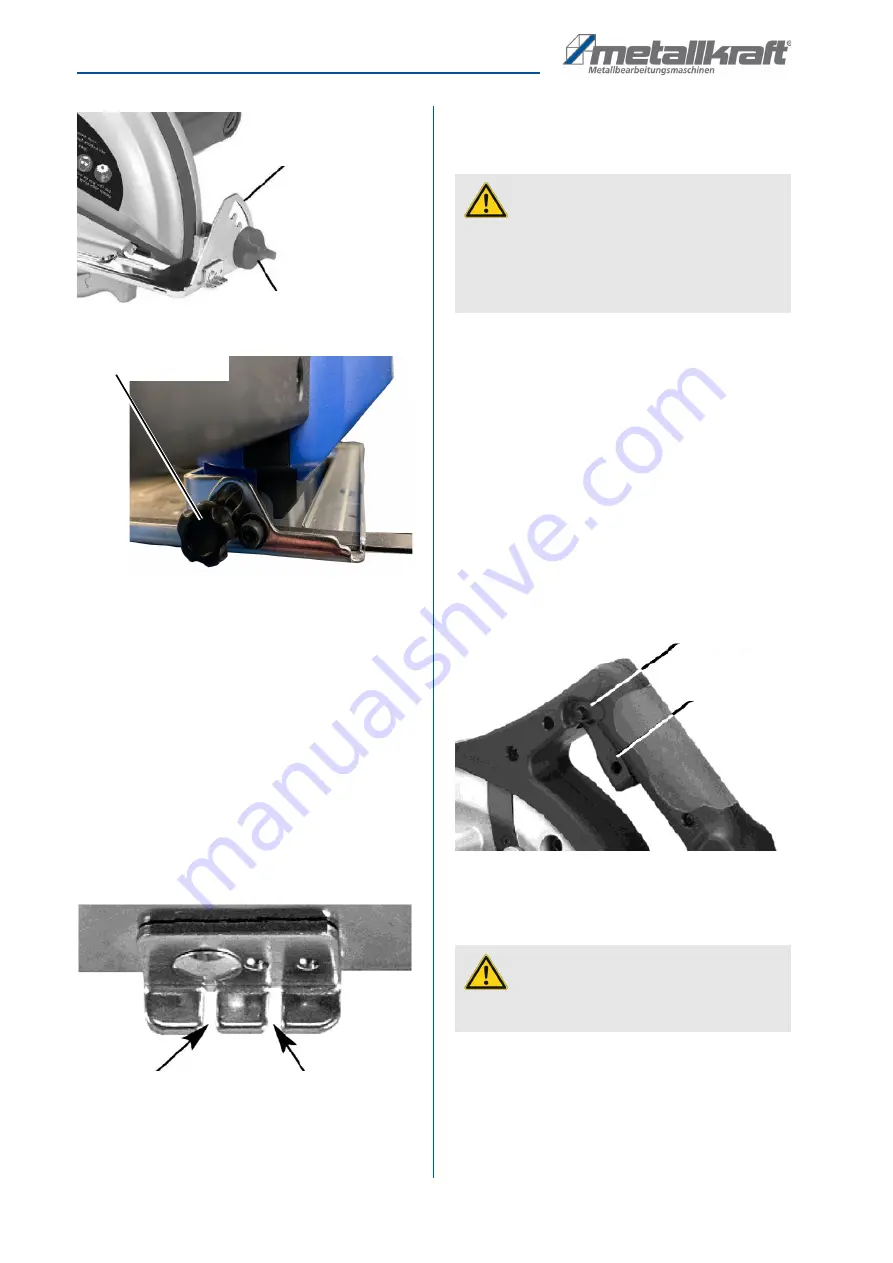
Fig. 6: Setting the bevel angle
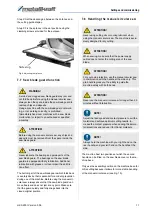
7.4 Using the cutting guide display
To support manually guided sawing, the cutting guide
display is located on the front end of the machine sup-
port.
During sawing, align the orientation slots with the cut
line.
Use the right orientation slot (between the two marks) for
straight cuts.
Use the left orientation slot for cuts below a bevel angle
of 45°.
Fig. 7: Cutting guide display
7.5 Switching the circular saw on and
off
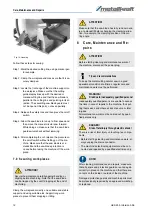
Proceed as follows to switch on the manual circular saw:
Step 1: Connect the manual circular saw to the power
supply using the power plug.
Step 2: Press the button on the safety lock to release the
on/off switch.
Step 3: Press the on/off switch to start the machine.
Step 4: To switch off the manual circular saw, release
the on/off switch and allow to snap back to its
original position.
Fig. 8: On/off switch
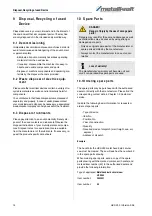
7.6 Setting the rip fence
For cuts parallel to a straight workpiece edge, you will
achieve more precise straight ahead motion by using the
rip fence while guiding the cut than by guiding the work-
piece with your free hand.
Step 1: Insert the rip fence into the mounting straps pro-
vided on the machine support.
Clamping screw for bevel
angle (front)
Scale
Clamping screw for
bevel angle (rear)
Orientation groove
for 45 ° cuts
Orientation groove
for 90 ° cuts
ATTENTION!
Make sure that the connection voltage of the power
supply matches the value printed on the type plate.
Make sure that the on/off switch is on off position
before you connect the power plug to the power sup-
ply.
ATTENTION!
Before setting the rip fence disconnect the manual
circular saw from the power supply.
ON/OFF
Switch
Lock

