16
KRBS 101 | Version 1.03
Care, maintenance and overhaul/repair
10.1 Cleaning and lubrication of the machine
.
The Machine should generally be cleaned after every
use.
Regularly remove the spark arrester and check whether
the interior of the grinding machine must be cleaned.
Brush or wipe all open machine parts in regular intervals
using a broom or a cloth.
Treat blank metallic working surfaces with anti-rust
spray.
Lubricate all moving parts and bearings once per month.
If necessary, replace the graphite support at the level
grinding area.
10.2 Adjust Belt change and Belt run
Step 1: Switch off the machine witt1 the main switch and
unplug the machine.
Step 2: Unscrew the safety screw and open Hie side
coverings plate by turning the lever.
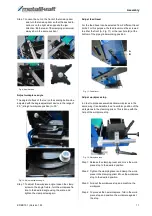
Step 3: Turn the cover of the abrasive wheel (2, Fig. 3)
backwards.
Step 4: Release the bell by turning the hand wheel
(11, Fig. 3).
Step 5: Take out the belt.
Step 6: Put in a new belt.
Step 7: Stretch the belt wilh lhe hand wheel. You have
reached lhe right bell tension if the upper spin
-
clle nul is culs out 7 lo 10 mm and the lension is
taken over by the spring only.
Step 8: Afterwareis close lhe cover ancl lighlen the
safety screw again.
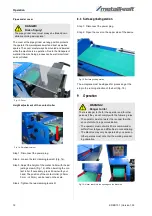
Step 9: lt is recommended, to adjust the band running a
bit rough by pushing the belt to the abrasive
wheel and turning the acljustment screw .
Step 10: Close the cover of lhe abrasive wheel and start
the machine.
Step 11: The bell running can now be adjusled by lurning
the acljuslmenl screw. Turn care fully ancl
watch how the bell is cloing. lf you have rea
-
ched lhe right adjustmenl, you should be see
-
ing lhe same distance on both sicles on lhe
grincling roller.
10.3 Changing the contact roller
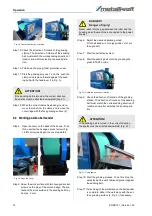
Step 1: Disconnect the power plug.
Step 2: Unscrew the safety screw and open the side
cover.
Step 3: Relax the sanding belt by turning the hand
-
wheel. Then open the cover of the surface
grinding surface .
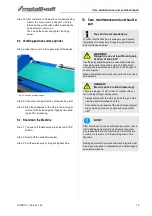
Step 4: Remove the sanding belt.
Step 5: Remove the contact roll.
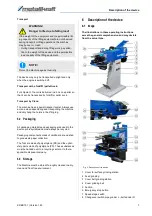
ATTENTION!
- It is indispensable to switch the machine off and to
pull off the mains plug before performing cleaning
and maintenance work!
- Never use solvents or cleaning solutions to clean
plastic parts or lacquered surfaces. The surface may
be dissolved and consequential damage may occur.
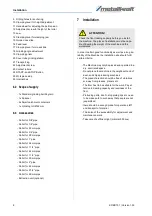
ATTENTION!
- Never remove chips or grinding dust with bare
hands. Danger of injuries due to sharp-edged chips.
- Never remove chips or grinding dust with a com
-
pressed air blow gun. This can lead to eye injury
and may damage machine parts.
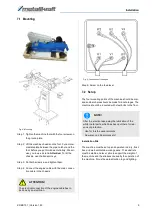
ATTENTION!
Use only belts with the dimension 2000 mm x 100
mm. Check before installation for your own safety
tl1e dimensions of the belt and check it for evt.
structural faults. Always select that belt which suits to
the material to be grinded.
Choose grinding belts with a weid where the opposite
ends are glued together. Grinding belts with the ends
glued together on top, can break when changing the
belt direction.
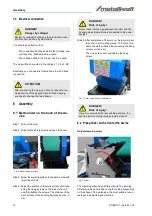
WARNING!
When changing the sanding belt, the upper limbs between
the drive roller and the sanding belt can be crushed.
WARNING!
Danger of Electric shock!
Disconnect the mains plug before working on the
device.
Summary of Contents for KRBS 101
Page 1: ...KRBS 101 Instruction Manual KRBS 101 KRBS 101 Combined pipe section and belt grinding machine...
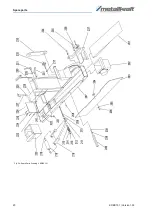
Page 20: ...20 KRBS 101 Version 1 03 Spare parts Fig 24 Spare Parts Drawing 2 KRBS 101...
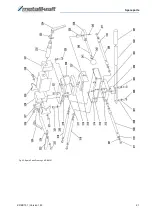
Page 21: ...Spare parts KRBS 101 Version 1 03 21 Fig 25 Spare Parts Drawing 3 KRBS 101...
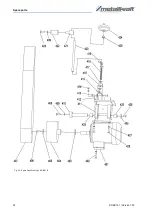
Page 22: ...22 KRBS 101 Version 1 03 Spare parts Fig 26 Spare Parts Drawing 4 KRBS 101...
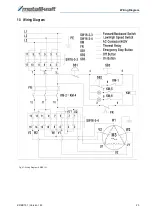
Page 23: ...Wiring Diagram KRBS 101 Version 1 03 23 13 Wiring Diagram Fig 27 Wiring Diagram KRBS 101...
Page 25: ...Notes KRBS 101 Version 1 03 25 15 Notes...
Page 26: ...www metallkraft de...

