10
RBM 305 | Version 2.02
Operation
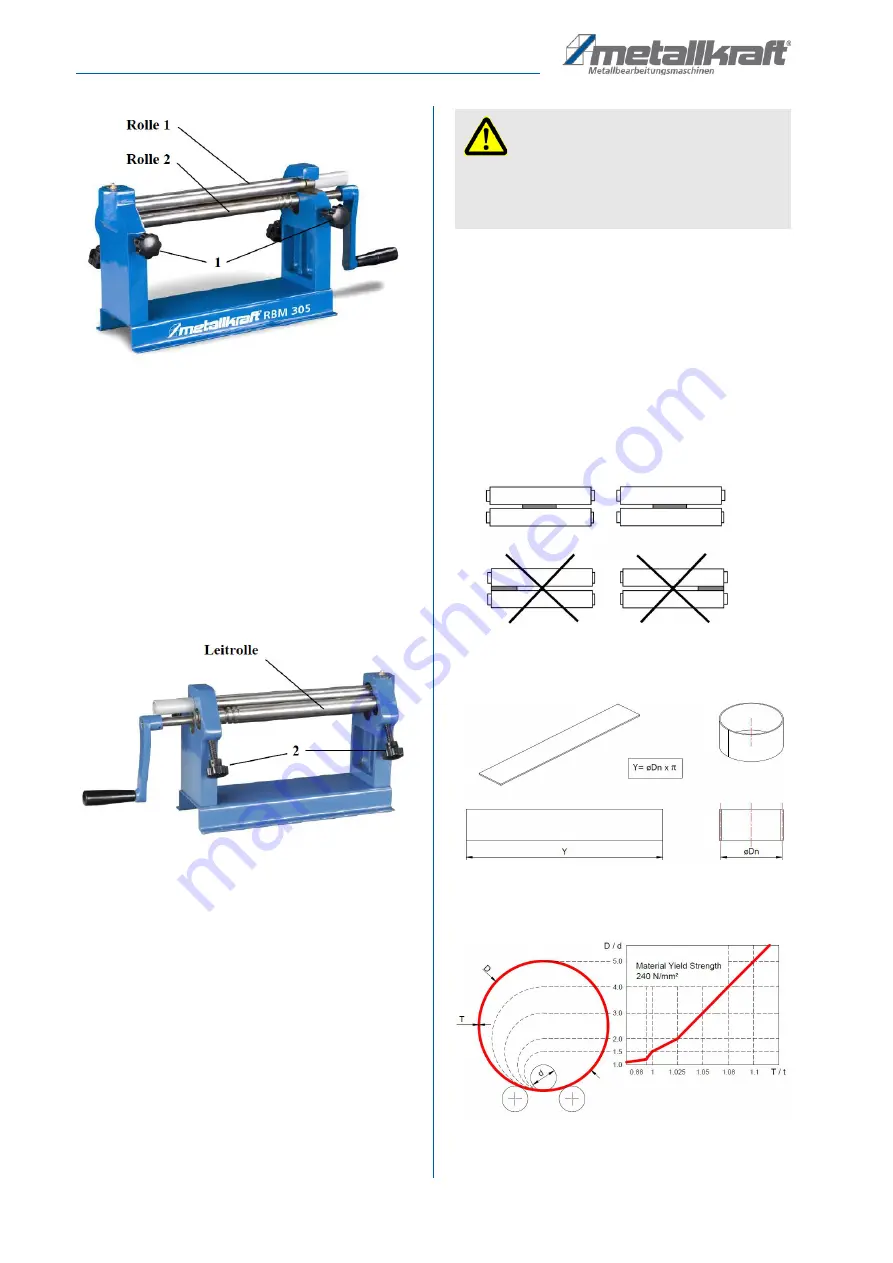
Fig. 7: Setting the sheet thickness
8.3 Adjusting the guide pulley
The guide roller (3) is adjusted by means of the two
rotary handles (2; Fig. 8). In order to achieve a greater
radius of curvature of the sheet, the rotary handles must
be unscrewed, screwed in for a smaller radius of curva
-
ture. To create straight tubes, the idler must be set paral
-
lel to the other rollers. For conical tubes, the idler must
be set at an angle. For this purpose, one of the rotary
handles (2) must be screwed in correspondingly deeper
than the other.
Fig. 8: Adjusting the guide pulley
8.4 bending process
Bending may only be performed by qualified personnel
experienced in these machines. All steps of bending,
pre-bending and conical bending must be carried out ex
-
tremely carefully. It should be noted that a small radius is
made by repeating the bending process several times;
Once too much bent, this step can not be undone.
Before editing
- Remove dirt and oil from the material.
- The material ends must be free of chips and burnt
residues.
- Burned material is harder at the points of separa
-
tion than in the remaining area.
- The material has to be level.
- It is recommended to make a stencil made of card
-
board or cardboard for the desired radius
Always work the workpiece in the center of the rollers
Fig. 9: Position workpiece in the middle of the rollers
Calculation of the workpiece length
Fig. 10: Calculation of the workpiece length
Bending chart
Fig. 11: Bending chart
WARNING!
It is not allowed to use profiles exceeding the specifi
-
cation strength. Do not work on more than one piece
at a time. Use the machine only for the intended pur
-
pose.

