2
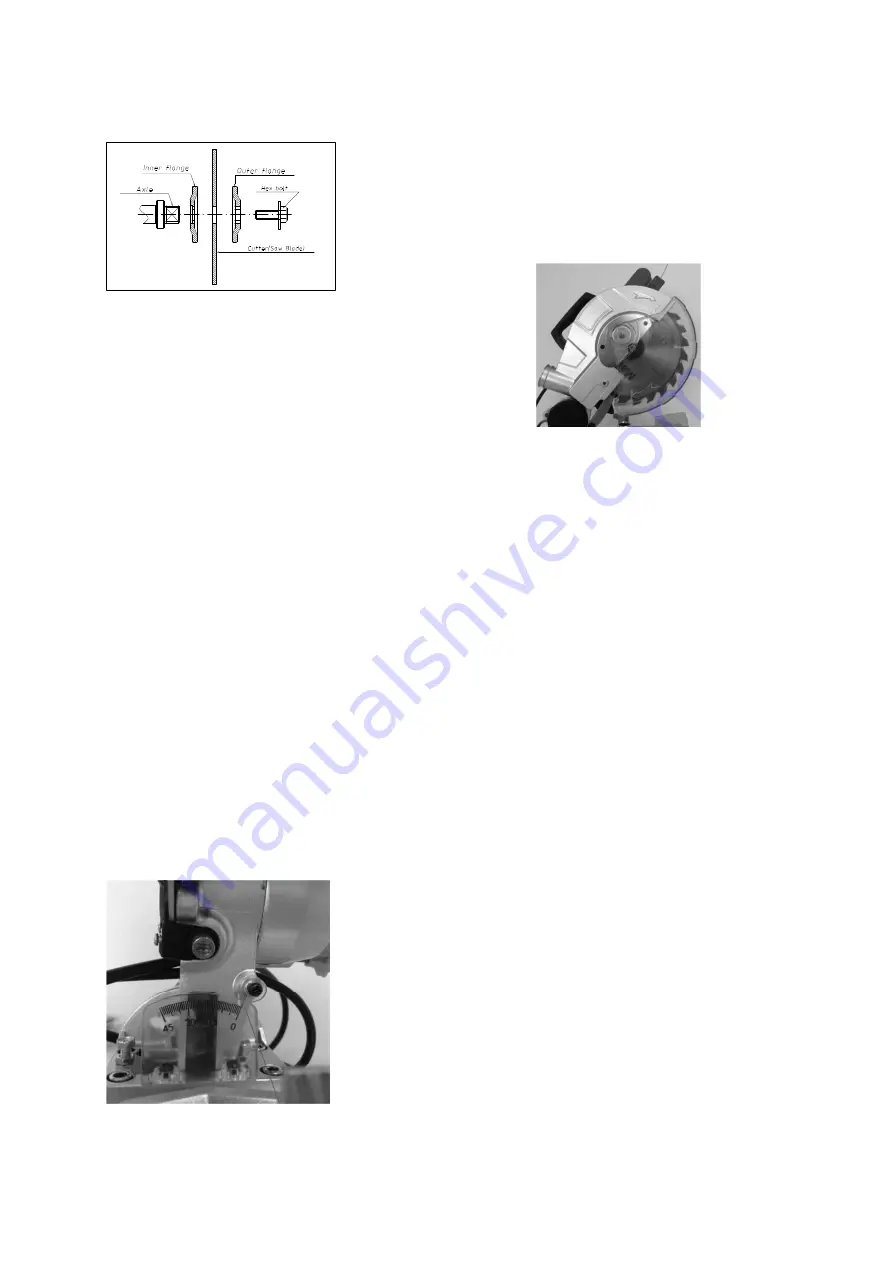
Mount flange and hex bolt. Lock the spindle by prong spanner and tighten hex bolt counter-clockwise with
wrench firmly to fix blade.
Note: Only using attached wrench when mounting or dismounting
saw blade. When dismounting saw blade, lift up safe cover. Loosen
her bolt with wrench and disassemble her bolt, flange and saw
blade.
GUARD
●
●
●
●
Release the safe cover block and lower the handle, the guard will automatically rise. Finish cutting and lift up
handle, the guard will be back to the original position.
●
●
●
●
Don
′
t damage or disassemble guard for your safety.
●
●
●
●
Don
′
t use defective safe cover.
●
●
●
●
If transparent guard becomes so dirty that saw blade or workpiece can
′
t be saw, disconnect the plug from the
power receptacle and clean guard with damp cloth. Don
′
t use solvent or cleaner .
DUST COLLECTOR
●
●
●
●
Connecting dust collector, insert syphon into the shred spout on the cover of saw blade and put the inlet of
dust collector on the syphon.
●
●
●
●
When the collector holds half bag of dust, dismount it and unzip. Clean up the dust collector.
Note: If using vacuum cleaner, operation will be more effective.
SWITCH OPERATION
The switch is turned ON while the trigger is pulled by finger. The power switch is turned OFF upon releasing the
trigger.
Note: Before plugging in, make sure whether switch and trigger are normal.
ADJUSTMENT OF MITERED ANGLE
Loosen screws on guide plate. Turn the base to the angle which needle indicates. Then tighten the screws firmly
to fix the rotative base.
Note: When turning the base, lift up the handle.
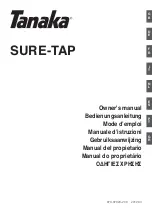
ADJUSTMENT OF BEVEL CUT
Saw blade can incline 45°towards left.
When adjusting bevel cut, loosen the back lever and incline the saw blade to the angle which needle indicates.
Then tighten lever to fix bracket.
Note: When inclining saw blade, lift up the handle.
Needle indicator
Safe cover block
Summary of Contents for 5411074127695
Page 3: ...3 Changement de lame Blade veranderingen Blade change ...
Page 40: ...1 ...


