40
For sawing mitre cuts in the table saw position,
proceed as follows:
Set the guide fence (17) for sawing mitre cuts.
Proceed as described for sawing straight cross-
cuts in the table saw position, starting in point 2.
SAWING BEVEL CUTS
Bevel cuts are performed with the machine set up in
the cuf-off saw position. While sawing bevel cuts,
the workpiece is placed against the fence and sawn
through at an inclination.
Set the bevel angle.
Proceed as described for sawing straight cross-
cuts in the cut-off position.
SAWING COMPOUND MITRE CUTS
Compound mitre cuts are performed with the
machine set up in the cuf-off saw position. While
sawing compound mitre cuts,
the workpiece is placed against the fence and sawn
through in a combined mitre and bevel cut.
Set the mitre angle.
Set the bevel angle.
Proceed as described for sawing straight cross-
cuts in the cut-off position.
MOUNTING AND ADJUSTING THE TABLE
EXTENDERS
Using the table extenders you can support long
workpieces.
The table extenders can be mounted both to the left
and to the right of the machine.
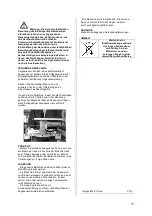
Insert on each side a table extender (41) into the
openings in the base of the machine as shown.
DUST EXTRACTION
The dust extraction outlet together with an external
vacuum cleaner takes care of the dust extraction of
the working surface.
Place the adapter (42) on the dust extraction
connection (5).
Connect a vacuum cleaner to the machine.
LUBRICATION
From time to time, apply a drop of oil to the
thread of the lock screw (28).
CLEANING AND MAINTENANCE
Attention! Before performing any
work on the equipment, pull the
power plug.
Cleaning
_ Keep the ventilation slots of the machine clean to
prevent overheating of the engine.
_ Regularly clean the machine housing with a soft
cloth, preferably after each use.
_ Keep the ventilation slots free from dust and dirt.
_ If the dirt does not come off use a soft cloth
moistened with soapy water.
_ Never use solvents such as petrol, alcohol,
ammonia water, etc. These solvents may damage
the plastic parts.
Maintenance
_ Our machines have been designed to operate
over a long period of time with a minimum of
maintenance. Continuous satisfactory operation
depends upon proper machine care and regular
cleaning.
For all maintenance works
_ Switch the machine “OFF”
_ Remove the plug from the socket
_ Wait until the machine has come to a complete
standstill
_ Repair and maintenance works may only be
carried out by trained specialists, with the
exception of those described in this chapter.
_ Replace defective parts, especially defective
safety facilities. Parts that have not been
tested and approved by the manufacturer can lead
to unforeseen damages.
- Make sure that all safety facilities are operational
once more, after the completion of maintenance
works.
Before every use
_ Remove sawdust and wood splinters from the
machine with a brush and dust cloth, or with
a vacuum cleaner.
_ Check the power cable and plug for damages, and
let damaged parts be replaced by a
certified electrician.
_ Check all moving parts, and make sure that they
can move freely and smoothly over their
entire operational range.
_ Check the riving knife, and make sure that the
distance between the riving knife and saw
blade is between 5mm.
Changing the saw blade
HAZARD!
The saw blade may be extremely
hot and can cause burns,
immediately after you have
stopped sawing. Always led a hot
saw blade cool off.
Never clean saw blades with
flammable liquids.
This can cause injuries, also when the saw
blade is not turning. The movable saw blade
guard must cover the saw blade, whenever you
tighten or release the driveshaft bolt.
Always wear gloves while changing the saw
blade.
_ Set the support arm to 0° (vertical) and tighten t
he bevelling lock nut.
_ For removing the topmost sawing table, loosen
the corresponding screws. Remove the
sawing table.
_ To prevent that the saw blade rotates, pull the saw
blade lock forward. Use your hand at the same time
to turn the saw blade slowly, until the saw blade
latch is activated.
_ Loosen the driveshaft bolt of the saw (left-turning
thread).


