background image

51

7.6.2011

METOS 700 Ranges, Gas solid top

    GENERAL INFORMATION 

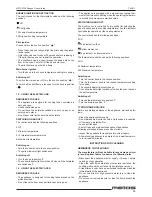
  This chapter contains general information which all users of the 
manual must be familiar with. Specifi c information for individual 
users of the manual is provided in subsequent chapters (“ IN-
STRUCTIONS FOR .... “ ).

   1 APPLIANCE 

SPECIFICATIONS 

•    The appliance dataplate is located inside the control panel.
•  The appliance model and serial number are also detailed on 

decals under the brand logo and on the packing.

    2 GENERAL 

PRESCRIPTIONS 


The manufacturer will not be liable for any damage or inju-
ry resulting from failure to observe the following rules.


   REMINDERS FOR THE INSTALLER   

•    Read this manual carefully. It provides important information 

for safe installation, use and maintenance of the appliance.

•     Installation, conversion to a different type of gas and applian-

ce maintenance must be carried out by qualifi ed technicians 
authorized by the manufacturer, in compliance with current 
safety standards and the instructions in this manual.

•     Identify the specifi c appliance model. The model number is 

detailed on the packing and on the appliance dataplate.

•     The appliance must be installed in a well-ventilated room.
•     Do not obstruct any air vents or drains present on the ap-

pliance.

•  Do not tamper with appliance components.

    REMINDERS FOR THE USER 

•    Read this manual carefully. It provides important information 

for safe installation, use and maintenance of the appliance.

•     Keep this manual in a safe place known to all users so that it 

can be consulted throughout the working life of the applian-
ce.

•     Installation, conversion to a different type of gas and applian-

ce maintenance must be carried out by qualifi ed technicians 
authorized by the manufacturer, in compliance with current 
safety standards and the instructions in this manual.

•     For after-sales service, contact technical assistance centres 

authorized by the manufacturer and demand the use of origi-
nal spare parts.

•  Have the appliance serviced at least twice a year. The manu-

facturer recommends taking out a service contract.

•  The appliance is designed for professional use and must be 

operated by trained personnel.

•  The appliance is to be used for cooking food as specifi ed in 

the prescriptions for use.Any other use is considered to be 
improper.

• Do not allow the appliance to operate empty for prolonged 

periods. Only pre-heat the oven just before use.

•     Do not leave the appliance unattended while in operation.
• In the event of an appliance fault or malfunction, shut the 

gas shut-off valve and/or switch the appliance off at the main 
switch installed upline.

•  Clean the appliance following the instructions given in Chap-

ter “ INSTRUCTIONS FOR CLEANING”.

• Do not store fl ammable materials in close proximity to the 

appliance. FIRE HAZARD.

•     Do not obstruct any air vents or drains present on the ap-

pliance.

•  Do not tamper with appliance components.

    REMINDERS FOR THE MAINTENANCE TECHNICIAN 

•      Read this manual carefully. It provides important information 

for safe installation, use and maintenance of the appliance.

•     Installation, conversion to a different type of gas and applian-

ce maintenance must be carried out by qualifi ed technicians 
authorized by the manufacturer, in compliance with current 
safety standards and the instructions in this manual.

•     Identify the specifi c appliance model. The model number is 

detailed on the packing and on the appliance dataplate.

•     The appliance must be installed in a well-ventilated room.
•     Do not obstruct any air vents or drains present on the ap-

pliance.

•  Do not tamper with appliance components.

    REMINDERS FOR CLEANING 

•    Clean the satin fi nish stainless steel exterior surfaces, the 

cooking wells and the surface of the hotplates every day.

•  At least twice a year, have an authorized technician clean the 

internal parts of the appliance.

• Do not use direct or high pressure water jets to clean the 

appliance.

•  Do not use corrosive products to clean the fl oor beneath the 

appliance.

   3  SAFETY AND CONTROL DEVICES

   3.1 ELECTRIC  OVEN 

   SAFETY THERMOSTAT 


The manufacturer will not be liable for any damage or inju-
ry resulting from failure to observe the following rules.


•    The appliance is equipped with a manual reset safety ther-

mostat that interrupts heating when the operating temperatu-
re exceeds the maximum permitted value.

•     To restore appliance operation, remove the control panel (the 

front panel for Boiling pans and Bratt pans) and press the 
thermostat reset button.This procedure must only be carried 
out by a qualifi ed, authorized technician.

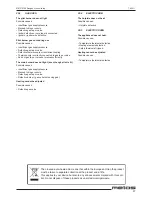
    4  DISPOSAL OF PACKING AND THE APPLIANCE 

   4.1 PACKING 


   The packing is made using environmentally friendly 
materials.  The plastic recyclable components are: 

•   the transparent cover, the bags containing the instructions 

manual and nozzles ( made of Polyethylene - PE  ). 

•  the straps (in Polypropylene - PP).   

    4.2 APPLIANCE 

     The appliance is manufactured 90% from recyclable metals 
(stainless steel, aluminium sheet, copper....  ). 

 The appliance must be scrapped in compliance with current 
regulations governing such disposal. 

•   It must be disposed of properly. 
•  Make the appliance unusable before scrapping. 

    INSTRUCTIONS FOR INSTALLATION 

   REMINDERS FOR THE INSTALLER   


The manufacturer will not be liable for any damage or inju-
ry resulting from failure to observe the following rules.


•    Read this manual carefully. It provides important information 

for safe installation, use and maintenance of the appliance.

•     Installation, conversion to a different type of gas and applian-

ce maintenance must be carried out by qualifi ed technicians 
authorized by the manufacturer, in compliance with current 
safety standards and the instructions in this manual.

Summary of Contents for 7210TCEPQ

Page 1: ...isten ohjeiden k nn s Tyyppi typ type 7210TCG 7410TCG 7610TCG 7410CGG 7610CGG 7410CGE 7610CGE 7210TCEPQ 7410TCEPQ 7610TCEPQ 7410CEEPQ 7610CEEEPT 7410TCTG 7410CTGG 7610CTGG 4228000 4228002 4228004 4228...

Page 2: ......

Page 3: ...SIS LLYSLUETTELO INNEH LLSF RTECKNING TABLE OF CONTENTS TEKNISET TIEDOT TEKNISK INFORMATION TECHNICAL INFORMATION 4 SUOMI 31 SVENSKA 39 ENGLISH 49...

Page 4: ...10 CG 74 10 CGG 74 10 CGE 76 10 CGG 76 10 CGE 76 10 CGGE 76 10 CGEE 80 120 G G E G E G G E H2O G G H2O H2O 42 5 105 48 11 105 40 G 73 42 5 G E G G E 105 48 11 108 5 G E 25 72 10 TCG 74 10 TCG 76 10 TC...

Page 5: ...olid top 5 G 105 120 G 73 42 5 G 82 8 90 48 113 11 76 10 CGGFL G 105 120 G 73 42 5 G 82 8 90 48 113 11 76 10 CGGFL G Kaasuliit nt Gasanslutning Gas connection EN 10226 1 R 1 2 EN ISO 228 1G 1 2 DK Ase...

Page 6: ...E E E E E E H2O H2O 48 11 105 73 36 58 5 58 5 36 48 11 105 36 48 11 36 48 11 36 45 36 105 105 120 72 10TCEP T Q 74 10TCEP T Q 76 10TCEPT 72 10CEP T Q 74 10CEP T Q 76 10CEPT 74 10CEEP T Q 76 10CEEEPT...

Page 7: ...73 42 5 E 80 H2O E 80 G E 74 10 TCTG 74 10 CTG 74 10 CTGG Asennuskuva installationsbild Installation diagram TEKNISET TIEDOT TEKNISKA DATA TECHNICAL DATA E Liitosjohdon vedonpoistaja Elkabelns dragavl...

Page 8: ...CTG SX SX DX H2O G E 48 11 105 108 5 73 42 5 E 80 80 E G G E G E 74 10 TCTG DX 74 10 CTGG SX 74 10 CTGG SX 74 10 CTG SX 74 10 CTG DX 74 10 TCTG SX SX DX G Kaasuliit nt Gasanslutning Gas connection EN...

Page 9: ...120 G E E E 76 10 CTGG 73 42 5 Asennuskuva installationsbild Installation diagram TEKNISET TIEDOT TEKNISKA DATA TECHNICAL DATA E Liitosjohdon vedonpoistaja Elkabelns dragavlastare Electric cable stres...

Page 10: ...G G E H2O H2O G G H2O 25 E 7 G 92 10 TCG 92 10 TCGP 92 10 TCG1P 92 10 CG 92 10 CGP 92 10 CG1P 98 10 CG 98 10 CGP 98 10 CG2P 98 10 CGG 98 10 CGGP 98 10 CGG2P 98 10 CGE 98 10 CGEP 98 10 CGE2P G 98 10 TC...

Page 11: ...H2O G G H2O H2O 105 65 E 7 94 10 TCG 94 10 TCGP 94 10 TCG1P 96 10 TCG 96 10 TCGP 96 10 TCG2P G G G H2O 105 65 94 10 CG 94 10 CGP 94 10 CG1P 96 10 CG 96 10 CGP 96 10 CG2P 6 5 G E E 94 10 CGG 94 10 CGGP...

Page 12: ...P 82 8 90 105 120 G G G 96 10 CGFL 96 10 CGFLP 96 10 CGFL2P 82 8 90 105 Asennuskuva installationsbild Installation diagram TEKNISET TIEDOT TEKNISKA DATA TECHNICAL DATA G Kaasuliit nt Gasanslutning Gas...

Page 13: ...Q E E E E E E H2O H2O H2O H2O 45 47 47 105 105 120 92 10TCEPQ 94 10TCEPQ 96 10TCEPQ 92 10CEPQ 94 10CEPQ 96 10CEPQ 94 10CEEPQ 96 10CEEEPQ E E E E E E Asennuskuva installationsbild Installation diagram...

Page 14: ...0 CTG H2O 94 10 CTGG Asennuskuva installationsbild Installation diagram TEKNISET TIEDOT TEKNISKA DATA TECHNICAL DATA E Liitosjohdon vedonpoistaja Elkabelns dragavlastare Electric cable stress relief G...

Page 15: ...DX 94 10 TCTG SX 94 10 CTG DX 94 10 CTG SX 94 10 CTGG DX 94 10 CTGG SX DX SX Asennuskuva installationsbild Installation diagram TEKNISET TIEDOT TEKNISKA DATA TECHNICAL DATA E Liitosjohdon vedonpoistaj...

Page 16: ...6 10 TCTG SX H2O 96 10 CTG DX 96 10 CTG SX 96 10 CTGG DX 96 10 CTGG SX DX SX Asennuskuva installationsbild Installation diagram TEKNISET TIEDOT TEKNISKA DATA TECHNICAL DATA E Liitosjohdon vedonpoistaj...

Page 17: ...7 6 2011 METOS 700 S hk kaasuliedet tasokaasuliedet El gasspis spis med hel h ll Ranges Gas solid top 17 Laitteiden kiinnitt minen toisiinsa Ihopkoppling av enheter Combining Appliances...

Page 18: ...2011 METOS 700 S hk kaasuliedet tasokaasuliedet El gasspis spis med hel h ll Ranges Gas solid top 18 PP PP Um UM V A Z UP R UP R UM V Z A R V A UM UP R PP PP Um UM V A Z UP R UP R UM V Z A R V A UM U...

Page 19: ...HJ UHJ UHJ UHJ UHJ 80 83 PP 8P UHJ UHJ UHJ UHJ UHJ UHJ UHJ 3D 3UHVVLRQH GL DOODFFLDPHQWR QVFKOXVVGUXFN 6XSSO SUHVVXUH 3UHVVLRQ GH UDFFRUGHPHQW 3UHVVLyQ GH FRQH LyQ DQVOXLWGUXFN 80 8JHOOR 0 VH 0 0 QR O...

Page 20: ...DV SUHVLRQHV DWHJRULHsQ HQ GUXN 1RP 1HHQ 1RUP 1RUPDO 0LQ 0D 8 3 12 1 8 12 1 07 3 3 3 7 8 8 D 7 DE 3 6 D 3 DV D 3UHVVLRQH GL DOODFFLDPHQWR QVFKOXVVGUXFN 6XSSO SUHVVXUH 3UHVVLRQ GH UDFFRUGHPHQW 3UHVVLyQ...

Page 21: ...N P K P K P K P K P K P K P K NJ K NJ K NJ K 3 3 7 7 3 7 3 3 3 3 3 7 7 3 7 3 3 3 3 3 3 3 XRFKR DSHUWR 2IIHQH RFKVWHOOHQ 2SHQ EXUQHU HX YLIV XHJR DELHUWR 2SHQ EUDQGHU RUQR DFNRIHQ 2YHQ RXU RUQRV 2YHQ...

Page 22: ...N P K P K P K P K P K P K P K NJ K NJ K NJ K 3 3 7 7 3 7 3 3 3 3 3 3 3 3 3 3 3 7 7 3 7 3 3 3 XRFKR DSHUWR 2IIHQH RFKVWHOOHQ 2SHQ EXUQHU HX YLIV XHJR DELHUWR 2SHQ EUDQGHU RUQR DFNRIHQ 2YHQ RXU RUQRV 2Y...

Page 23: ...1U 1U 1U 1U 1U N N N N P K P K P K P K P K P K P K NJ K NJ K NJ K 7 7 7 7 7 7 7 7 XRFKR DSHUWR 2IIHQH RFKVWHOOHQ 2SHQ EXUQHU HX YLIV XHJR DELHUWR 2SHQ EUDQGHU RUQR DFNRIHQ 2YHQ RXU RUQRV 2YHQ 73 7XWW...

Page 24: ...N P K P K P K P K P K P K P K NJ K NJ K NJ K 7 7 7 7 7 XRFKR DSHUWR 2IIHQH RFKVWHOOHQ 2SHQ EXUQHU HX YLIV XHJR DELHUWR 2SHQ EUDQGHU RUQR DFNRIHQ 2YHQ RXU RUQRV 2YHQ 73 7XWWDSLDVWUD O KSODWWH RRNLQJ KR...

Page 25: ...N P K P K P K P K P K P K P K NJ K NJ K NJ K 7 7 7 7 6 7 7 7 6 7 7 7 6 7 7 XRFKR DSHUWR 2IIHQH RFKVWHOOHQ 2SHQ EXUQHU HX YLIV XHJR DELHUWR 2SHQ EUDQGHU RUQR DFNRIHQ 2YHQ RXU RUQRV 2YHQ 73 7XWWDSLDVWUD...

Page 26: ...H 7HQVLRQ G DOLPHQWDWLRQ 7HQVLyQ GH DOLPHQWDFLyQ 9RHGLQJVVSDQQLQJ DVL 3KDVHQ 3KDVHV DVHV DVHQ UHTXHQ D UHTXHQ UHTXHQF UpTXHQFH UHFXHQFLD UHTXHQWLH 3LDVWUH 3ODWWHQ 3ODWHV 3ODTXHV 3ODQFKDV 3ODWHQ 3RWHQ...

Page 27: ...H 7HQVLRQ G DOLPHQWDWLRQ 7HQVLyQ GH DOLPHQWDFLyQ 9RHGLQJVVSDQQLQJ DVL 3KDVHQ 3KDVHV DVHV DVHQ UHTXHQ D UHTXHQ UHTXHQF UpTXHQFH UHFXHQFLD UHTXHQWLH 3LDVWUH 3ODWWHQ 3ODWHV 3ODTXHV 3ODQFKDV 3ODWHQ 3RWHQ...

Page 28: ...H 7HQVLRQ G DOLPHQWDWLRQ 7HQVLyQ GH DOLPHQWDFLyQ 9RHGLQJVVSDQQLQJ DVL 3KDVHQ 3KDVHV DVHV DVHQ UHTXHQ D UHTXHQ UHTXHQF UpTXHQFH UHFXHQFLD UHTXHQWLH 3LDVWUH 3ODWWHQ 3ODWHV 3ODTXHV 3ODQFKDV 3ODWHQ 3RWHQ...

Page 29: ...H 7HQVLRQ G DOLPHQWDWLRQ 7HQVLyQ GH DOLPHQWDFLyQ 9RHGLQJVVSDQQLQJ DVL 3KDVHQ 3KDVHV DVHV DVHQ UHTXHQ D UHTXHQ UHTXHQF UpTXHQFH UHFXHQFLD UHTXHQWLH 3LDVWUH 3ODWWHQ 3ODWHV 3ODTXHV 3ODQFKDV 3ODWHQ 3RWHQ...

Page 30: ...7 6 2011 METOS 700 S hk kaasuliedet tasokaasuliedet El gasspis spis med hel h ll Ranges Gas solid top 30...

Page 31: ...2011 EDITION 001 Alkuper isten ohjeiden k nn s Tyyppi 7210TCG 7410TCG 7610TCG 7410CGG 7610CGG 7410CGE 7610CGE 7210TCEPQ 7410TCEPQ 7610TCEPQ 7410CEEPQ 7610CEEEPT 7410TCTG 7410CTGG 7610CTGG 4228000 422...

Page 32: ...I 35 10 2 TASOKAASULIESI SIMPLE SERVICE 35 10 3 KAASU UUNI 35 11 K YTT NOTTO 35 K YTT OHJEET 35 K YTT J N HUOMIOON 35 17 K YT ST POISTO V LIAIKAISESTI 37 PUHDISTUSOHJEET 37 PUHDISTUKSESSA HUOMIOITAVAA...

Page 33: ...en ulkopuolinen kaasun sulkuventtiili ja katkaise virransy tt laitteeseen ennen puhdistus tai yl l pitotoimenpiteit Puhdista laite kappaleen PUHDISTUSOHJEET ohjeiden mukaisesti l s ilyt syttyv materia...

Page 34: ...rkista mahdolliset vuodot saumoissa ja putkiliitoksissa Tutustu huolellisesti t m n ohjeen sis lt n koska siin on t rke tietoa laitteen oikeasta tehokkaasta ja turvallisesta asentamisesta k yt st ja h...

Page 35: ...TTIMEN VAIHTO Poista keittolevy Irrota etupaneli ja sis puoliset suojat Irrota liitin R Poista suutin UP ja korva se taulukon T1 mukaisella suuttimella Asenna takaisin ja kirist liitin R Asenna irrote...

Page 36: ...iloissa olevan raaka aineen kuumen tamiseen ja kypsent miseen K yt kattiloita joilla on suora pohja l laita vetta altaaseen sen ollessa tyhj ja kuuma t m saattaa sammuttaa polttimet 12 KAASULIEDEN K Y...

Page 37: ...ritettava valmistajan antami en ohjeiden mukaisesti paikallisia ohjeita ja m r yksi nou dattaen Ainoastaan tarvittavan ammattip tevyyden omaava henkil saa liitt laitteita kaasu tai s hk verkkoon ja ta...

Page 38: ...arkista laitteen toiminta asennuksen ja mahdollisen kaasutyy pin vaihdon j lkeen Jos laite ei toimi kts Vianetsint 19 1 KAASULLA TOIMIVAT LAITTEET K ynnist laite ASENNUSOHJEET kappaleen mukaisesti ja...

Page 39: ...DITION 001 vers ttning av tillverkarens engelskspr kiga manual Tyyppi 7210TCG 7410TCG 7610TCG 7410CGG 7610CGG 7410CGE 7610CGE 7210TCEPQ 7410TCEPQ 7610TCEPQ 7410CEEPQ 7610CEEEPT 7410TCTG 7410CTGG 7610C...

Page 40: ...ER 41 5 REFERENSER OCH F RORDNINGAR 42 6 UPPACKNING 42 7 PLACERING 42 8 AVL GSNANDE AV R KGAS 42 9 ANSLUTNINGAR 42 10 BYTE AV GASTYP 43 10 1 GASSPIS 43 10 2 GASPIS MED HEL H LL SIMPLE SERVICE 43 10 3...

Page 41: ...rar avvikande fr n det normala Kalla vid behov p service Bryt alltid gas och str mtillf rseln till apparaten innan reng rings eller underh lls tg rder utf rs Reng r apparaten enligt anvisningarna i RE...

Page 42: ...Om vat tentrycket verstiger 300 kPa b r anslutningen f rses med en tryckreduceringsventil L s noggrant anvisningarna i denna manual emedan de inneh ller viktig information om apparatens r tta effekti...

Page 43: ...gsnade komponenter tillbaka i bakv nd ordning 10 2 2 BYTE AV SKRUVEN F R MINIMIL GA Avl gsna frontpanelen Avl gsna dys Um och ers tt den enligt tabell T1 Dra t dys Um Montera avl gsnade komponenter t...

Page 44: ...ch str mtillf rseln till apparaten innan reng rings eller underh lls tg rder utf rs Reng r apparaten enligt anvisningarna i RENG RINGSAN VISNINGAR F rvara inte ant ndbart material i apparatens n rhet...

Page 45: ...manual emedan de inneh ller viktig information om apparatens r tta effektiva och s kra installation anv ndning och underh ll Installation av denna apparat skall utf ras enligt tillverkarens anvisning...

Page 46: ...omponenter 18 BYTE AV GASTYP Se Installationsanvisningar 19 IBRUKTAGNING Granska apparatens funktion efter installation och eventuellt byte av gastyp Om apparaten inte fungerar se FELS KNING 19 1 GASE...

Page 47: ...700 El gasspis spis med hel h ll 20 5 ELUGN Ugnen v rms inte M jliga orsaker Felaktig termostat Felaktiga v rme element S kerhetstermostaten har l st ut Temperaturen kan ej justeras M jliga orsaker F...

Page 48: ......

Page 49: ...al 7 6 2011 EDITION 001 Type 7210TCG 7410TCG 7610TCG 7410CGG 7610CGG 7410CGE 7610CGE 7210TCEPQ 7410TCEPQ 7610TCEPQ 7410CEEPQ 7610CEEEPT 7410TCTG 7410CTGG 7610CTGG 4228000 4228002 4228004 4228006 42280...

Page 50: ...DARDS AND LAWS 52 6 UNPACKING 52 7 POSITIONING 52 8 FUMES EXHAUST SYSTEM 52 9 CONNECTIONS 52 10 CONVERSION TO A DIFFERENT TYPE OF GAS 53 10 1 GAS HOB 53 10 2 GAS SOLID TOP RANGES SIMPLE SERVICE 53 10...

Page 51: ...als in close proximity to the appliance FIRE HAZARD Do not obstruct any air vents or drains present on the ap pliance Do not tamper with appliance components REMINDERS FOR THE MAINTENANCE TECHNICIAN R...

Page 52: ...Connect the appliance to an efficient ground circuit Connect the earth conductor to the terminal with the symbol next to the main terminal board Connect the metal structure of the appliance to the equ...

Page 53: ...SUPPLY The appliance must be connected to a potable water supply The water inlet pressure must be between 150 kPa and 300 kPa Use a pressure reducer if the inlet pressure is above the maximum permitt...

Page 54: ...s manual For after sales service contact technical assistance centres authorized by the manufacturer and demand the use of origi nal spare parts Have the appliance serviced at least twice a year The m...

Page 55: ...steel exterior surfaces the cooking wells and the surface of the hotplates every day At least twice a year have an authorized technician clean the internal parts of the appliance Do not use direct or...

Page 56: ...not use sharp objects which might scratch and damage the surfaces HOTPLATE RANGE Clean surfaces with a damp cloth Switch on for a few minutes to dry rapidly Lubricate surfaces with a fine coat of foo...

Page 57: ...s out during use Possible causes Insufficient gas supply pressure Defective gas tap or valve Defective thermocouple or insufficient heating Thermocouple incorrectly connected to gas tap or valve Knob...

Page 58: ...58 7 6 2011 METOS 700 Ranges Gas solid top...

Page 59: ......

Page 60: ......

Page 61: ...te Maschine bei uns hergestellt aufgrund ihren Konzipierung und Bauart sowie in der von uns in Verkehr Ausfuhrung den einschlagigen grundlegenden Sicherheitsanforderungen der EG Maschinenrichtline ent...

Page 62: ...ULWWR QHO FHUWLILFDWR GL HVDPH GHO WLSR H VRGGLVID L UHTXLVLWL HVVHQ LDOL DSSOLFDELOL HQXQFLDWL QHOOD SUHVHQWH GLUHWWLY LV LQ FRQIRUPLW ZLWK WKH W SH DV GHVFULEHG LQ WKH W SH H DPLQDWLRQ FHUWLILFDWH D...

Page 63: ...ULWWR QHO FHUWLILFDWR GL HVDPH GHO WLSR H VRGGLVID L UHTXLVLWL HVVHQ LDOL DSSOLFDELOL HQXQFLDWL QHOOD SUHVHQWH GLUHWWLY LV LQ FRQIRUPLW ZLWK WKH W SH DV GHVFULEHG LQ WKH W SH H DPLQDWLRQ FHUWLILFDWH D...

Page 64: ...ULWWR QHO FHUWLILFDWR GL HVDPH GHO WLSR H VRGGLVID L UHTXLVLWL HVVHQ LDOL DSSOLFDELOL HQXQFLDWL QHOOD SUHVHQWH GLUHWWLY LV LQ FRQIRUPLW ZLWK WKH W SH DV GHVFULEHG LQ WKH W SH H DPLQDWLRQ FHUWLILFDWH D...

Page 65: ...HVFULWWR QHO FHUWLILFDWR GL HVDPH GHO WLSR H VRGGLVID L UHTXLVLWL HVVHQ LDOL DSSOLFDELOL HQXQFLDWL QHOOD SUHVHQWH GLUHWWLY LV LQ FRQIRUPLW ZLWK WKH W SH DV GHVFULEHG LQ WKH W SH H DPLQDWLRQ FHUWLILFDW...

Page 66: ...ULWWR QHO FHUWLILFDWR GL HVDPH GHO WLSR H VRGGLVID L UHTXLVLWL HVVHQ LDOL DSSOLFDELOL HQXQFLDWL QHOOD SUHVHQWH GLUHWWLY LV LQ FRQIRUPLW ZLWK WKH W SH DV GHVFULEHG LQ WKH W SH H DPLQDWLRQ FHUWLILFDWH D...

Page 67: ...HVFULWWR QHO FHUWLILFDWR GL HVDPH GHO WLSR H VRGGLVID L UHTXLVLWL HVVHQ LDOL DSSOLFDELOL HQXQFLDWL QHOOD SUHVHQWH GLUHWWLY LV LQ FRQIRUPLW ZLWK WKH W SH DV GHVFULEHG LQ WKH W SH H DPLQDWLRQ FHUWLILFDW...

Page 68: ...HVFULWWR QHO FHUWLILFDWR GL HVDPH GHO WLSR H VRGGLVID L UHTXLVLWL HVVHQ LDOL DSSOLFDELOL HQXQFLDWL QHOOD SUHVHQWH GLUHWWLY LV LQ FRQIRUPLW ZLWK WKH W SH DV GHVFULEHG LQ WKH W SH H DPLQDWLRQ FHUWLILFDW...

Page 69: ...VFULWWR QHO FHUWLILFDWR GL HVDPH GHO WLSR H VRGGLVID L UHTXLVLWL HVVHQ LDOL DSSOLFDELOL HQXQFLDWL QHOOD SUHVHQWH GLUHWWLY LV LQ FRQIRUPLW ZLWK WKH W SH DV GHVFULEHG LQ WKH W SH H DPLQDWLRQ FHUWLILFDWH...

Page 70: ...VFULWWR QHO FHUWLILFDWR GL HVDPH GHO WLSR H VRGGLVID L UHTXLVLWL HVVHQ LDOL DSSOLFDELOL HQXQFLDWL QHOOD SUHVHQWH GLUHWWLY LV LQ FRQIRUPLW ZLWK WKH W SH DV GHVFULEHG LQ WKH W SH H DPLQDWLRQ FHUWLILFDWH...

Page 71: ...WR QHO FHUWLILFDWR GL HVDPH GHO WLSR H VRGGLVID L UHTXLVLWL HVVHQ LDOL DSSOLFDELOL HQXQFLDWL QHOOD SUHVHQWH GLUHWWLY LV LQ FRQIRUPLW ZLWK WKH W SH DV GHVFULEHG LQ WKH W SH H DPLQDWLRQ FHUWLILFDWH DQG...

Page 72: ......

Reviews: