2.11.2005
Rev. 1.5
Installation
45
•
First tilt the kettle at least half-way and after that press the tilting reverse button as
long as the kettle stops in the cooking position.
•
Check the kettle's horizontal by the upper rim of the kettle.
If the kettle is not horizontal, the position of the mounting plate of the tilting limit switches
must be adjusted as follows:
•
Tilt the kettle at least half-way.
•
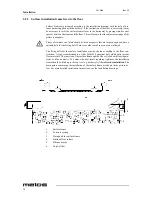
Loosen the locking nut for adjustment (5) and the fixing nut for the limit switch
plate (6) so that the limit switch plate (1) can be moved, but after moving stays in
the new point.
•
If the combi-kettle in its cooking position is tilted too much towards the spout, turn
the limit switch plate (1) slightly downwards. In case the kettle in its cooking po-
sition is tilted too much backwards, turn the limit switch plate (1) slightly upwards
•
Tighten the locking nut (5) slightly after adjustment, press the tilting reverse button
until the kettle tilting stops and check the kettle's horizontal again by the upper rim
of the kettle.
•
Tighten both the fixing nut (6) and the locking nut (5), if the combi-kettle is hori-
zontal in its cooking position. Otherwise, repeat the adjustment measures.
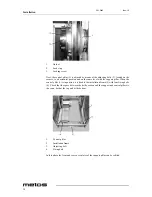
1.
Tilting lever
2.
Mounting plate of limit switches
3.
Limit switch for cooking position
4.
Limit switch of tilting end position
5.
Locking nut for adjustment
6.
Fixing nut for bearing unit and limit switch plate
5.8.2
Fastening the mixer motor cover box
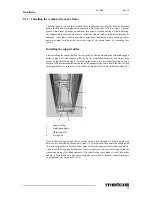
On the large kettle models (Proveno 150, 200, 300), the cover box of the mixing motor
comes unattached inside the kettle. The cover box is fastened after installation by using
the screws supplied while the kettle is in a tilted position.
Summary of Contents for PROVENO S 100
Page 2: ......
Page 4: ...2 11 2005 Rev 1 5...
Page 7: ...2 11 2005 Rev...
Page 8: ...2 11 2005 Rev...
Page 62: ...Connection diagram S00123 B3...
Page 63: ...Installation drawing L00115 B3...
Page 64: ...Text part ChillPlus L00114 A4...
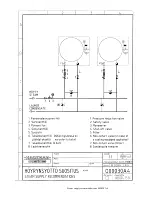
Page 65: ...Steam supply recommendations 000030 A4...
Page 68: ......

