background image

METRA.  The World’s best kits.

© COPYRIGHT 2004-2016  METRA ELECTRONICS CORPORATION


REV

. 3/17/2016   INST95-7504

Installation instructions for part 95-7504

metraonline.com

CAUTION!


All accessories, switches, climate controls panels, and 

especially air bag indicator lights must be connected before cycling 
the ignition. Also, do not remove the factory radio with the key in the 
on position, or while the vehicle is running.

• ISO DDIN radio provision

• Display replacement pocket

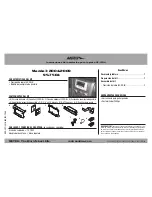
• A) Radio housing • B) ISO DDIN brackets • C) ISO DDIN trim plate • D) Display replacement pocket

• E) Display retention brackets • F) (2) 3/8” #10 bolts • G) (2) #10 nuts • H) (2) Plastic panel clips

KIT FEATURES

KIT COMPONENTS

WIRING & ANTENNA CONNECTIONS

 (sold separately)

Wiring Harness: • 70-7903
Antenna Adapter: • Not required

Mazda 3 2004-2009

95-7504

G

H

Dash Disassembly

 ..................................................2

Kit Preparation

 ........................................................2

Kit Assembly


ISO DDIN radio provision ...................................... 3

Table of Contents

F

• Panel removal tool • Phillips screwdriver

TOOLS REQUIRED

A

E

D

C

B

Summary of Contents for 95-7504

Page 1: ...tion or while the vehicle is running ISO DDIN radio provision Display replacement pocket A Radio housing B ISO DDIN brackets C ISO DDIN trim plate D Display replacement pocket E Display retention brackets F 2 3 8 10 bolts G 2 10 nuts H 2 Plastic panel clips KIT FEATURES KIT COMPONENTS WIRING ANTENNA CONNECTIONS sold separately Wiring Harness 70 7903 Antenna Adapter Not required Mazda 3 2004 2009 9...

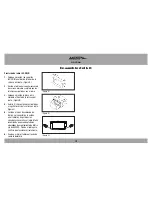
Page 2: ...ate Control Vehicles 2006 2009 1 Using the 2 3 8 10 bolts and 2 10 nuts attach the display retention brackets to the display unit 2 Remove the 2 Phillips screws in the sub dash Figure A 3 Mount the display into the sub dash using the screws removed in step 2 Continue to kit assembly Manual Climate Control Vehicles 2004 2009 Automatic Climate Control Vehicles 2004 2005 1 Using the 2 Phillips screws...

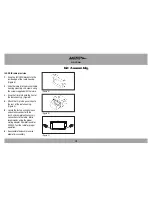
Page 3: ...e trim plate onto the front of the radio housing Figure B 4 Attach the 2 plastic panel clips to the rear of the radio housing Figure C 5 Locate the factory wiring harness and antenna connector in the dash and complete all necessary connections to the radio Metra recommends using the proper mating adapter from Metra and or AXXESS Test the radio for proper operation 6 Reassemble the dash in reverse ...

Page 4: ...y Log onto www installerinstitute com or call 800 354 6782 for more information and take steps toward a better tomorrow Metra recommends MECP certified technicians IMPORTANT If you are having difficulties with the installation of this product please call our Tech Support line at 1 800 253 TECH Before doing so look over the instructions a second time and make sure the installation was performed exa...

Page 5: ...culo funcionando Provisión de radio ISO DDIN Bolsillo de reemplazo de pantalla A Carcasa del radio B Soportes ISO DDIN C Placa de moldura ISO DDIN D Cavidad de reemplazo de pantalla E Soportes de retención de pantalla F 2 3 8 x 10 pernos G 2 10 nueces H 2 Ganchos para panel CARACTERÍSTICAS DEL KIT COMPONENTES DEL KIT CABLEADO Y CONEXIONES DE ANTENA se venden por separado Arnés de cableado 70 7903 ...

Page 6: ...A CAVIDAD DE REEMPLAZO DE PANTALLA MONTADO EN LA PANTALLA DEL PANEL DE MOLDURA VISTA TRASERA LA PANTALLA DEL PANEL DE REEMPLAZO Soportes pantalla Montaje de cavidad Vehículos automáticos de control de clima 2006 2009 1 El uso de los 2 3 8 X 10 pernos y 2 10 tuercas fije los soportes de retención de pantalla para la pantalla 2 Retire los 2 tornillos Phillips en la sub tablero Figura A 3 Monte la pa...

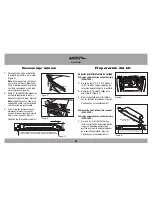
Page 7: ...te de la carcasa del radio Figura B 4 Sujetar 2 clips del panel suministrados a la parte trasera de la carcasa de radio Figura C 5 Localice el arnés de cableado de fábrica y el conector de la antena en el tablero y haga todas las conexiones necesarias al radio Metra recomienda que use adaptadores adecuados de acoplamiento de Metra y o de AXXESS Pruebe el radio para verificar que funcione correctam...

Page 8: ...Electronics Certification Program MECP EL CONOCIMIENTO ES PODER Mejore sus habilidades de instalación y fabricación inscribiéndose en la escuela de dispositivos electrónicos móviles más reconocida y respetada de nuestra industria Regístrese en www installerinstitute com o llame al 800 354 6782 para obtener más información y avance hacia un futuro mejor IMPORTANTE Si tiene dificultades con la insta...

Reviews: