99-5832G
2
1.
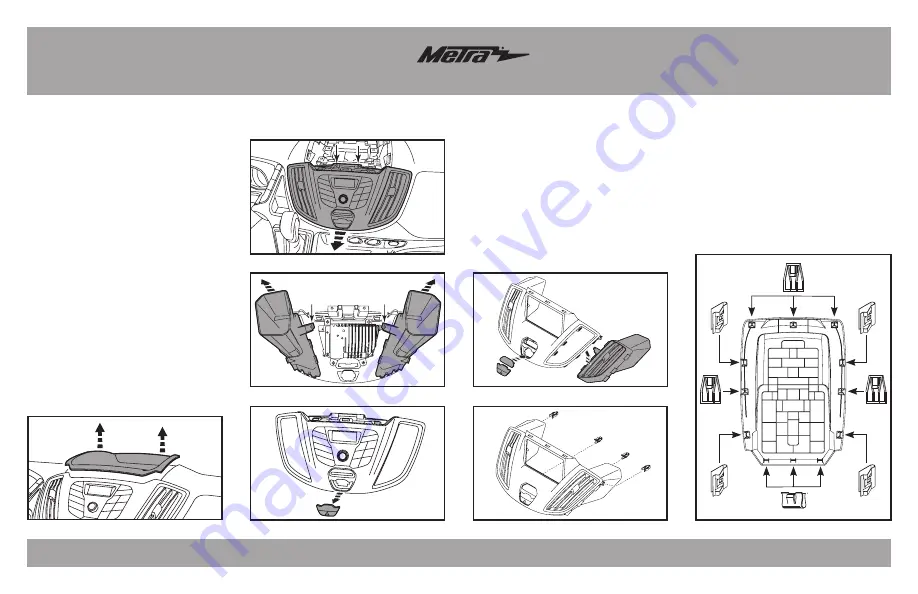
Unclip the dash panel above the
radio. (Figure A)
2.
Remove (2) T-20 Torx screws
securing the factory radio/trim
panel. (Figure B)
3.
Unclip the factory radio/trim panel
from the dash, unplug and remove.
(Figure B)
4.
Remove (1) T-20 Torx screw per
vent then unclip and remove the
vents from the factory radio/trim
panel. (Figure C)
5.
Unclip and remove the hazard
switch assembly from the factory
radio/trim panel. (Figure D)
Continue to kit preparation
Dash Disassembly
Kit Preparation
1.
Secure the factory vents to the
radio
trim panel
using the (2) #8 x 3/8”
Phillips pan head screws provided.
(Figure A)
2.
Snap the factory hazard button into the
radio trim panel
. An
airbag light blank
has been included for models without a
passenger airbag indicator. (Figure A)
(Figure B)
(Figure A)
(Figure D)
(Figure B)
(Figure C)
(Figure C)
(Figure A)
3.
Attach the (4)
plastic panel clips
provided, to the
radio trim panel
.
(Figure B)
4.
Attach the (12)
metal panel clips
provided, to the
dash panel
. (Figure C)
Continue to kit assembly


