SECTION 3 - M. FRAME, ADJ. RING, TRAMP REL. & CLRNG JACK ASSY
3-20
MP SERIES CONE CRUSHER TECHNICAL REFERENCE MANUAL
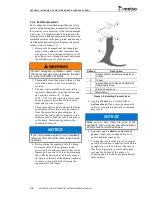
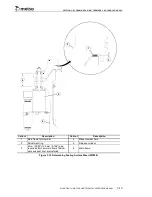
4. Thread an M20 eyebolt into the end of the
cylinder rod. The eyebolt must be turned
down completely so that the shoulder of the
eyebolt is seated on the top surface of the
cylinder rod. The M20 eyebolt used must
have a diameter not to exceed 72 mm
(2.83") in order to pass through the rod nut.
5. Lower a lifting sling from an overhead crane
through the hole in the drive ring. Thread
the rod nut then the upper bearing cone with
the bevel pointing down onto the sling
before passing the sling through the hole in
the adjustment ring and main frame down to
the floor or platform. For the
MP800
also
locate the rod seal between the flanges of the
adjustment ring and main frame before the
sling is passed through the holes in the
adjustment ring and main frame.
If an overhead crane is not available,
scaffolding can be built to support a chain
hoist to install the tramp release cylinder
assembly.
6. Connect the sling to the eyebolt with a
shackle. The shackle and sling used to
connect to the eyebolt must have adequate
capacity and a width not to exceed 72 mm
(2.83") in order to pass through the rod nut.
7. Carefully raise the tramp release cylinder
rod through the hole in the main frame and
adjustment ring.
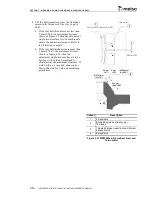
8. With the threaded end of the cylinder rod
above the top of the adjustment ring, first
coat the bearing cone with “never seize”
then slide the bearing cone over the top of
the rod until it seats on the flange just below
the threads. Then screw the rod nut onto the
rod end until it bottoms out on the bearing
cone.
9. Lower the tramp release cylinder until the
bearing cone seats in the bearing cup and the
lifting sling slackens. Disconnect the lifting
sling and unscrew the eyebolt from the end
of the cylinder rod. Plug the threaded hole at
the end of the cylinder rod with an M20 bolt
or with grease to protect the threads and
keep the hole from filling up with dirt.
10. Rotate the release cylinder so the manifold
block on the cylinder is pointing outward
from the Crusher.
11. Reconnect the tramp release system hoses to
the release cylinder. Pressurize the
accumulator with nitrogen to the proper
pre-charge pressure. Refer to
Checking
Pre-Charge Pressure and Charging the
Accumulator (Tramp Release System)
in
Section 12
for information on pressurizing
the accumulator to the pre-charge pressure.
12. After the cylinder is installed and all
connections completed, the system must be
bled to remove any entrapped air. The
system is then to be pressurized and checked
for leaks. Refer to
Section 12
for
information on bleeding and checking the
tramp release system.
WARNING
Provide safe work platforms for all
maintenance and operational requirements.
Death or serious injury may result from a fall
from an unstable or inadequate work
platform. Work platforms must be anchored
to provide adequate stability and must be
structurally able to support the loads
sustained
during
any
maintenance
operation. Workers must also be prepared
with fall arrest harness equipment. Follow all
OSHA, MSHA and site specific guidelines
for the requirements of working from
elevated platforms.
NOTICE
Do not pump oil into the tramp release
circuit before the accumulators are
pre-charged with nitrogen. This could
damage the bladder and necessitate an
accumulator replacement.
Summary of Contents for MP1000
Page 1: ...Nordberg MP Series Cone Crusher ...
Page 2: ......
Page 4: ......
Page 6: ......
Page 8: ......
Page 64: ...SECTION 0 SAFETY 0 56 MP SERIES CONE CRUSHER TECHNICAL REFERENCE MANUAL ...
Page 66: ......
Page 74: ......
Page 154: ...Countershaft and Countershaft Box Callout Description 1 Countershaft 2 Countershaft box 1 2 ...

